Pyramid of Osiris - Challenge: Destroy All of the Tomb's Arrow Traps
The first set of arrow traps for this challenge is in the room at the top of the WIDE STAIRCASE WITH FLYING ARROWS.
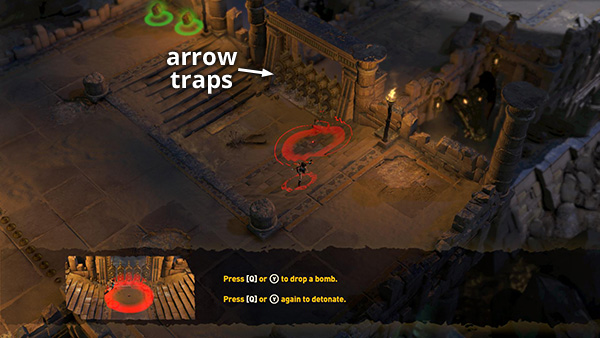
In the room at the top of the long staircase with the flying arrows, approach the arrow traps (1-5/35) in the doorway from either side. Plant a remote bomb, move out of the way, and then detonate the bomb to destroy the traps. Repeat if necessary to destroy all 5 traps. There are more of these traps ahead. If you destroy all 35, you'll get a bonus.
The next set of traps is in the room with the SEALED DOOR AND MARK OF SET.
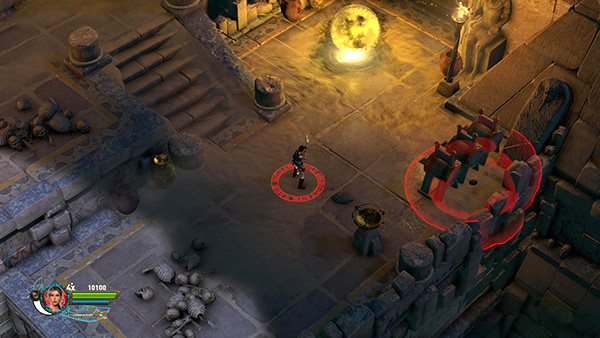
Move behind the 3 arrow traps (6-8/35) to set a bomb. Get out of the way before detonating it. You can also blow up the nearby sarcophagus at the same time.
There are several more sets of traps in the SPIKE FIELD WITH SMALL PLATFORMS. You can work on the Arrow Trap challenge at the same time as the challenge where you blast skeletons onto spikes, as described in the main walkthrough and in this separate set of screenshots.
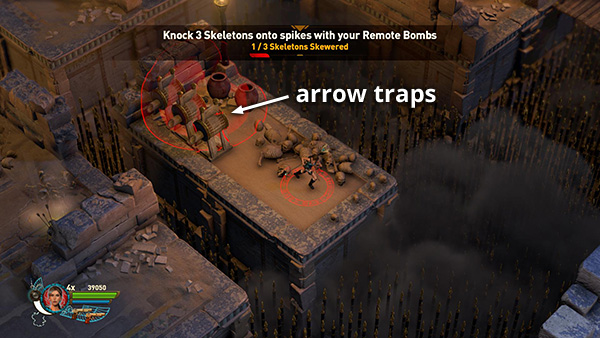
After destroying the first skeleton in this area, blow up the 3 arrow traps (9-11/35) on the small platform where the skeleton was.
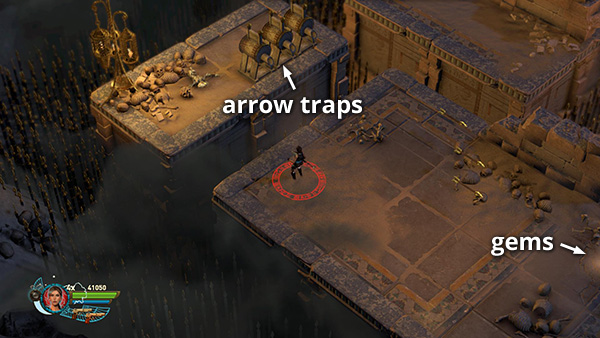
The next 3 arrow traps (12-14/35) on the platform with the second skeleton. When you destroy these traps, you can safely retrieve the gems under the floor on the previous platform.
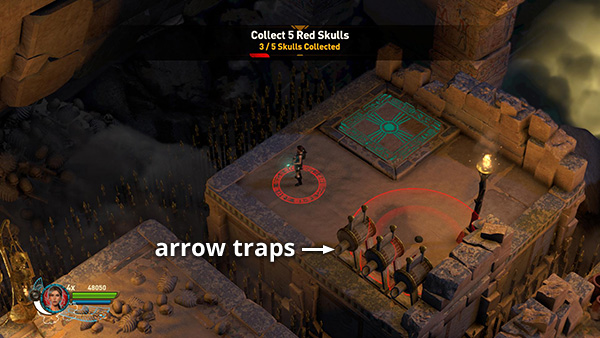
There are 3 more arrow traps (15-17/35) on the platform where you find the third red skull. Again, once you destroy these you can then get the gems under the floor on the previous platform.
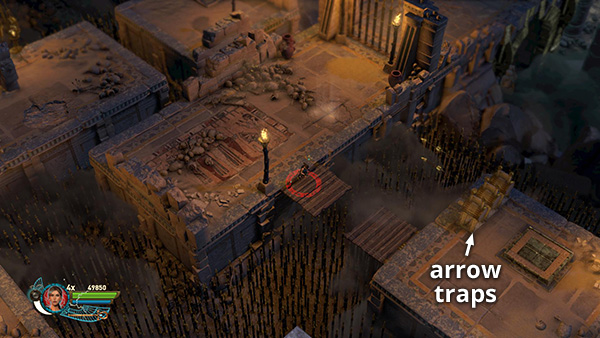
And finally 3 more traps (18-20/35) on the platform with the pressure pad that opens the gate.
The remaining arrow traps are on the BROKEN BRIDGE at the end of the level. See that section of the main walkthrough and these screenshots for details.
Copyright © 2014- - Stellalune (
). All rights reserved. The screenshots and videos included here were made using Fraps. Feel free to copy or print this walkthrough for personal use. By all means, share it with friends, but please include this credit line so people can send me their feedback. No part of this walkthrough may be reproduced on another site without permission. Follow this link for details about this site's advertising and privacy policy.