Sanctuary of the Scion - Uzi Secret
NOTE: Console players may want to try the Alternate Method for Getting Uzi Secret just before leaving the sphinx area. You'll wait a little longer for the Uzis, but there is a save crystal just before the tricky part.
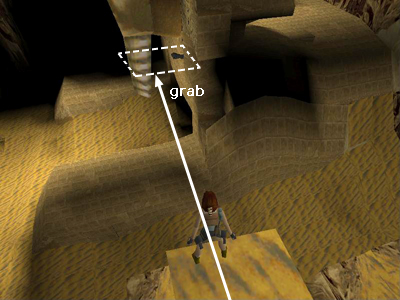
When standing on the jutting ledge after the one with the second box of shotgun shells, turn to face the sphinx. If you use the Look button and rotate Lara's vision, you can catch a glimpse of a dark object against the lighter background of the sphinx's neck or headdress. This is secret #1, the Uzis, floating on an invisible platform (roughly outlined in the screenshot below).

To get there, carefully set up a running jump: Position Lara at the edge of the ledge, between the left corner and the middle. (If she's too far to the right, she won't be able to jump far enough to grab the invisible ledge.) Save your game if you can. Hop back once, then press Forward then Jump to make Lara take a running jump right at the edge.

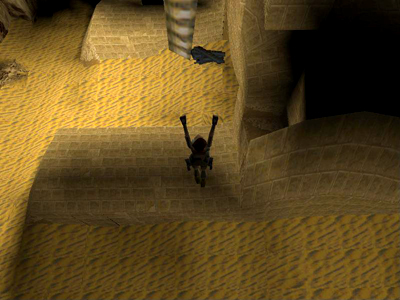
While Lara is in the air, press and hold Action to grab the edge of the invisible platform; pull up.
Hold the Walk button while on the platform. This way you can maneuver Lara around without fear of accidentally stepping off. Pick up the goodies and then get ready to shoot the 2 winged mutants that fly in from the other side of the sphinx. If you use the Uzis, you can kill both before they get close enough to push Lara off the platform. Or, to conserve ammo, quickly descend from the platform (next paragraph) and kill them with pistols or magnums from below.

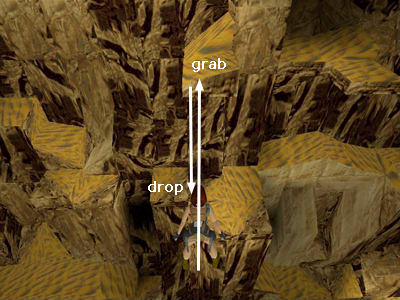
To get down, turn back toward the cave wall. Walk to the edge and line Lara up so she's squarely facing the left side of the ledge where you started. (The right edge is a little too high to grab and Lara will fall if you try.) Hop back and then take a running jump to grab the ledge. Let go to drop to the rocks below.
NOTE: Lara loses a tiny bit of health when you do this. To avoid any injury, hang from the left side of the ledge instead of the front, traverse to the left and then drop.)
Walkthrough text and diagrams copyright © 1998- Stellalune (email ). Special thanks to Daffy C. for this more direct method for getting the Uzis. All TR1 screenshots were made using Glidos and Fraps. Feel free to copy or print this walkthrough for personal use. By all means, share it with friends, but please include this credit line so people can send me their feedback. No part of this walkthrough may be reproduced on another site without permission. Follow this link for details about this site's advertising and privacy policy.