Sanctuary of the Scion - Uzi Secret
NOTE: Ideally this alternate method for reaching the level's only secret, the Uzis, should be used after obtaining both Ankhs. Then you only have to climb to the top of the sphinx once. Of course, you can go for the guns at any time and then return to the top of the sphinx later.
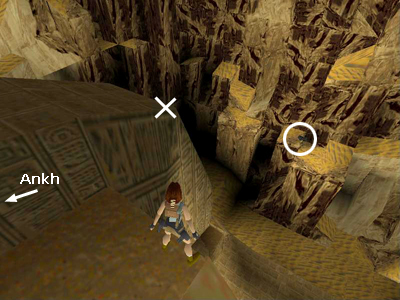
After placing the two Ankhs in the receptacles on top of the sphinx, climb back onto the sphinx's headdress on the right side (when facing the rear of the sphinx) and walk out to the corner marked with an X in the screenshot above.
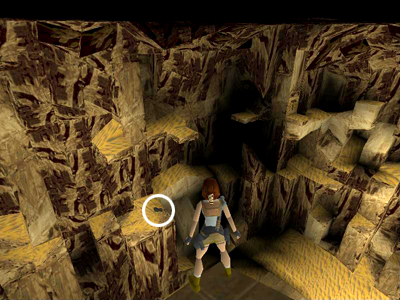
If you use the Look button and rotate Lara's vision, you can catch a glimpse of a dark object against the lighter background of the sandy ledges along the cave wall. This is secret #1, the UZIS, floating on an invisible platform. The guns are circled in these screenshots.
Carefully position Lara at this corner squarely facing the Uzis below. Use the Look button to make sure she's facing the right way. NOTE: The screenshot above was taken with the camera shifted upward and to the left a bit so you can see both the corner where Lara is standing and the guns, but she's in the correct spot.)
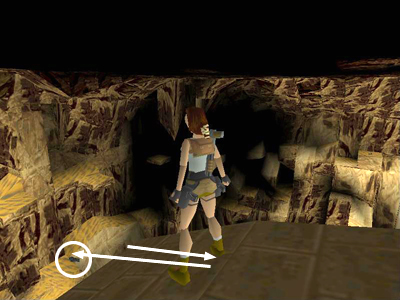
When you've got the positioning right, hop back once (to the spot shown above). Then press Forward then Jump to make Lara take a running jump right at the edge.
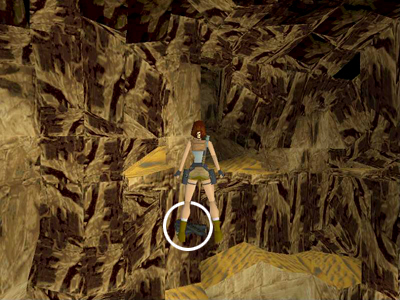
If you've set up the jump carefully, Lara should land on the invisible platform right on top of the guns.
Hold the Walk button while on the platform. This way you can maneuver Lara around without fear of accidentally stepping off. Pick up the goodies and then get ready to shoot the 2 winged mutants that fly in from the other side of the sphinx. If you use the Uzis, you can kill both before they get close enough to push Lara off the platform. Or, quickly descend from the platform (next paragraph) and kill them with pistols or magnums from below.
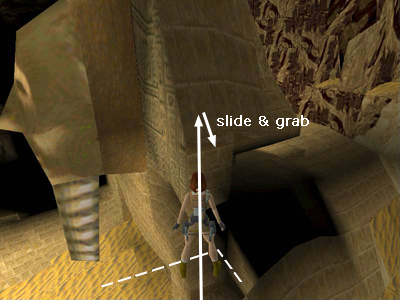
To get down, walk to the edge of the invisible platform nearest the sphinx. Set Lara up for a running jump, aiming for the bottom left corner of the sphinx's headdress (i.e., walk to the edge, adjust her angle and hop back once). Then take that running jump. Lara will land on the side of the sphinx and start to slide. Press Action to grab the edge.
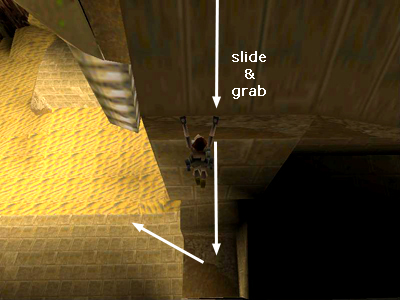
Drop to the ledge below, losing a little bit of health. Or, to avoid taking any damage, traverse to the right and drop onto the darker ledge below.
If you've already placed the Ankhs in their receptacles and are ready to leave this area, climb down onto the sphinx's paw. Or, if you still need to place the Ankhs, climb up to the right onto the sphinx's back.
Walkthrough text and diagrams copyright © 1998- Stellalune (email ). Special thanks to BPanther for this alternate path back to the sphinx from the Uzi platform. All TR1 screenshots were made using Glidos and Fraps. Feel free to copy or print this walkthrough for personal use. By all means, share it with friends, but please include this credit line so people can send me their feedback. No part of this walkthrough may be reproduced on another site without permission. Follow this link for details about this site's advertising and privacy policy.