STELLA'S LARA CROFT GO WALKTHROUGH - Android, iOS, PS4 and Vita, Steam, and Windows Phone/PC/Tablet
MAZE OF STONES - PART 3: THE TERRACE OF FORKED TONGUES
Updated: 8/31/15(†)
Relic Fragments: 1
Gems: 3
Follow this link for my video walkthrough.
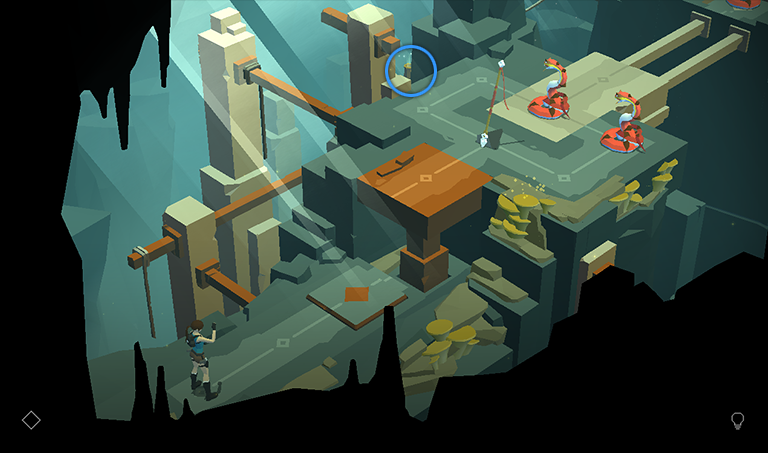
There's an vase in the background to the left of the ledge with the snakes. Tap it to obtain another SAPPHIRE (6/32).
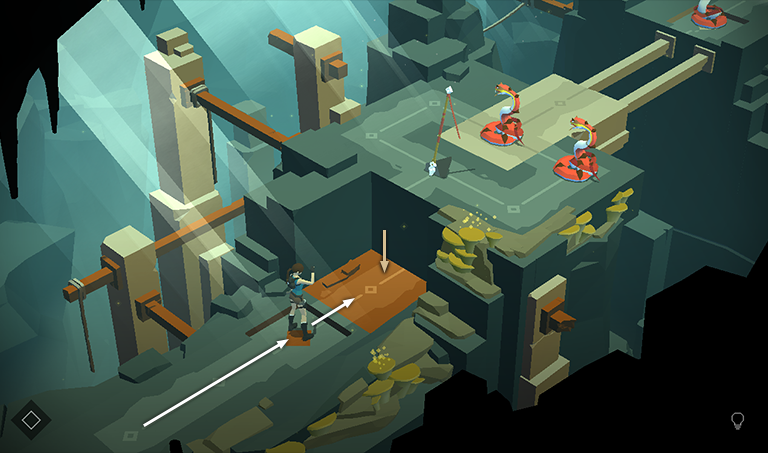
Then move forward onto the pressure pad to lower the orange platform, allowing you to step onto it.
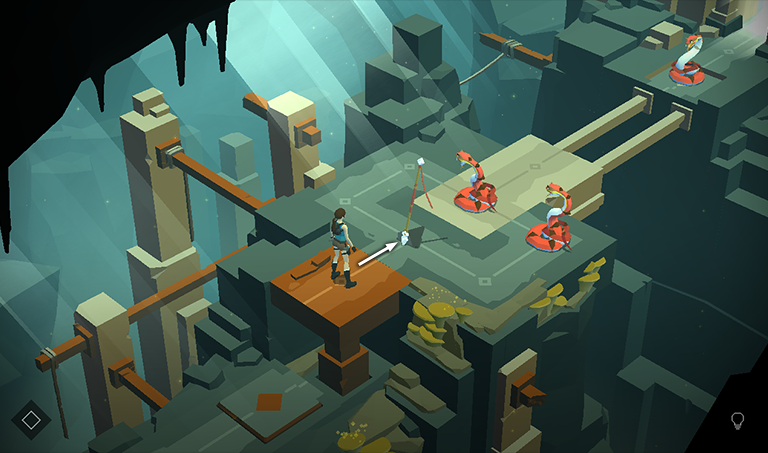
When you step off the pad and onto the platform, it rises again, carrying Lara up to the ledge above. Step forward to grab the SPEAR, but don't throw it yet.
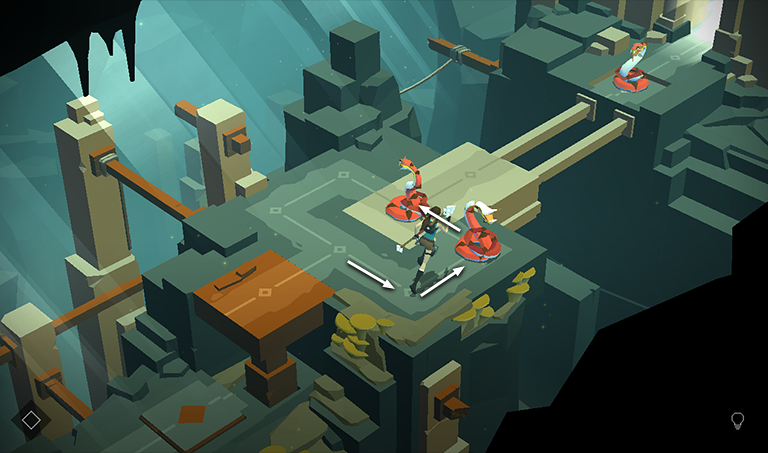
You can kill the first 2 snakes by moving around the ledge counterclockwise.
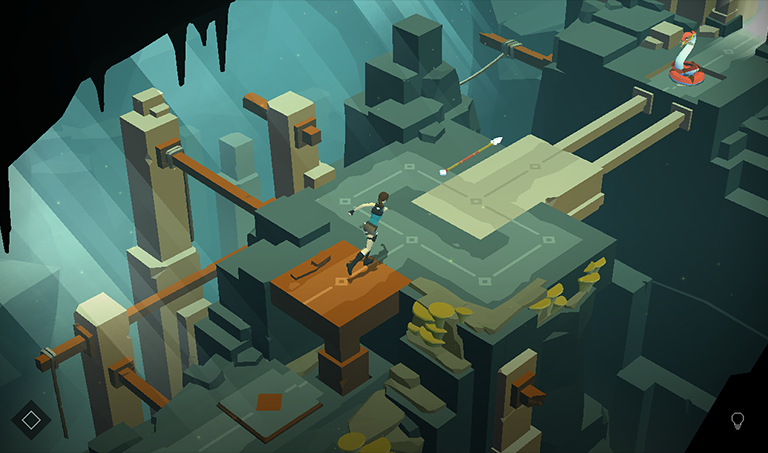
Now, if you want to unlock the Put This Apple on Your Head achievement/trophy, return to the orange platform and use the spear to kill the third snake from there. The achievement requires you to throw a spear 6 nodes or farther, and this qualifies.
Killing the snake deactivates the pressure pad on which it is sitting, shifting the tan platform forward, thus preventing you from continuing. So you'll need to restart the level in order to proceed. If you don't want to restart or don't care about achievements, instead of moving back to kill the third snake, just continue as shown below.
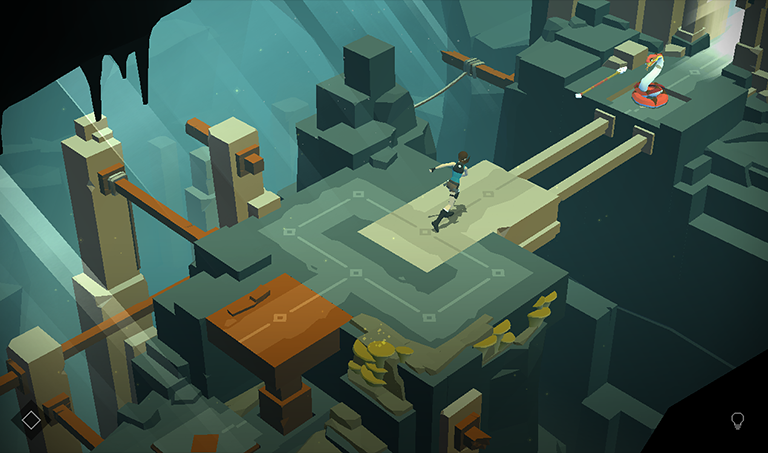
While standing on the tan platform, use the spear to kill the third snake.
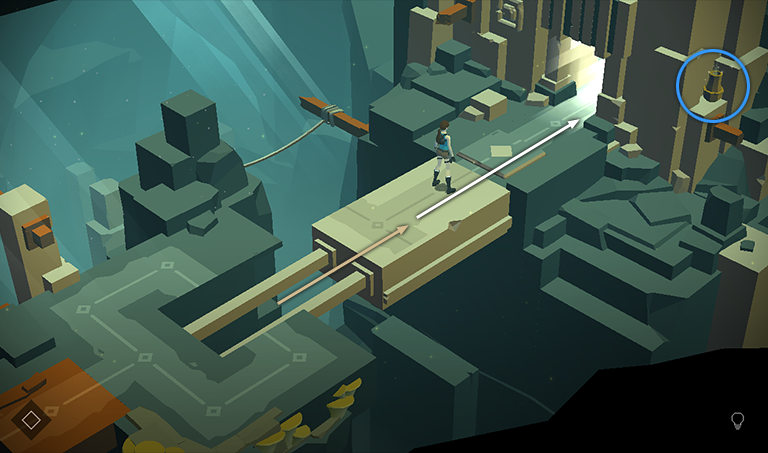
When it disappears, the pressure pad on which it was sitting is no longer depressed. This causes the tan platform to move forward. Smash the vase to the right of the doorway to get another SAPPHIRE (7/32). Then go through the doorway.
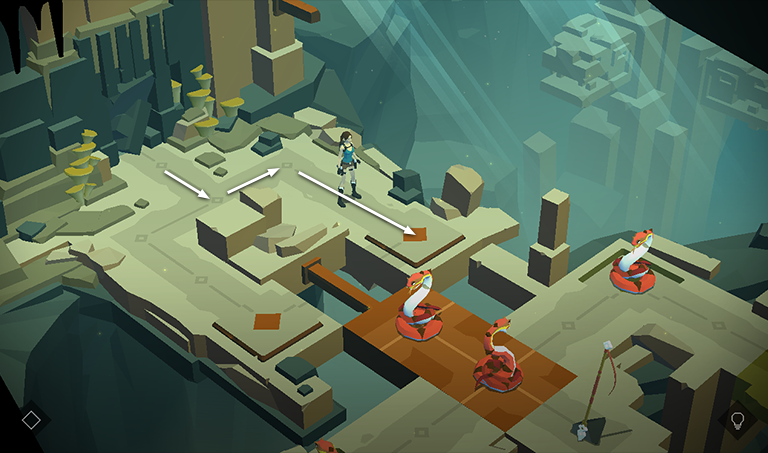
In the next area, depressing either of the 2 pressure pads will move the orange platform. In order to avoid being killed by the snakes sitting on the platform, move onto the pressure pad on the right.
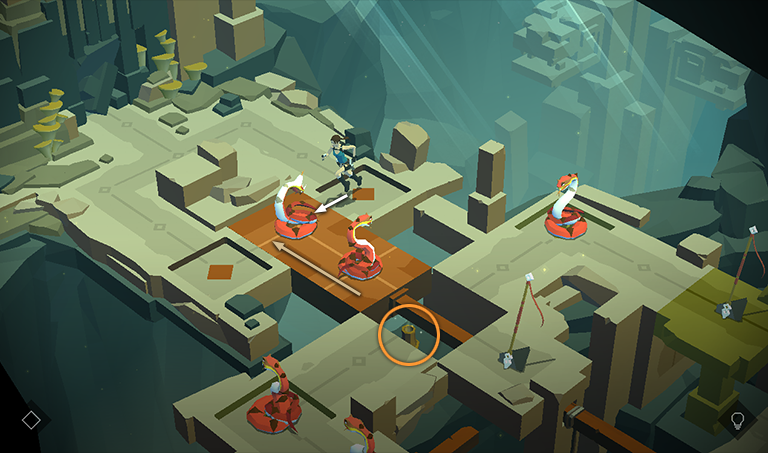
When the platform slides toward Lara, you'll be able to glimpse an vase sitting on a ledge below the walkway. Smash it to get a piece of the of the THE FROZEN SPIDER relic (3/12) before moving to the left to kill the first snake.
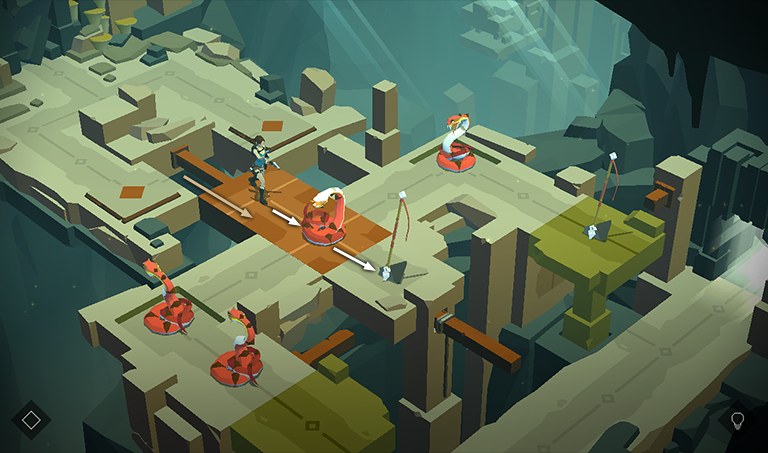
As Lara moves onto the platform, it slides back to its original position. Now you can approach the second snake from the side to kill it. When it disappears, step forward to pick up a SPEAR.
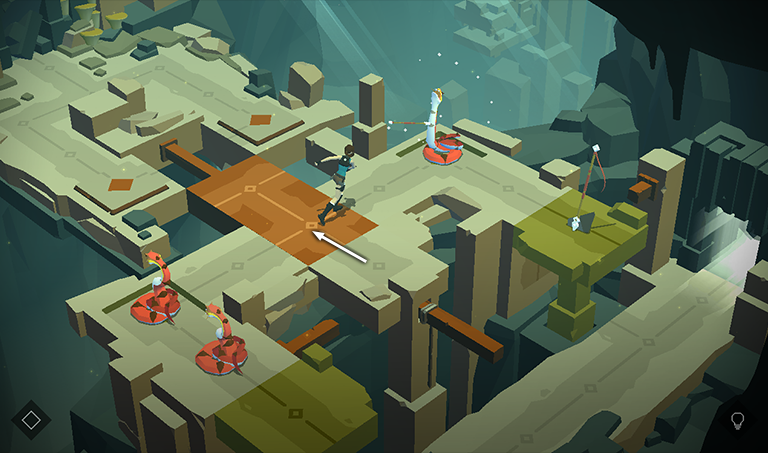
Move one space back to the left and use the spear to kill the single snake in the upper corner.
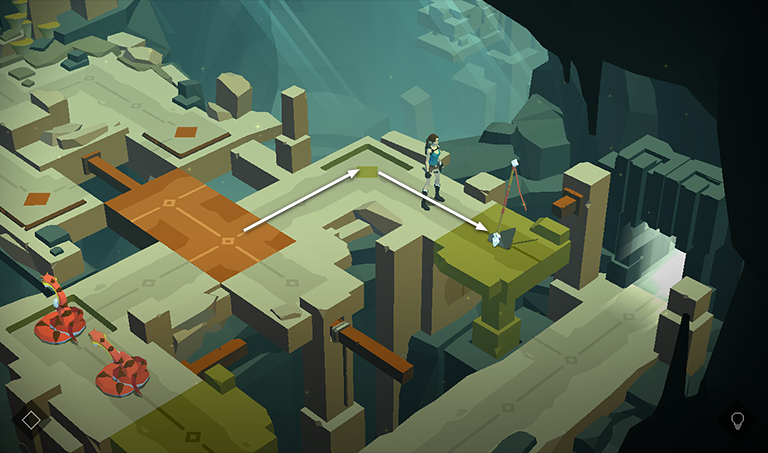
Then you can move around past the spot where the snake was sitting to retrieve the second SPEAR.
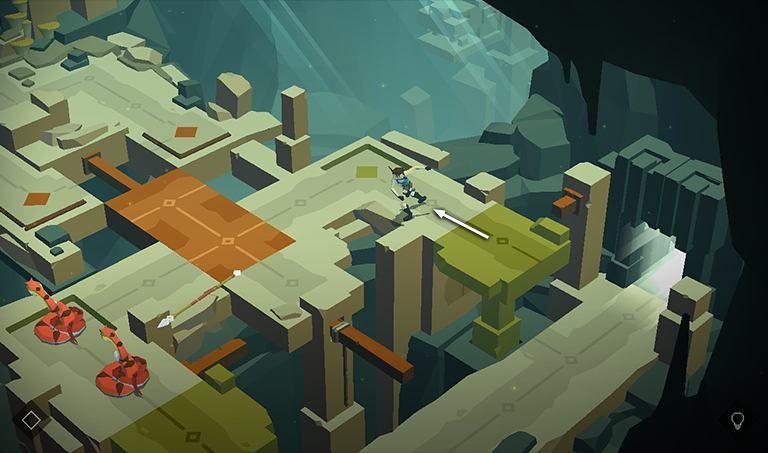
Move one space back to the left and use the spear to kill the snake opposite.
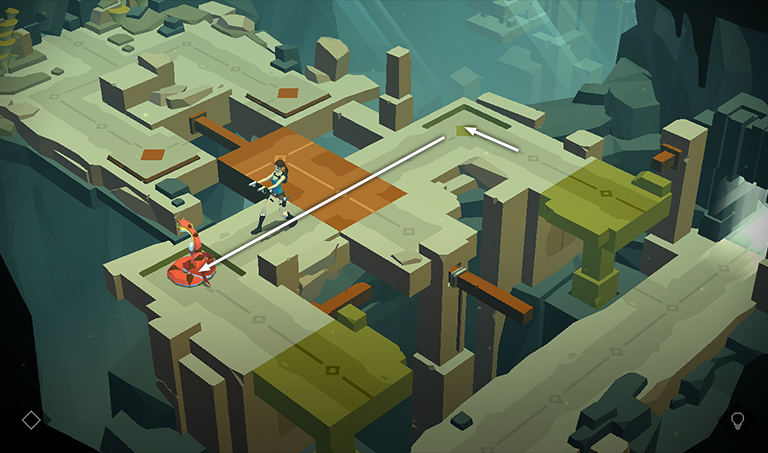
Now it's safe to follow the walkway to the remaining snake and kill it by sneaking up alongside it.
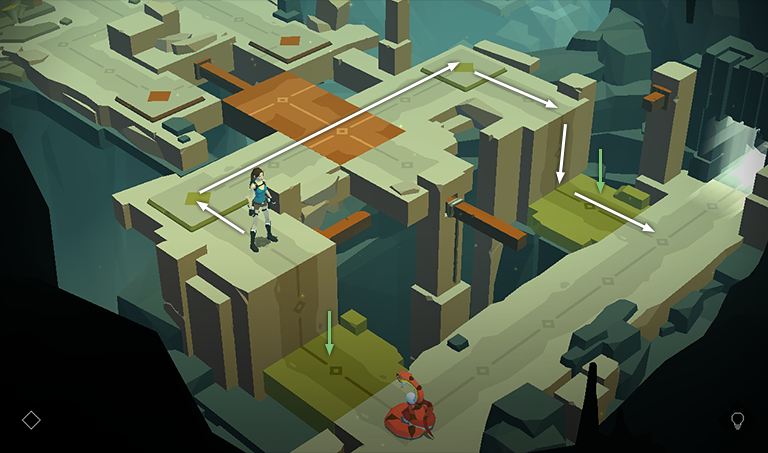
Now that the pressure pads in both corners of this walkway no longer have snakes sitting on them, the green platforms sink to the lower level. There's one more snake below, so don't climb down on the left side. Instead move around to the right and climb down there. If you like, you can move to the left and kill the snake or just proceed through the doorway to the next area.
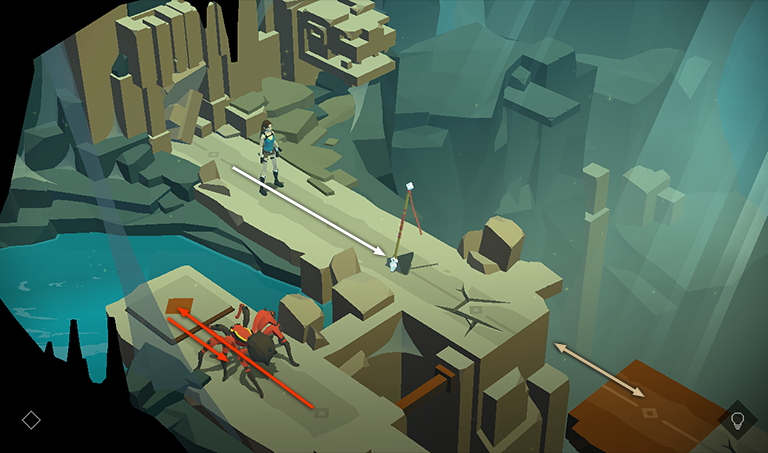
Move forward and pick up the SPEAR sitting on the path, but don't use it. You need the spiders alive so they can step on pressure pads for you. As you advance to the spear, the spider on the left moves onto the pressure pad, which shifts the orange platform toward you. Then it moves off the pad once more, causing the platform to move away.
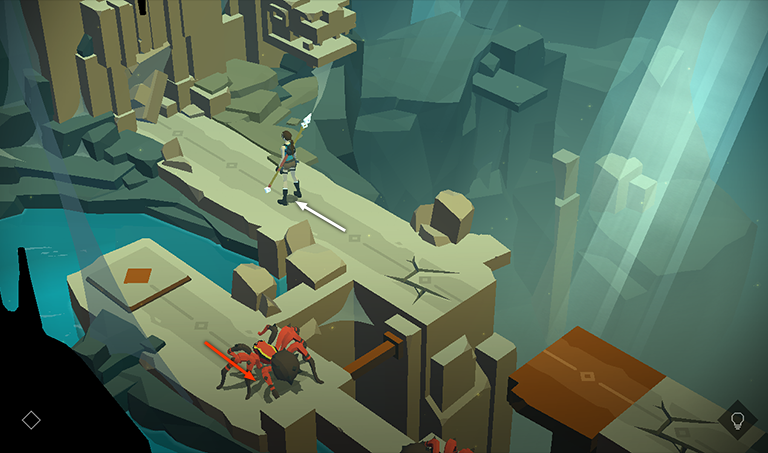
Do not step on the cracked floor yet. Instead, move back toward the entrance one space. As you do this, the spider moves to the right.
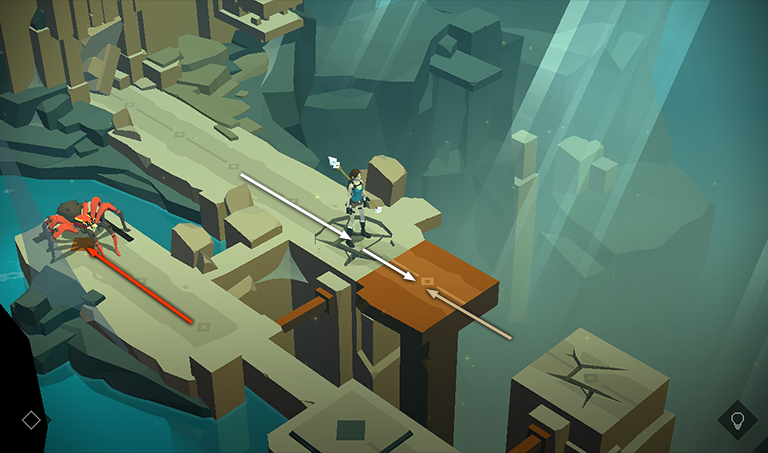
Now turn around and move forward two spaces onto the cracked floor. Meanwhile, the spider moves to the left, onto the pressure pad. This shifts the orange platform toward Lara. Step onto it.
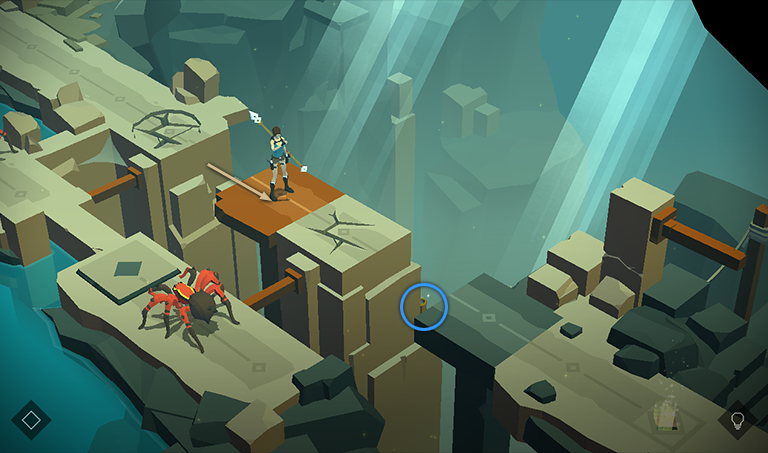
As you step onto the moving platform, the first spider steps off the pressure pad, causing the platform to slide back to the right. Meanwhile the second spider should be facing his own pressure pad about to move onto it. Before you go any farther, smash the vase below on the right to get another SAPPHIRE (8/32).
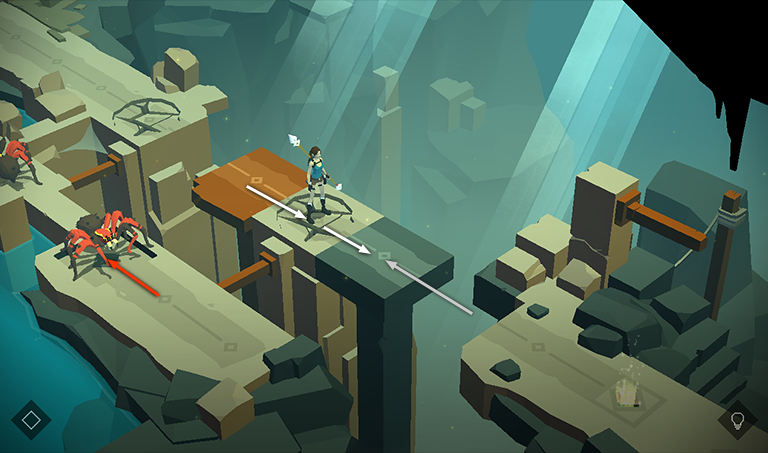
Now step onto the cracked floor, while the spider moves to the left, onto the pressure pad. This shifts the gray platform toward Lara so you can move onto it.
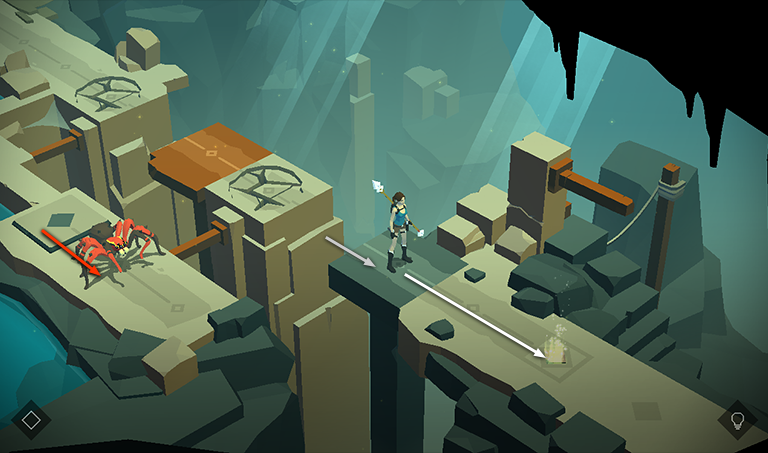
As Lara moves onto the gray platform, the spider moves off the pressure pad and the platform returns to its original position. Proceed forward to the level exit.
†UPDATE HISTORY: 8/31/15 - Walkthrough first posted.
WAS THIS WALKTHROUGH HELPFUL? If not, I apologize and invite you to contact me with any questions. If you need help right away, I recommend the r/TombRaider subreddit. Other fan-run forums are listed at tombraiders.net/stella/community.html. If this site was useful, please consider supporting it financially or in other ways. For details, visit tombraiders.net/stella/support.html. As always, I welcome your corrections/suggestions. Thank you!
Copyright © - Stellalune ( ). Screenshots were made using the Andy Android emulator. Feel free to copy or print this walkthrough for personal use. Share it with friends if you like, but please include this credit line so people can send me their feedback. No part of this walkthrough may be reproduced on another site without permission. Follow this link for details about this site's advertising and privacy policy.
Stella's Tomb Raider Site: tombraiders.net.