STELLA'S LARA CROFT GO WALKTHROUGH - Android, iOS, PS4 and Vita, Steam, and Windows Phone/PC/Tablet
MAZE OF STONES - PART 2: DOWN A SPIDER'S LEG
Updated: 8/31/15(†)
Relic Fragments: 1
Gems: 2
Follow this link for my video walkthrough.
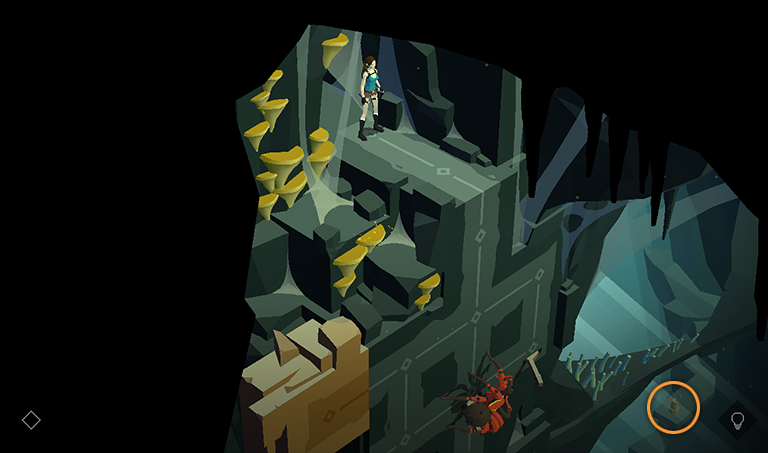
Far below the entrance on the left is a breakable vase containing a fragment of the THE FROZEN SPIDER relic (2/12).
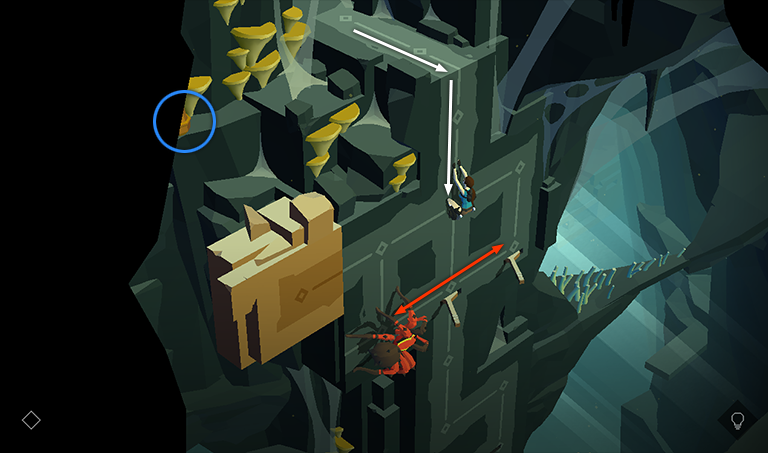
As you step forward to the edge, a giant spider begins moving back and forth along the wall below. Climb down to the first horizontal path, smashing the vase above on the left as you go to get another SAPPHIRE (4/32).
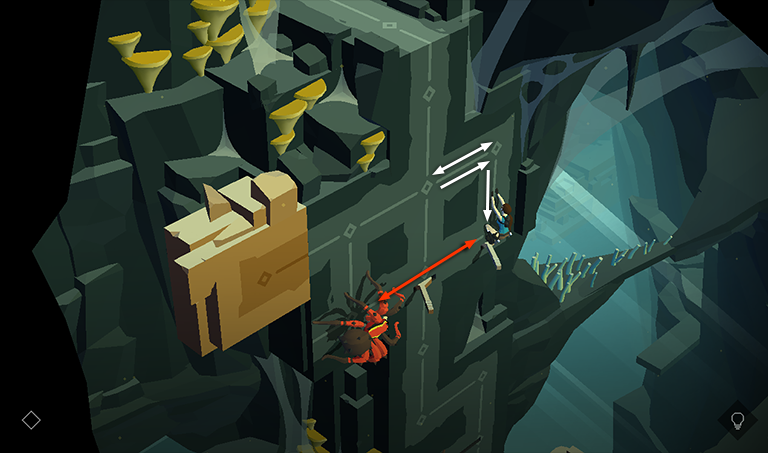
Climb to the right, then left, then back to the right, then down to the lever on the right. As you go, the spider climbs to the right, then back to the left out of your way.
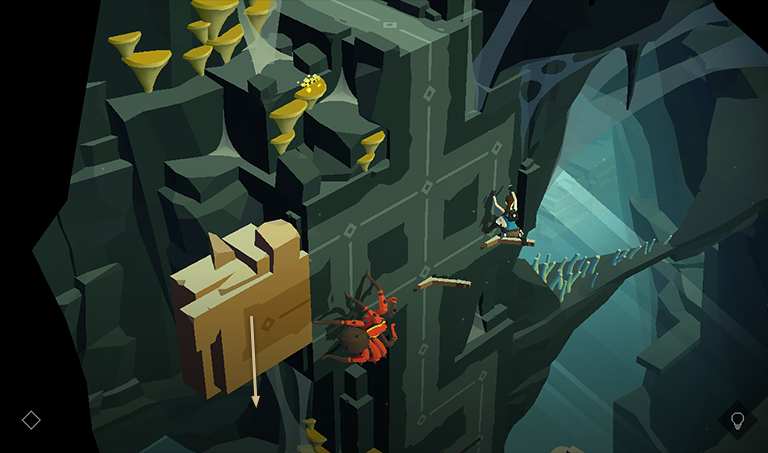
Kick the lever to move the tan block downward.
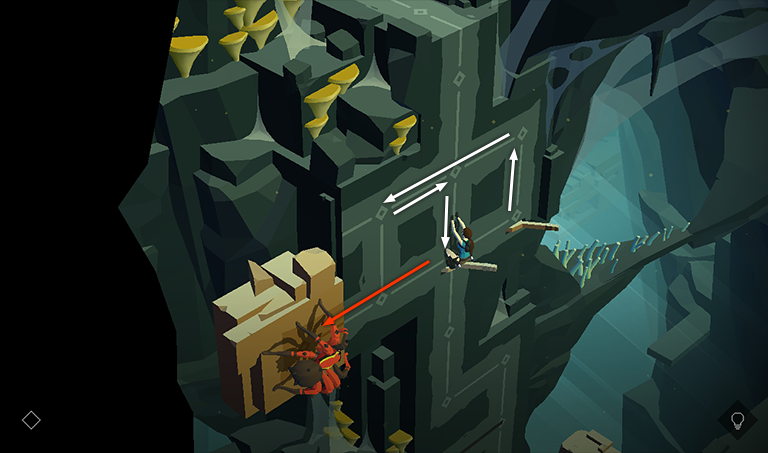
Climb up once, left twice,
back to the right once, then down to the left lever. As you climb, the spider moves to the left onto the tan block.
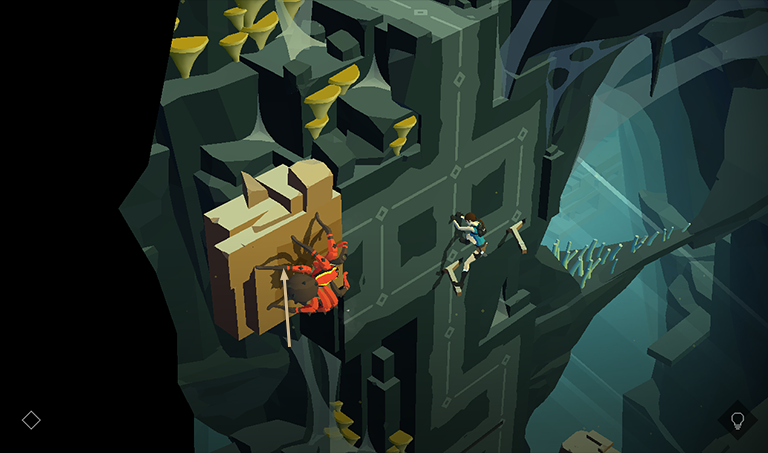
Kick the lever to shift the tan block upward again. Now the spider is out of your way.
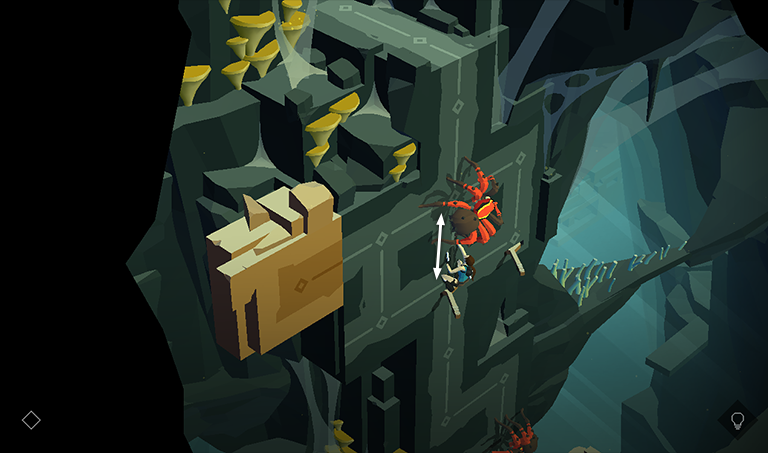
You can just ignore it, or climb up, down, then back up again to shoot it from below as it moves to the right.
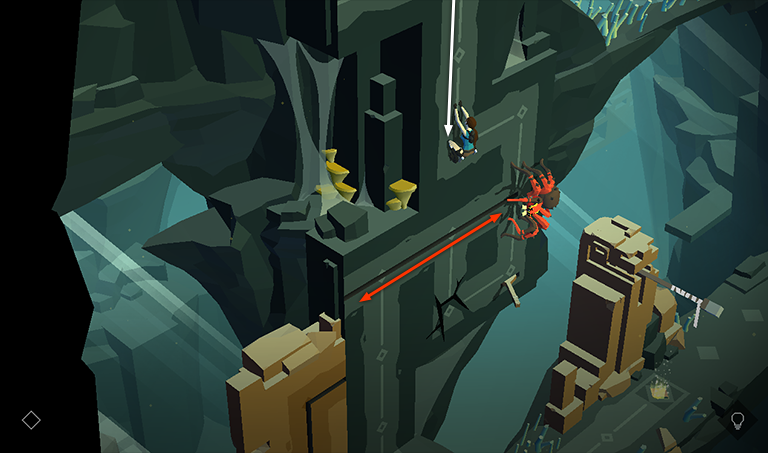
To get past the second spider, which is moving back and forth below, climb down to the bottom of the straight track. At this point, the second spider should be at the right end of its path, regardless of whether you took extra turns killing the first spider.
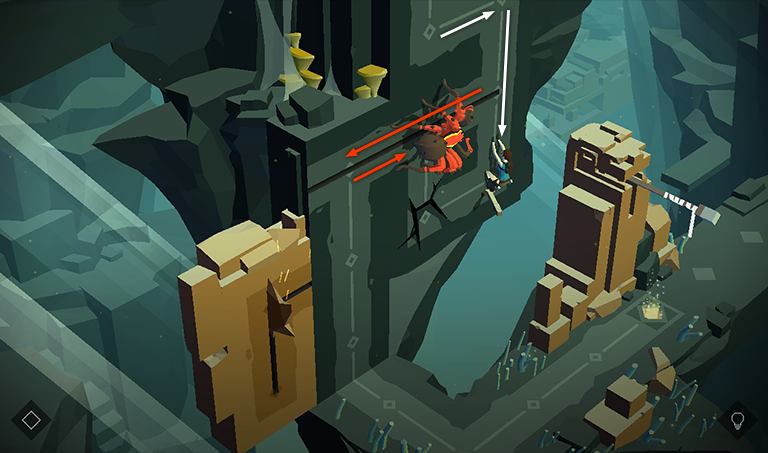
As you climb to the right, then downward twice toward the next lever, the spider will move left then turn around and head back to the right.
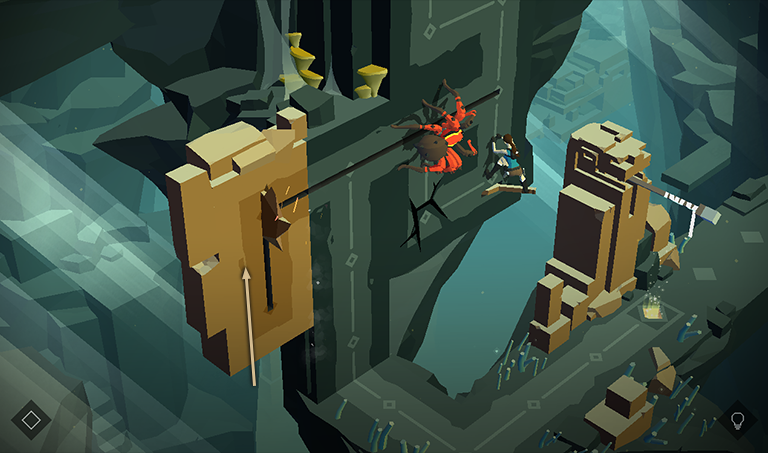
Kick the lever to move the tan block with the spinning blade upward.
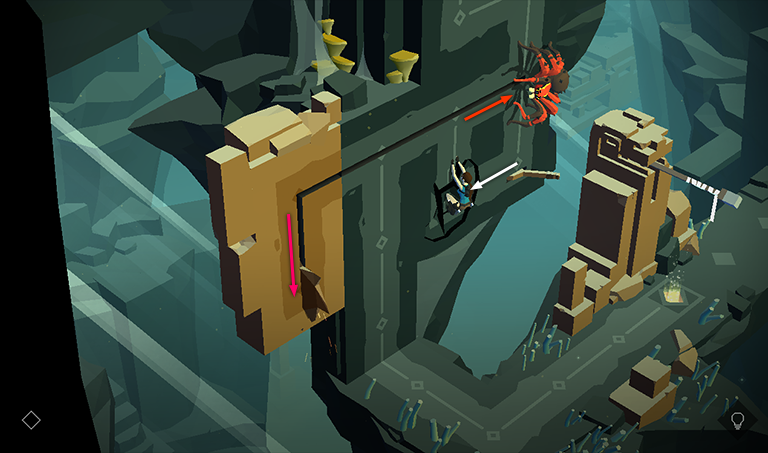
Then climb to the left, onto the cracked section of wall. As you do, the spider moves to the right and turns around, and the blade moves downward.
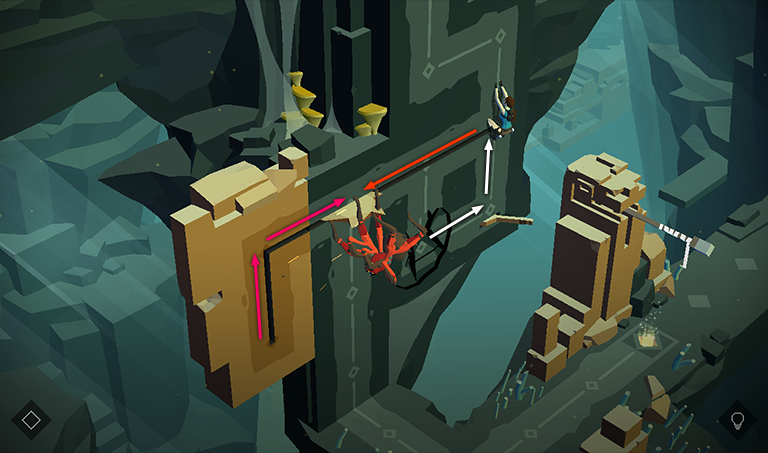
Now climb back to the right and upward. As you go, the spider moves left and the blade moves right. When the two meet, that's the end of the spider.
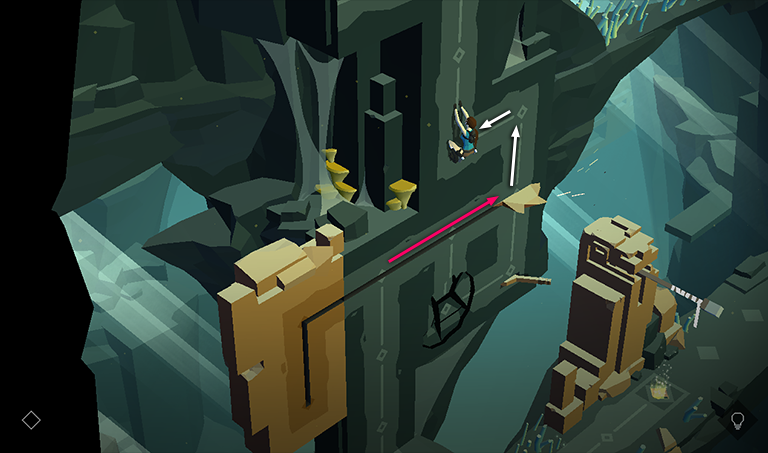
To avoid the blade, climb upward then left, as the blade moves to the right. Do not climb onto the cracked wall again, since it won't support Lara a second time.
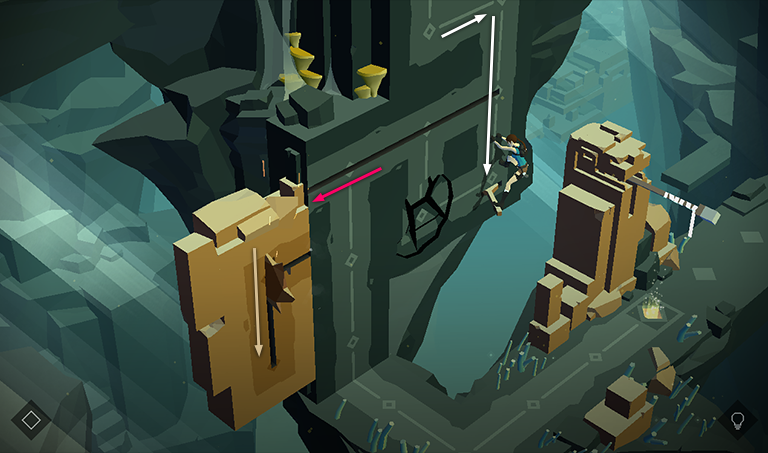
Then climb back down to the lever as the blade moves left onto the tan block. Kick the lever to shift the tan block downward, isolating the blade so it can no longer reach you.
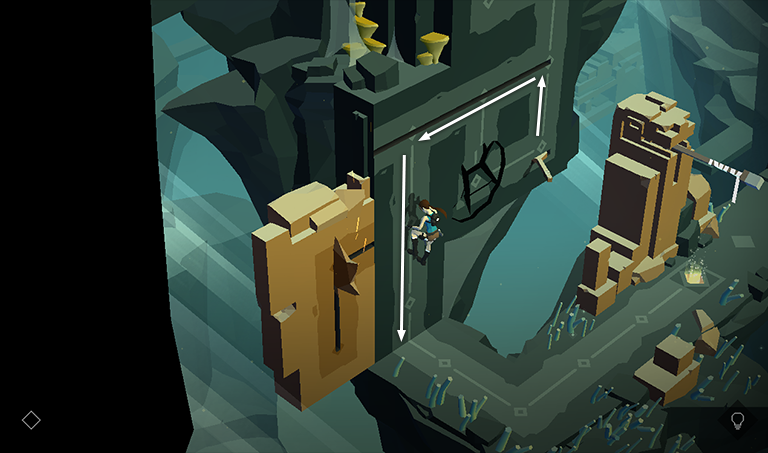
Now you can climb up, over to the left, and down to the floor.
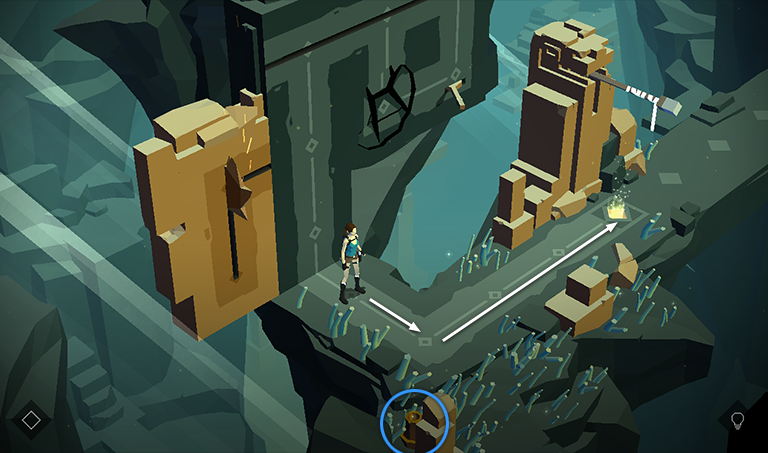
Tap the vase in the foreground to get another SAPPHIRE (5/32). Then proceed to the exit.
†UPDATE HISTORY: 8/31/15 - Walkthrough first posted.
WAS THIS WALKTHROUGH HELPFUL? If not, I apologize and invite you to contact me with any questions. If you need help right away, I recommend the r/TombRaider subreddit. Other fan-run forums are listed at tombraiders.net/stella/community.html. If this site was useful, please consider supporting it financially or in other ways. For details, visit tombraiders.net/stella/support.html. As always, I welcome your corrections/suggestions. Thank you!
Copyright © - Stellalune ( ). Screenshots were made using the Andy Android emulator. Feel free to copy or print this walkthrough for personal use. Share it with friends if you like, but please include this credit line so people can send me their feedback. No part of this walkthrough may be reproduced on another site without permission. Follow this link for details about this site's advertising and privacy policy.
Stella's Tomb Raider Site: tombraiders.net.