Atlantean Stronghold - Secret #1 and "How Do I Get It?" Achievement/Trophy
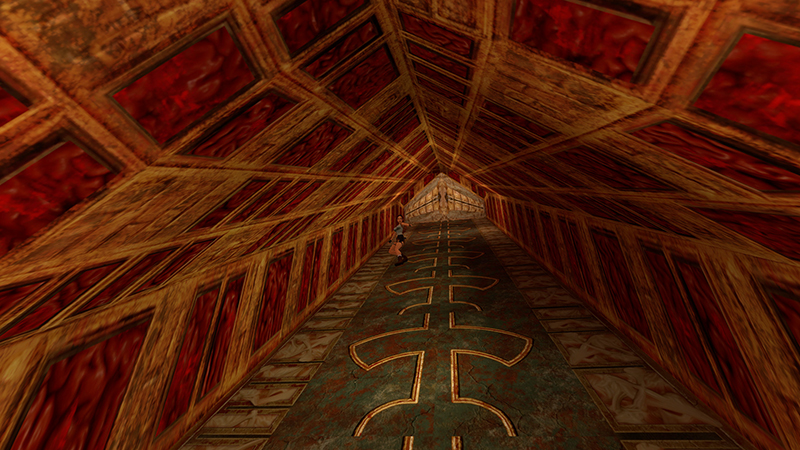
Slide down the long ramp, perhaps the same one at the end of the Great Pyramid level in TR1.
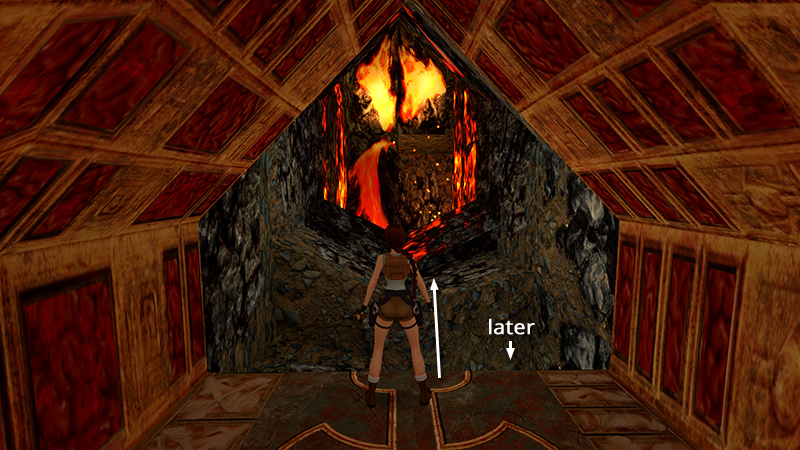
Continue up the next slope and jump across the hole in the floor. (You'll climb down here later.)
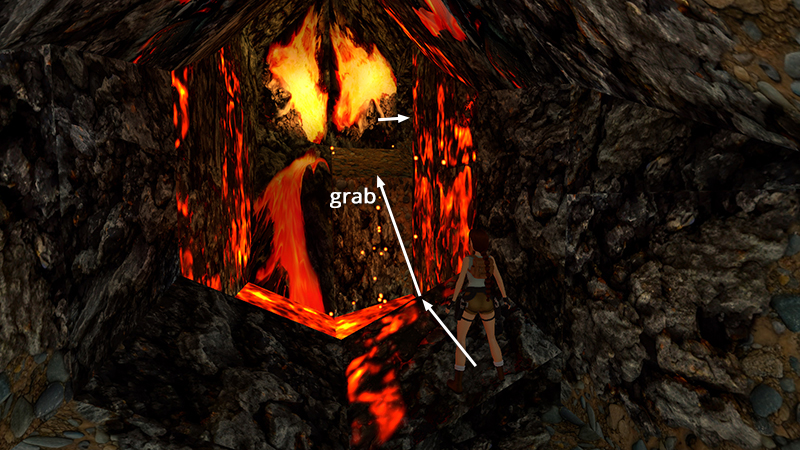
Take a running jump across the right side of the lava pool to grab the angled block on the other side. Pull up and enter the cave on the right...
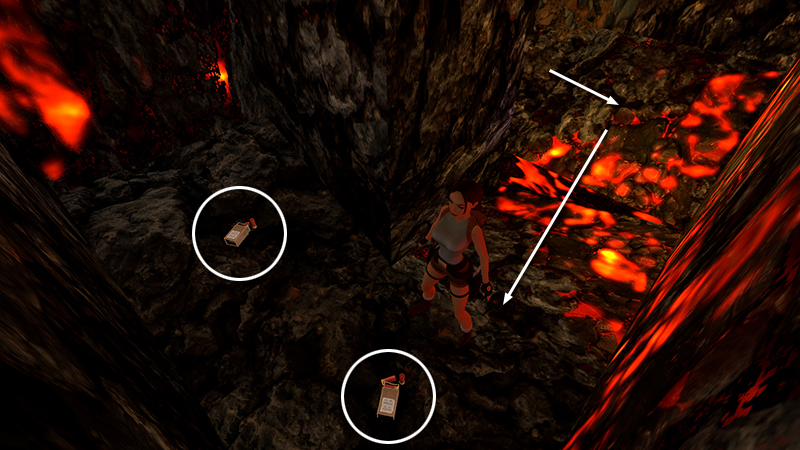
...for SECRET #1, 2 boxes of shotgun shells (1-2).
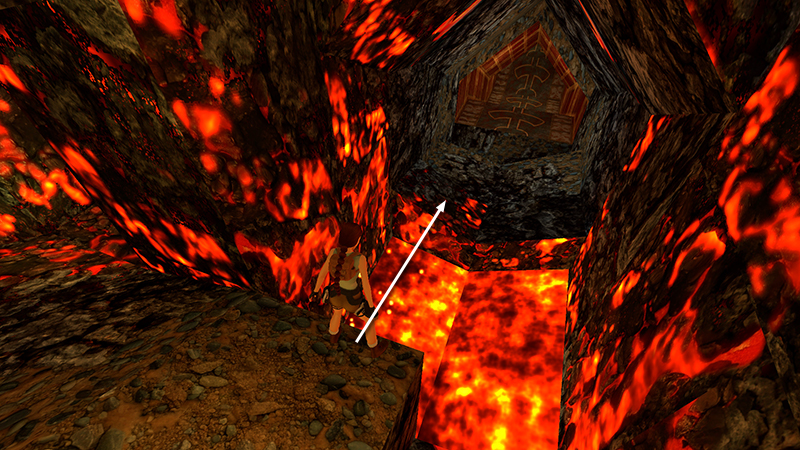
Exit the cave the way you came in. Take a standing jump over the lava.
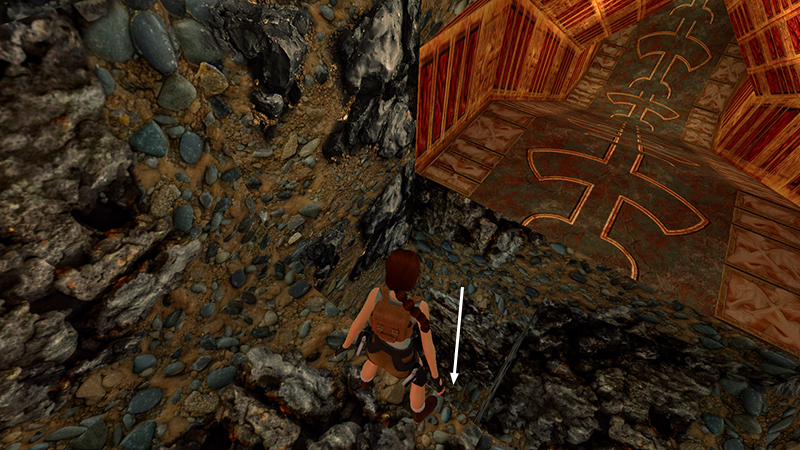
Drop into the hole just ahead on the left.
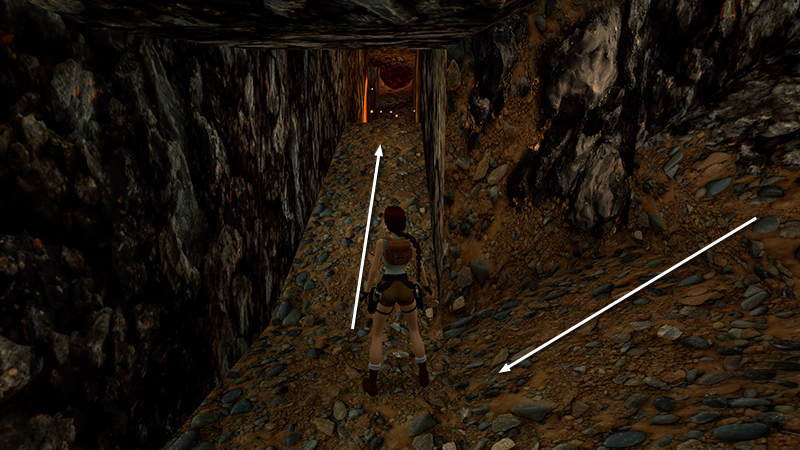
Follow the tunnel around the corner and up the slope to the edge of the lava pit.
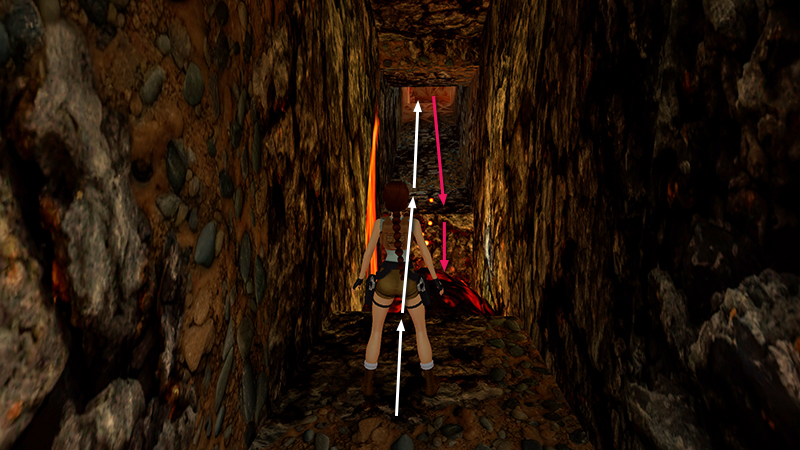
A boulder (1/4) rolls down the hill toward Lara, but if you just wait, it will land harmlessly in the pit. Now take a running jump across the pit and continue to the top of the ramp.
NOTE: This boulder is the first of 4 in this level (47 in all) that you'll need to trigger for the "Roll, Action!" achievement/trophy, which requires you to "make all the boulders except that one roll in a single [playthrough]." The "one" is covered at the beginning of the next level. The rest are noted as we go.
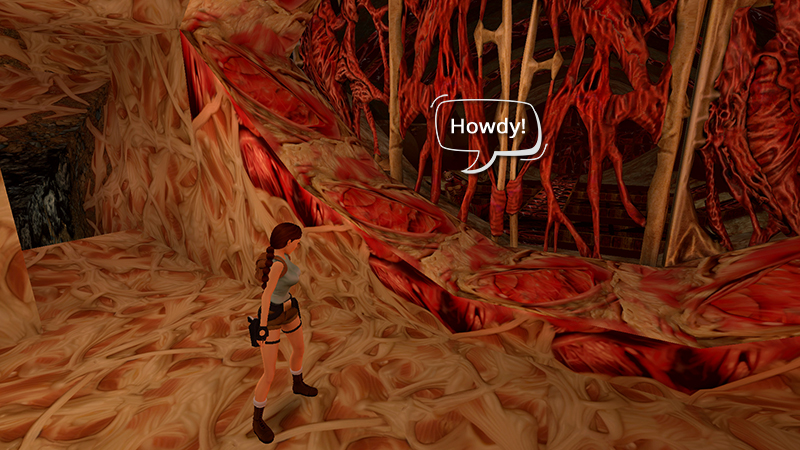
This wide alcove has a webbed window on the left with a centaur running around behind it. Fortunately, the centaur can't reach you yet.
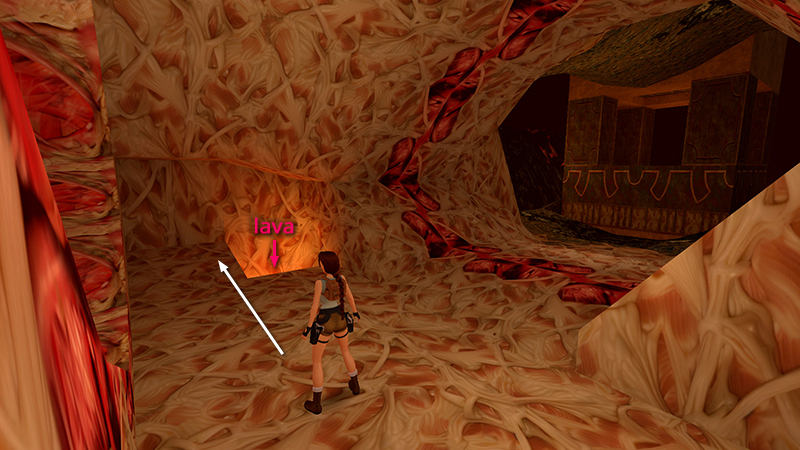
On the right is an opening overlooking a large cavern. Straight ahead, if the webbed window is still on Lara's left, there's a small, square lava pit near the wall.
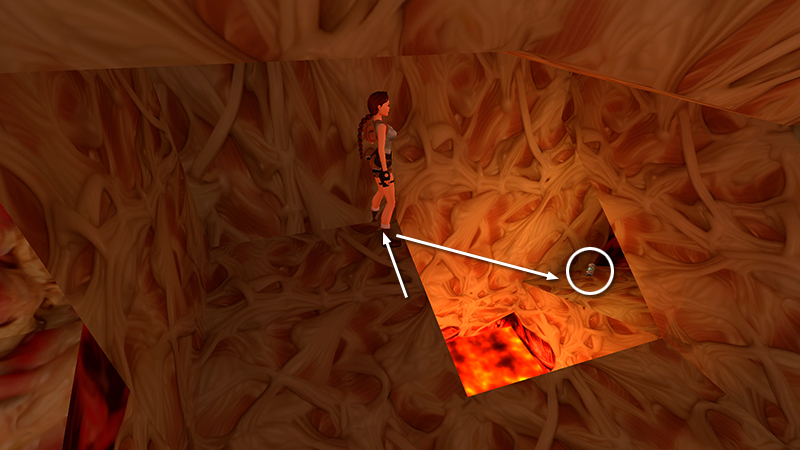
Stand at the left side of the pit facing the little nook with the small medi pack (3). Sidestep left toward the wall. Then take a standing jump, pressing Action to alter Lara's trajectory so she lands on the ledge.
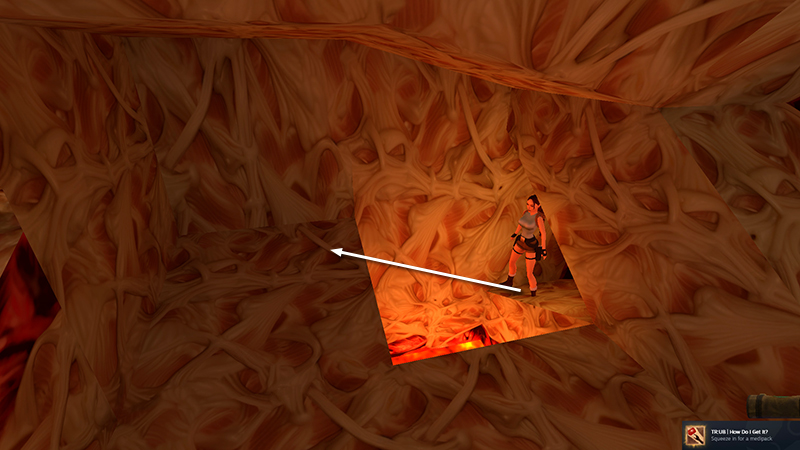
Take the medi pack to unlock the "How Do I Get It?" achievement/trophy. (Now they're just giving them away.) Turn around, walk to the edge, and and take another standing jump back across the pit.
DARK MODE: I plan to add optional dark mode for these pages, but my current priority is updating the walkthroughs. Meanwhile, may I suggest a reputable dark mode browser extension, such as Dark Reader? (Download only from trusted sites, like darkreader.org or your browser's web store.)
Walkthrough text and diagrams copyright © Stellalune (email ). Feel free to copy or print this walkthrough for personal use. By all means, share it with friends, but please include this credit line so people can send me their feedback. No part of this walkthrough may be reproduced on another site without permission.