The Hive - Entrance and "On Tiptoes" Achievement/Trophy
If you're achievement/trophy hunting, you'll need to proceed carefully in order to unlock two contradictory ones. The "On Tiptoes" achievement/trophy requires you to avoid triggering any boulders before using either of the switches on the other side of the room. "Roll, Action!" involves triggering all but one of the boulders in all 4 Unfinished Business levels. The one boulder that doesn't roll happens to be in this area, so you'll need to trigger 24 of the 25 boulders. There are 47 boulders across all 4 Unfinished Business levels, but these 24 are the only ones in The Hive. Note that all of the ornate, decorated tiles are safe. Most, though not all, of the plain tiles will trigger boulders.
If you don't care about achievements, this guide may still be useful, but you obviously won't need to be as careful.
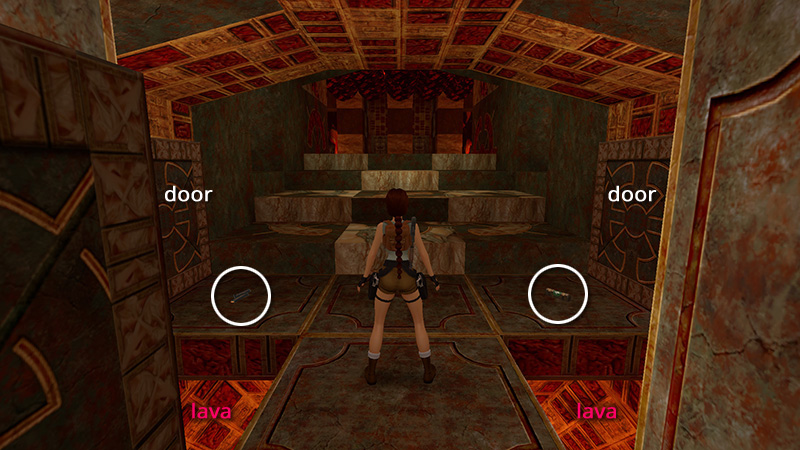
From the starting point, step forward and pick up the small medi pack and magnum clips (1-2) lying on the floor. Watch out for the holes in the corners—there's lava below—and note the two closed doors on the side walls.
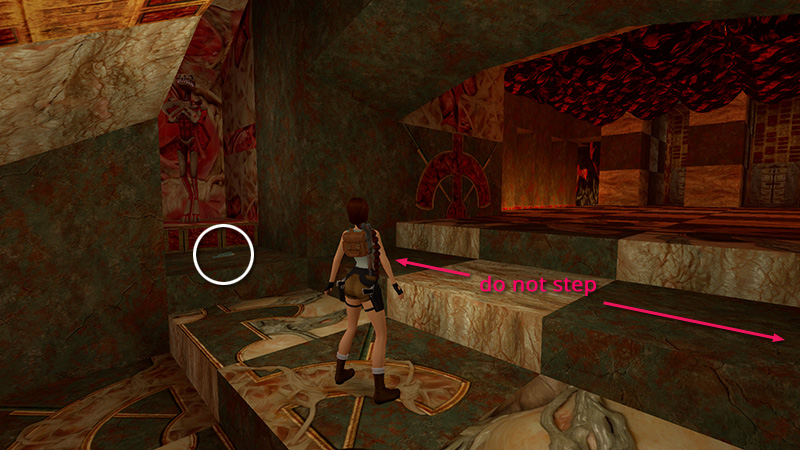
Climb the first two wide steps toward the checkerboard area, but don't step up onto the third step (i.e., the one with the plain, undecorated tiles), since this will trigger 2 boulders. Grab the 2 sets of Uzi clips (3-4) from the alcoves on the left...
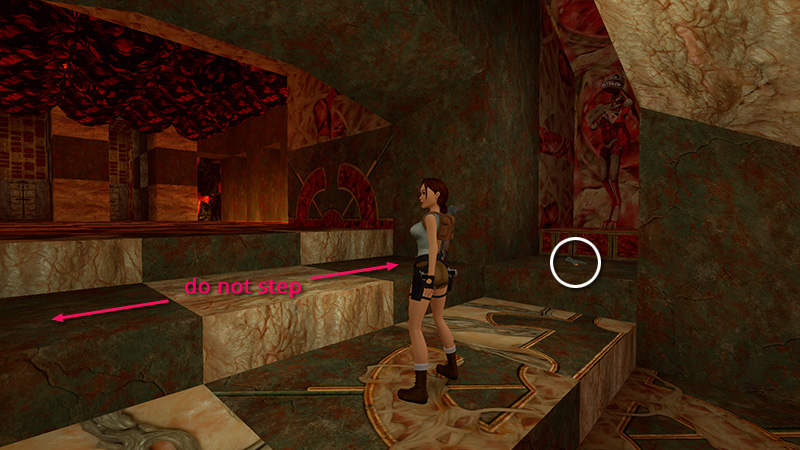
...and right. Don't worry, the 2 mutants (1-2) inside won't come to life yet.
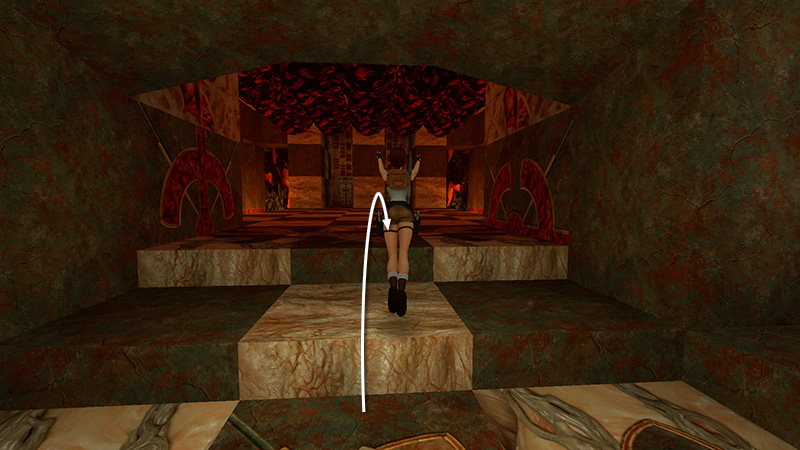
I recommend saving the game before proceeding, since this sequence is a little tricky. To cross the room without triggering any boulders, start by jumping over that third step, since touching it triggers two boulders. (The boulders won't squash Lara but will negate the achievement.)
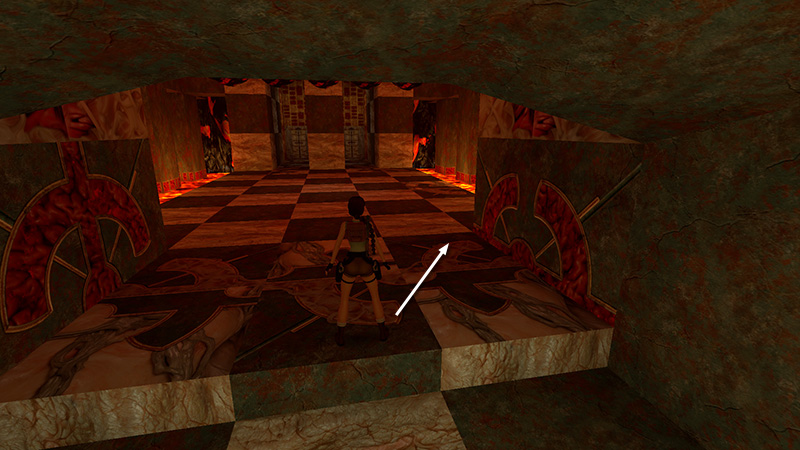
The 6 decorated tiles at the top of the steps are safe, as are the two decorated tiles near the lava along the right edge of the checkerboard floor. So advance carefully.
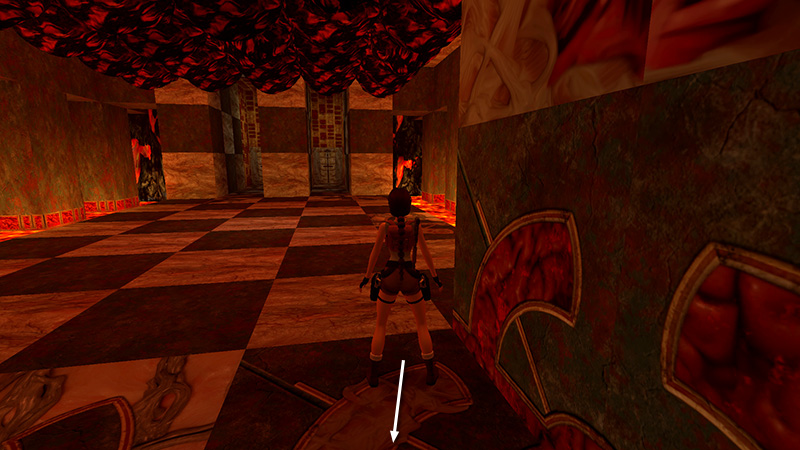
Position Lara on the far right tile, about two steps back from the far edge, as shown here. Face the two safe tiles ahead, then hop back.
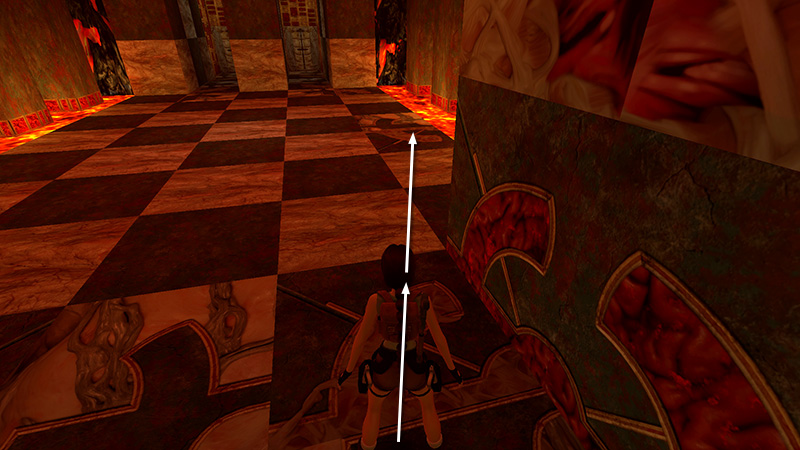
Now take a running jump over the plain trigger tiles to land on the nearer of the two safe tiles.
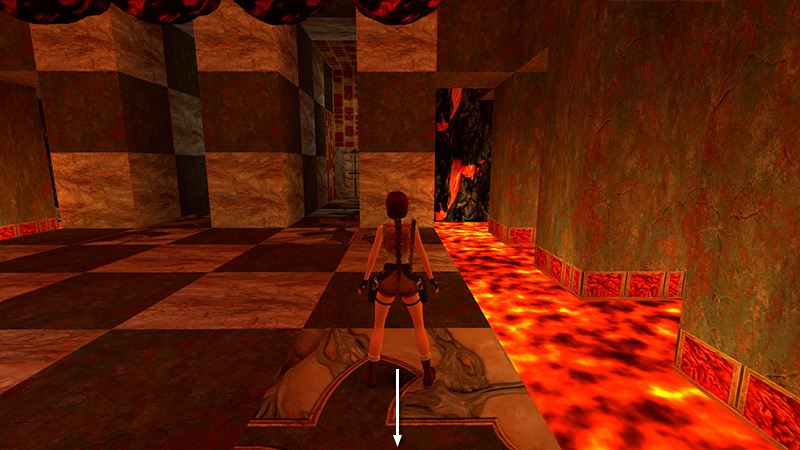
Again, walk forward and position Lara about two steps back from the far edge of the second safe tile. Hop back...
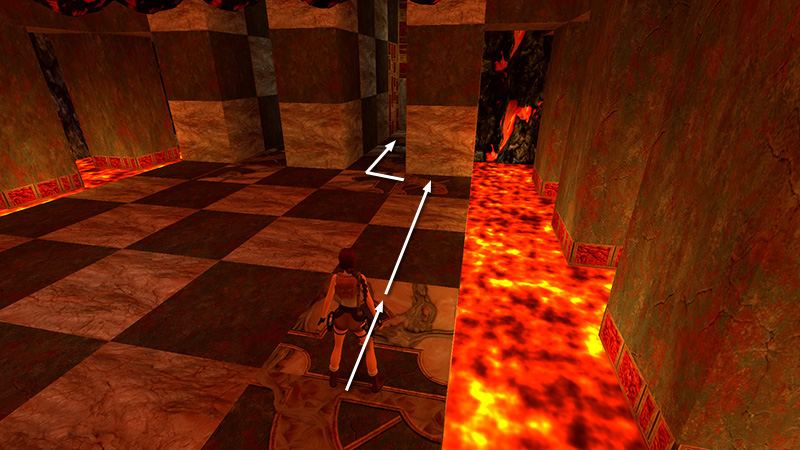
...then take another running jump over the two plain tiles to land on the safe tile in the far right (northeast) corner of the checkerboard. The other decorated tiles near the alcoves are safe, too, so move into the alcove.
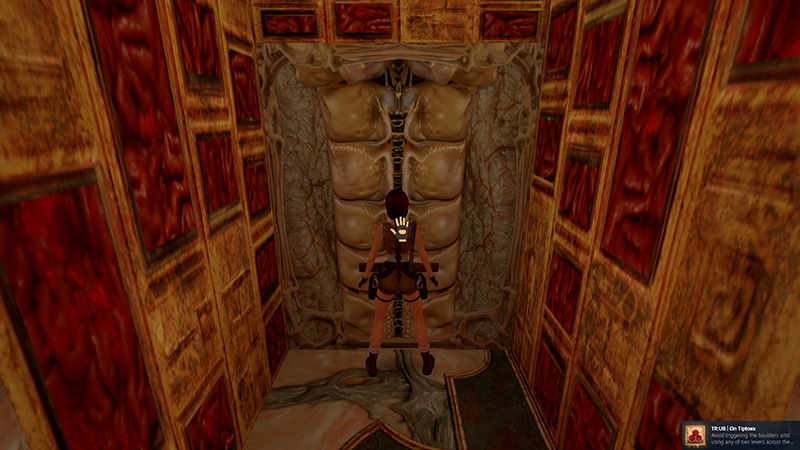
When you pull the switch, as long as you haven't triggered any boulders, the "On Tiptoes" achievement/trophy should unlock.
NOTE: If you mess up, either reload an earlier save or restart the level and try again. (To do this, jump in the lava or let a boulder squash Lara. Then, instead of reloading your last save, press Right to turn the page in the passport menu and choose "Restart Level.")
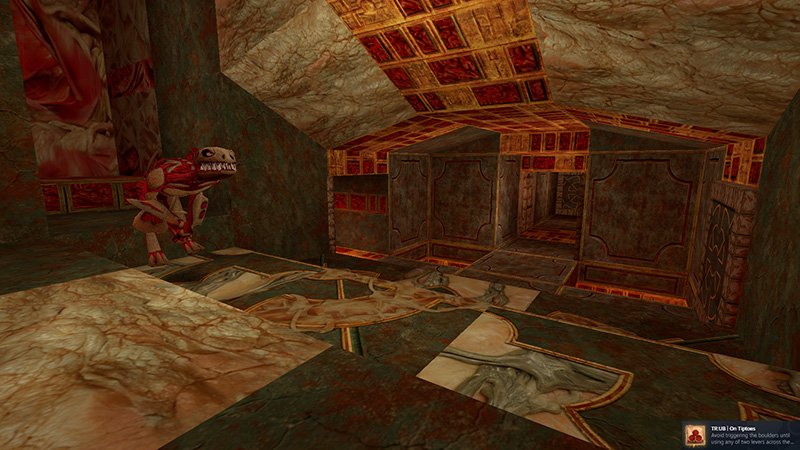
Using the switch opens one of the doors back at the entrance and also awakens one of the mutants (1).
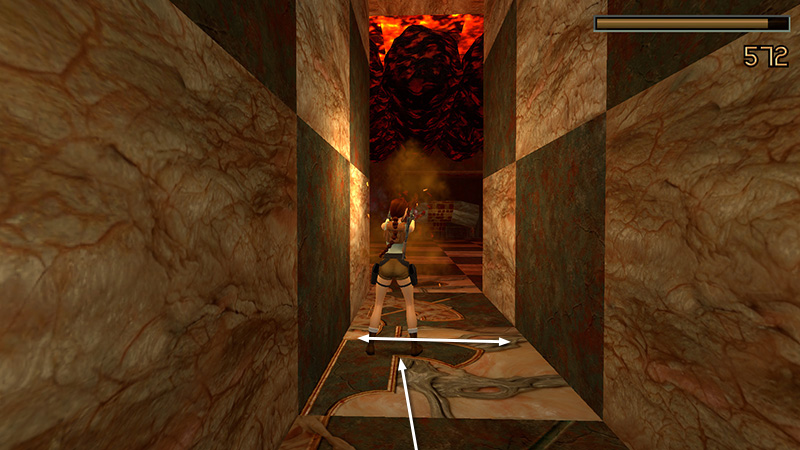
Roll, run forward a few steps so the camera moves behind Lara, and draw weapons. Lara is vulnerable in this narrow alcove, so use Magnums if possible to destroy the mutant before its projectiles do too much damage. Sidestepping left and right while firing can also help, but don't run out into the room or you're likely to trigger some boulders.
[Next | Hive Walkthrough]
DARK MODE: I plan to add optional dark mode for these pages, but my current priority is updating the walkthroughs. Meanwhile, may I suggest a reputable dark mode browser extension, such as Dark Reader? (Download only from trusted sites, like darkreader.org or your browser's web store.)
Walkthrough text and diagrams copyright © Stellalune (email ). Feel free to copy or print this walkthrough for personal use. By all means, share it with friends, but please include this credit line so people can send me their feedback. No part of this walkthrough may be reproduced on another site without permission.