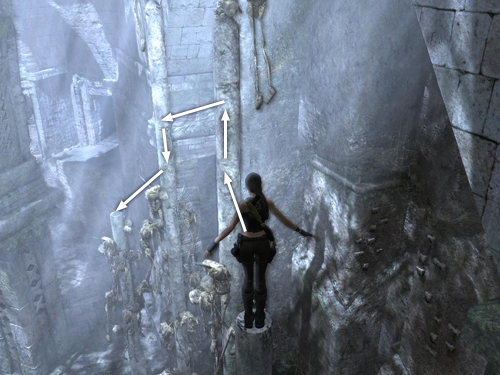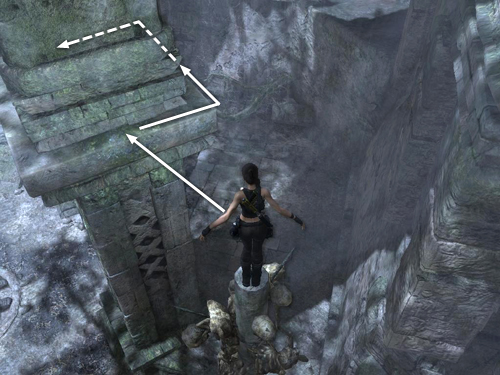
After getting treasure #41, as described in Part 1, jump back to the skinny column and perch top of it. Point the camera toward the next narrow, skeleton-adorned column and jump to grab it. Climb up a little if necessary and then jump to grab the third column. Climb down toward the spikes a bit and then jump from this column to perch on top of the fourth one.
NOTE: If you're having trouble jumping from column to column, understand that it doesn't matter how Lara is positioned on the column where you start. The important thing is to point the camera toward the column you want her to grab. Then just press Forward + Jump and she'll do it correctly.

Finally jump to grab the narrow ledge running around the square pillar ahead. Traverse around to the other side and pull up.

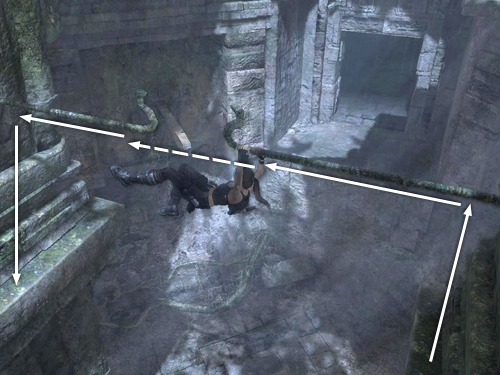
Jump straight up to grab the horizontal pole above. Climb hand over hand toward the hooked end of the pole. Continue climbing across onto the next pole (Xbox or PS3) or swing and jump to grab the next pole (PC). Then climb in toward the next column and drop to grab the narrow ledge below.

Traverse around the corner to the right and pull up. Jump to the yellowish metal beam jutting out of the wall.

Then jump from the beam to the doorway. Go inside and follow the dark corridor to the trap room.
[Part 1 | Return to the Midgard Serpent Walkthrough]
Copyright © 2008- - Stellalune (). All rights reserved. The screenshots and videos included here were made using Fraps. Feel free to copy or print this walkthrough for personal use. By all means, share it with friends, but please include this credit line so people can send me their feedback. No part of this walkthrough may be reproduced on another site without permission. Follow this link for details about this site's advertising and privacy policy.
|
