Hall of Seasons - Into the Basement of Doom
"This is Lara!" Achievement/Trophy Progress
These pages detail one possible route through the lower levels: from the Earth entrance to the FURNACE ROOM, on to the ELEVATOR, and back up to the MAIN ROOM, with all pickups. If you chose a different route, you may want to refer to the separate "BASEMENT OF DOOM" guide.
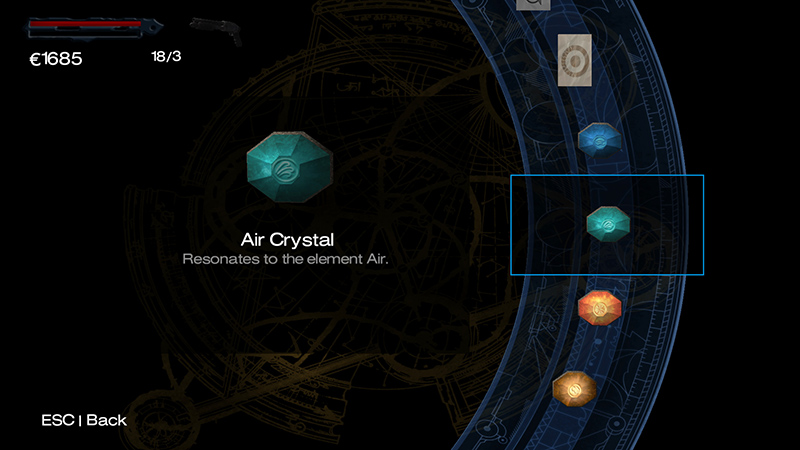
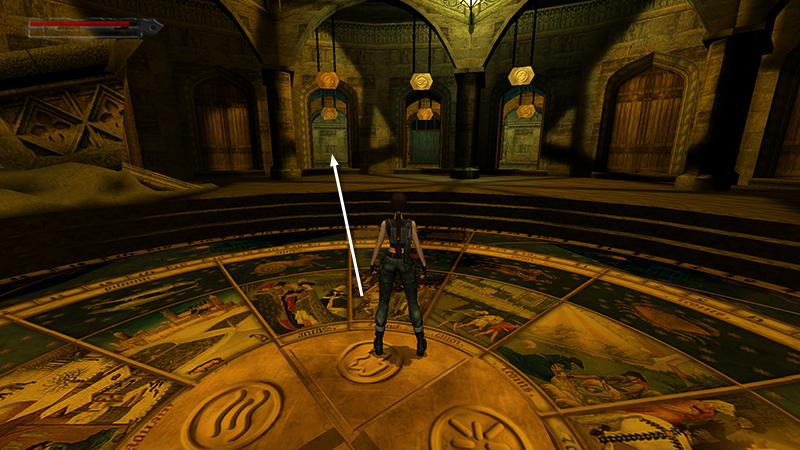
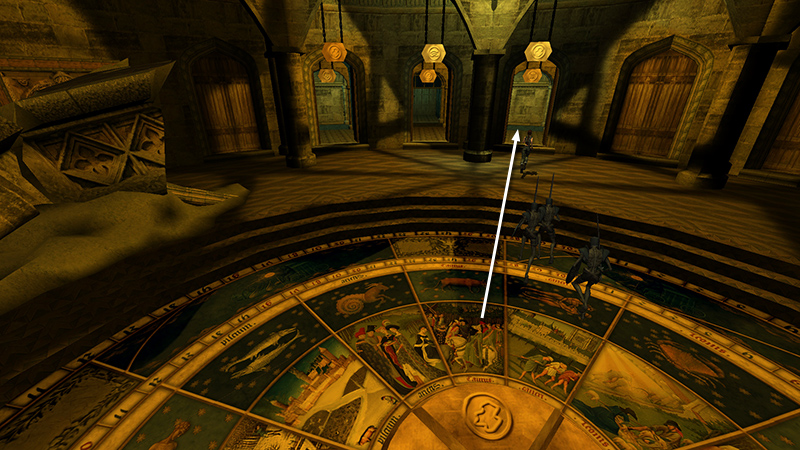
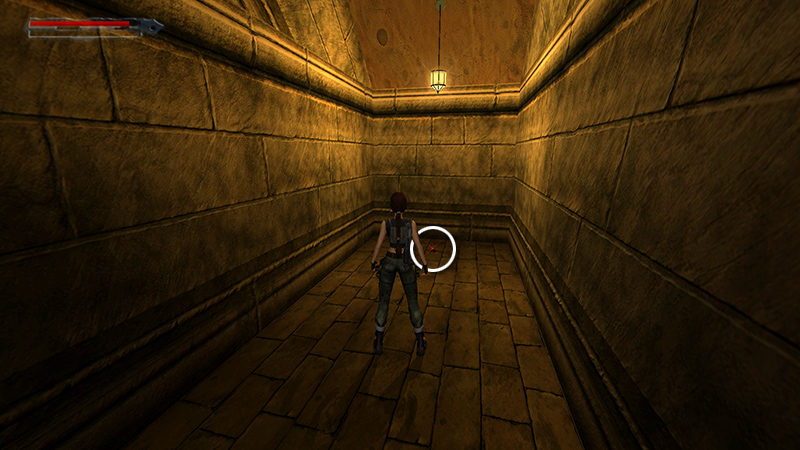
Once you've collected all 4 ELEMENT CRYSTALS, you'll return once more to the MAIN ROOM of the HALL OF SEASONS.
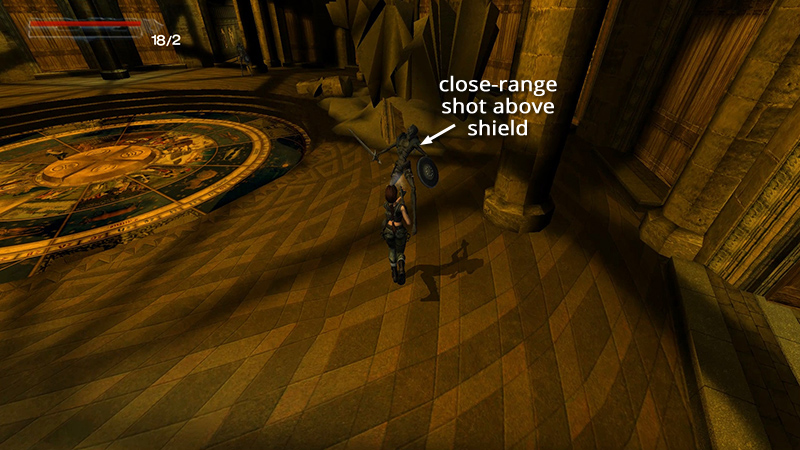
If you like, you can knock down the 3 undead knights (1-3) before placing the crystals. Melee attacks or shotgun blasts work well (one shot at close range should bypass their shields and knock them down), but any weapon other than the taser will do. If you're working on the achievement/trophy, "This is Lara!" (for knocking knights into pits), be sure to knock each knight down only once. Two knockdowns will destroy them, and you'll want them alive for the next part.
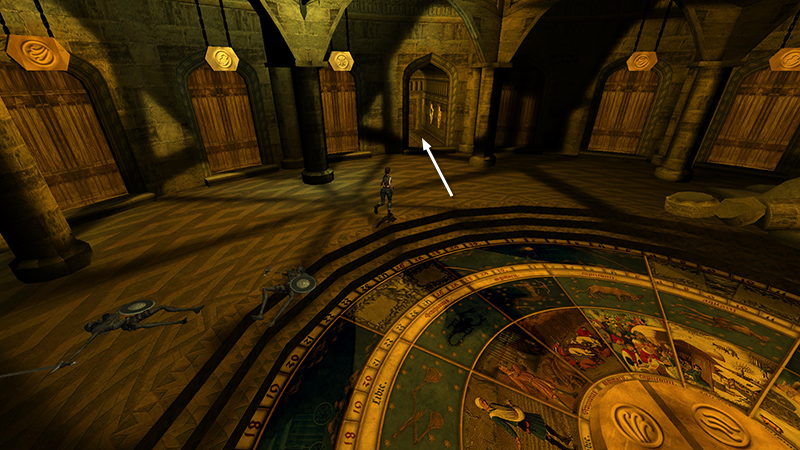
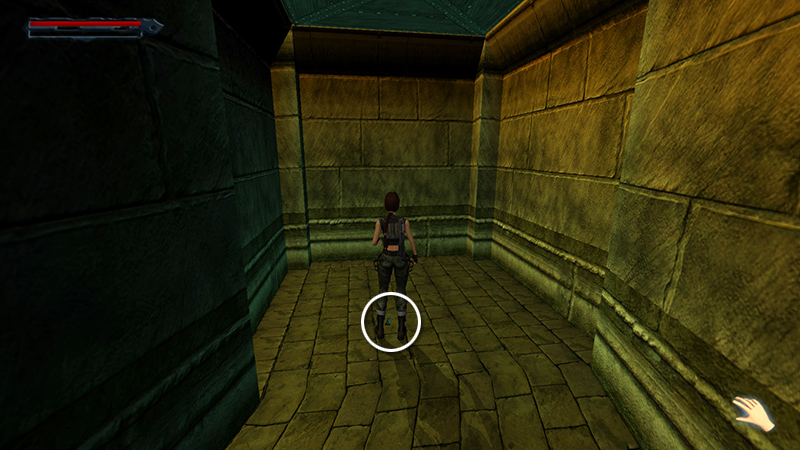
Now return to the short hallway where you first entered the level.
Place the WATER, AIR, FIRE, and EARTH CRYSTALS in the 4 receptacles to unlock a door down in the "BASEMENT OF DOOM."
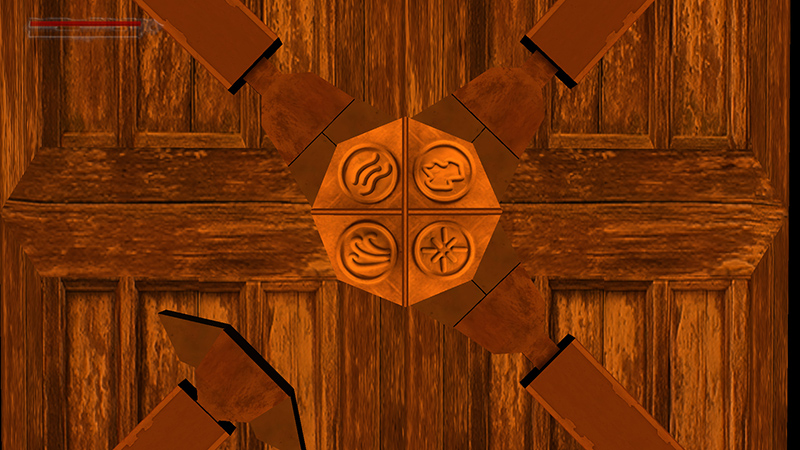
As you place each crystal, you'll see one part of an X-shaped lock disengage.
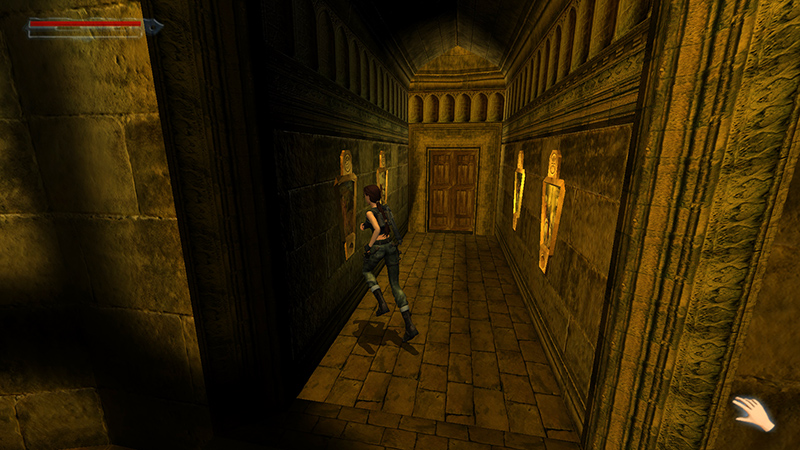
If you've been following this walkthrough, and want all pickups, it's best to drop into the BASEMENT via the Earth entrance. So, step on the button with the earth symbol to open three doors. (Maybe these doors are already open if you explored the Earth area last). If you don't care about luring the knights to the pit, go through the left door...
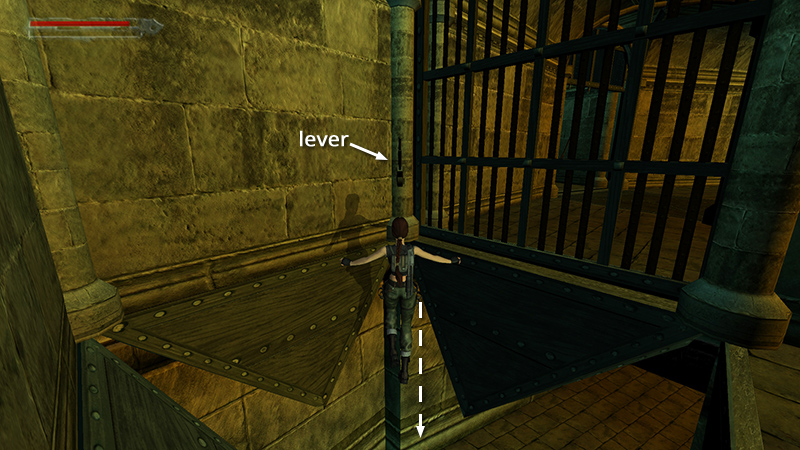
...and pull the lever to fall through the trapdoor.
Pick up a Viper clip (4) on the landing. (Lara will land almost on top of it if you used the left lever.)
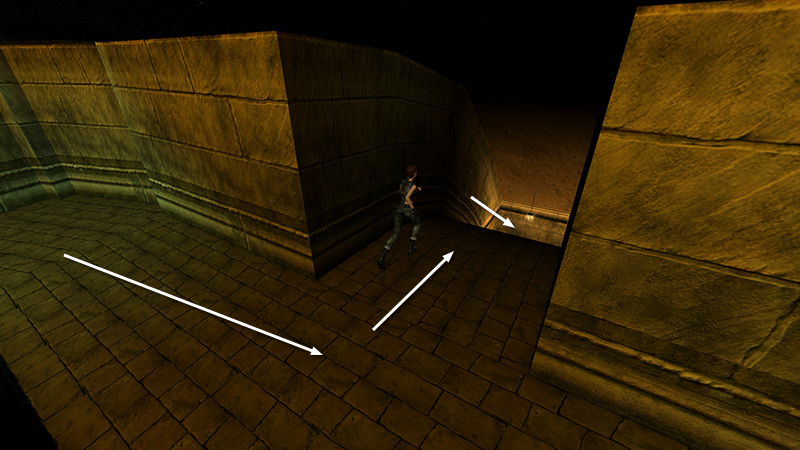
Then slide down the ramp into the BASEMENT. (Skip the next 6 screenshots and continue below.)
- OR -
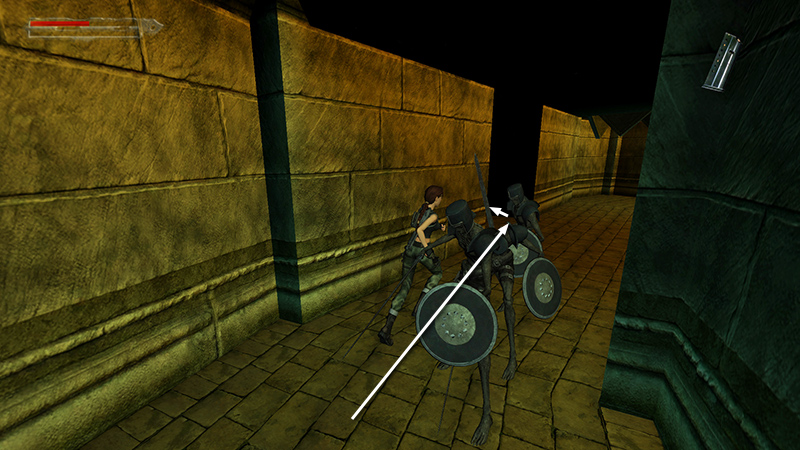
If you are attempting "This is Lara!" instead head for the right door.
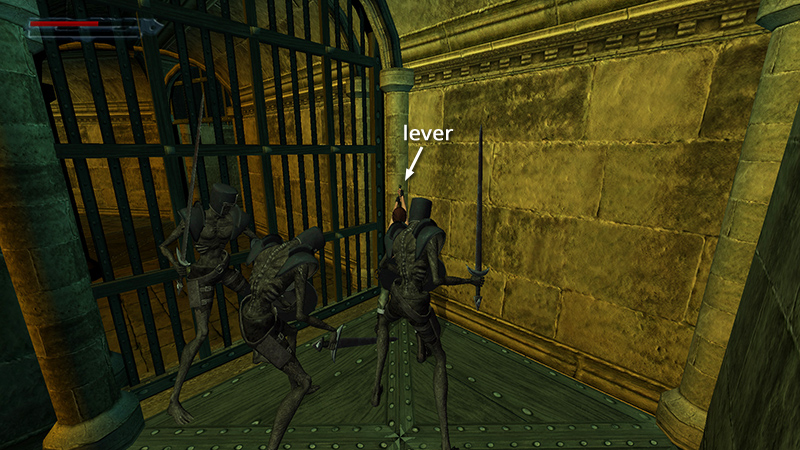
Run to the lever, in the far left corner near the bars. Wait for all 3 knights to approach. You may need to run out to get their attention, then lure them inside. When they're all standing on the trapdoor, pull the lever...
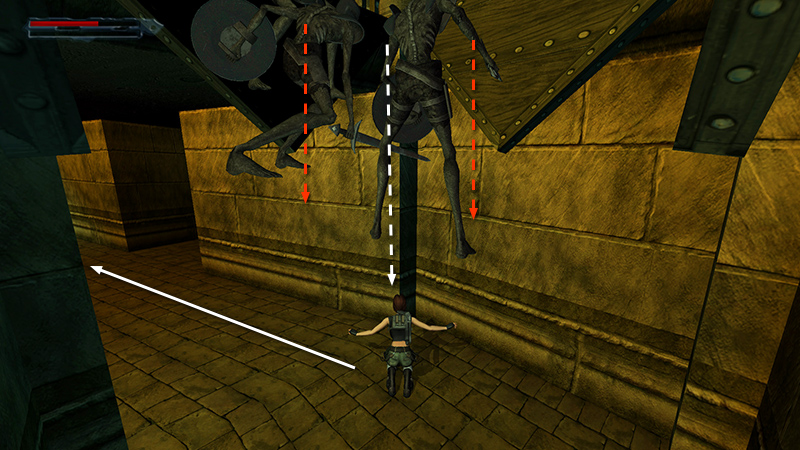
...to drop them (and Lara) into the room below. That's three more knights for achievement/trophy. (These are knights 6-8/17 if you followed the same sequence I have.) You can now destroy the knights, or just outrun them. If you choose to run, head to the left...
...and grab the Viper clip (4) lying on the floor before the knights close in.
Roll, run/jump past them...
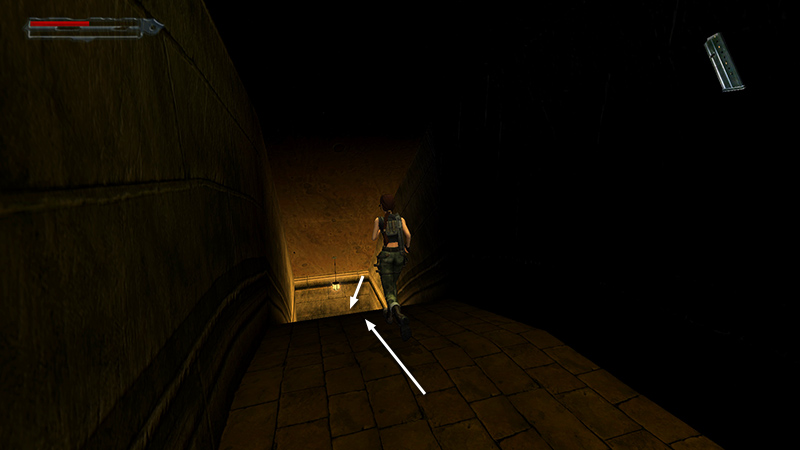
...and slide down the ramp into the BASEMENT.
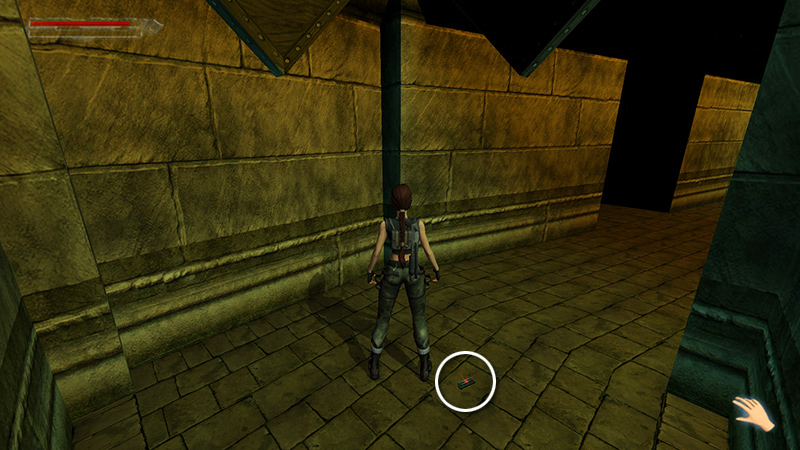
Pick up V-Packer shells (5) in the passage below the ramp.
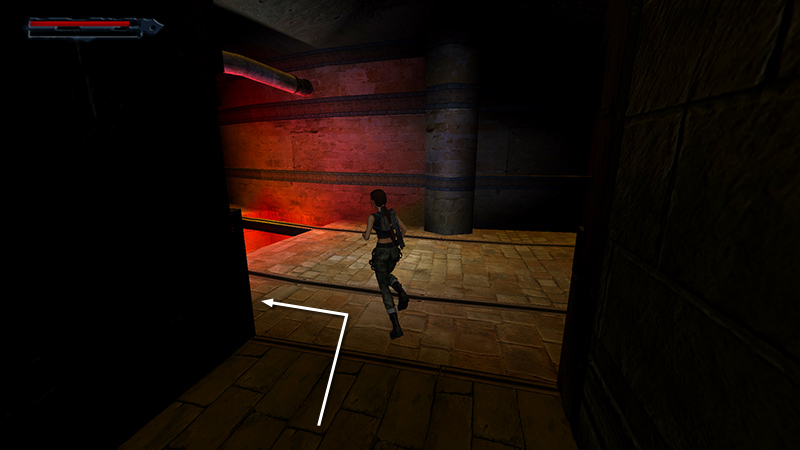
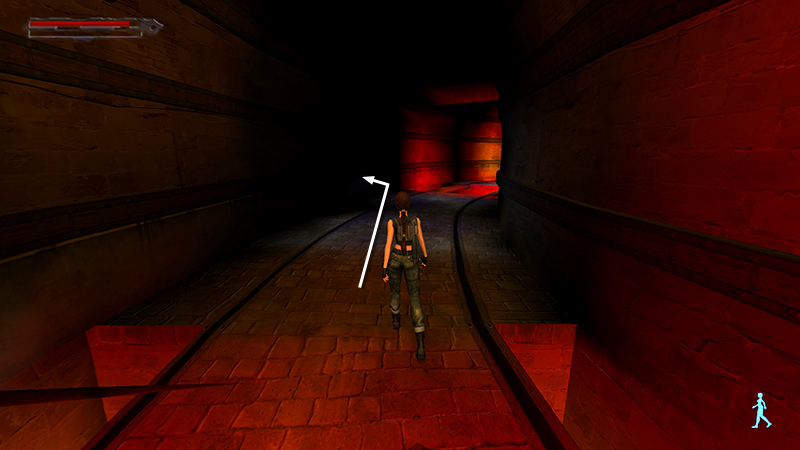
Then proceed into the huge, circular trap room. Turn left and stay close to the left wall.
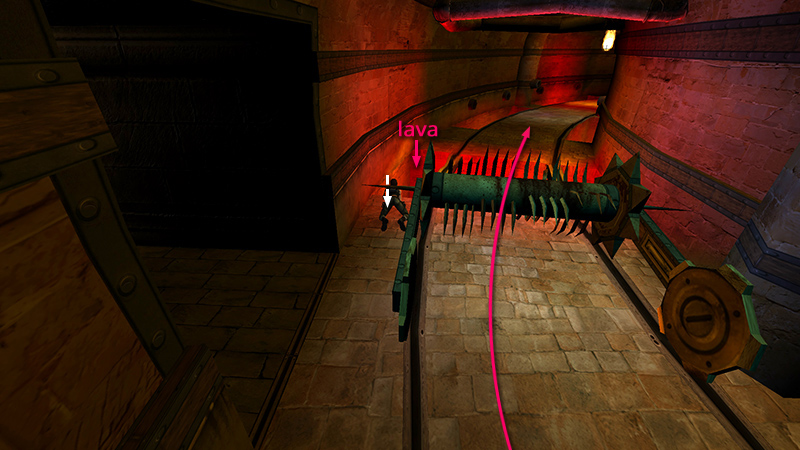
Duck and crawl forward toward the lava pit and wait for the rolling spiked wheel to move past.
When it's safe, stand up and take a running jump across the lava (or take a standing jump from the edge to grab the opposite edge, then pull up).
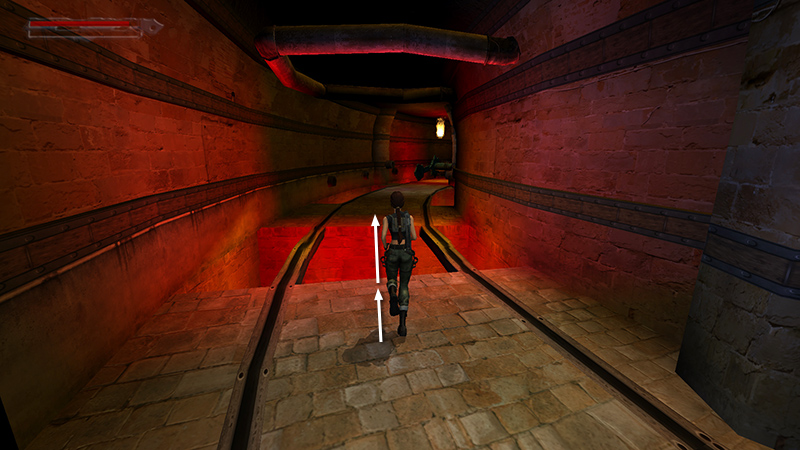
Walk carefully past the horizontal spikes that pop out of the walls as Lara approaches. If you weave between them in a serpentine path, you can avoid being skewered.
Continue forward, then left, into the FIRE PASSAGE.
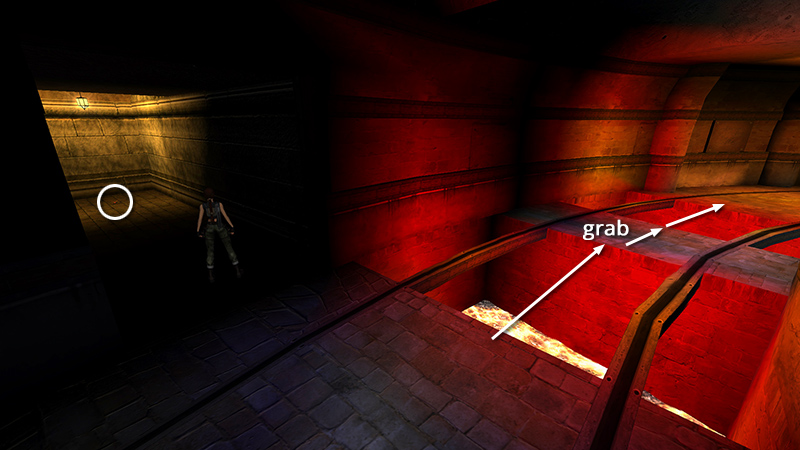
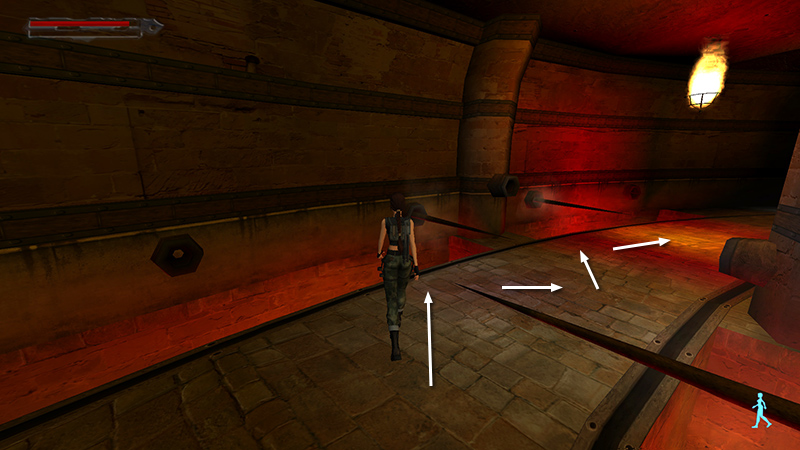
It's hard to spot in the dark, but you'll see it when you get close. Pick up a Viper clip (6). Then return to the trap room and jump across the next 2 lava pits. (It's either a standing jump-and-grab for the first pit, followed by a running jump across the second; or running jumps for both, taking care not to run off the ledge between pits.)
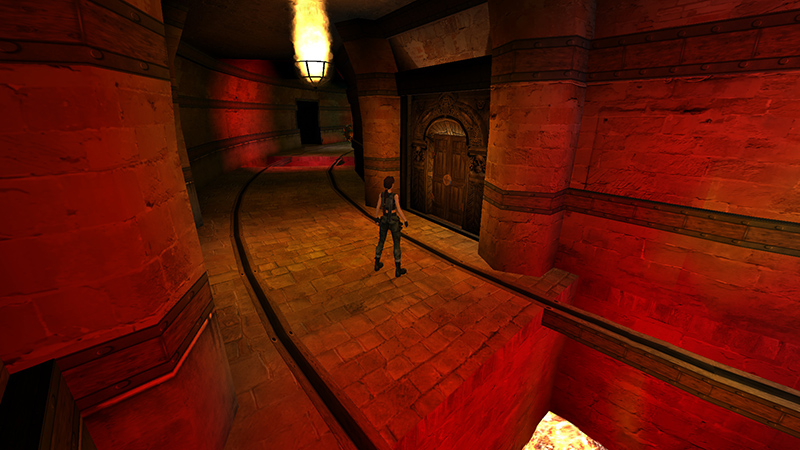
The entrance to the FURNACE ROOM is just ahead on the right.
DARK MODE: I plan to add optional dark mode for these pages, but my current priority is updating the walkthroughs. Meanwhile, may I suggest a reputable dark mode browser extension, such as Dark Reader? (Download only from trusted sites, like darkreader.org or your browser's web store.)
Walkthrough text and diagrams copyright © Stellalune (email ). Feel free to copy or print this walkthrough for personal use. By all means, share it with friends, but please include this credit line so people can send me their feedback. No part of this walkthrough may be reproduced on another site without permission.