City of the Dead - Deactivating the Machine Guns at the North End of the Street

Save the game before trying this next tricky sequence. At the intersection with the hump in the road, where you killed the fourth soldier, get back on the motorcycle.
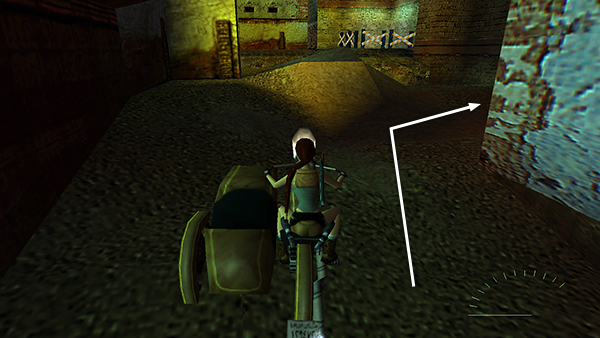
From the intersection with the hump in the road, ride along the street to the north...
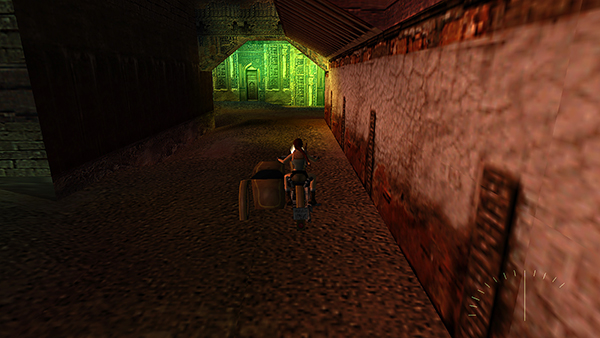
...under the green-lit archway.

As you approach the T intersection ahead, the 2 machine guns on the roof begin firing. Race around the corner to the right (east) to make the machine guns track Lara that way.
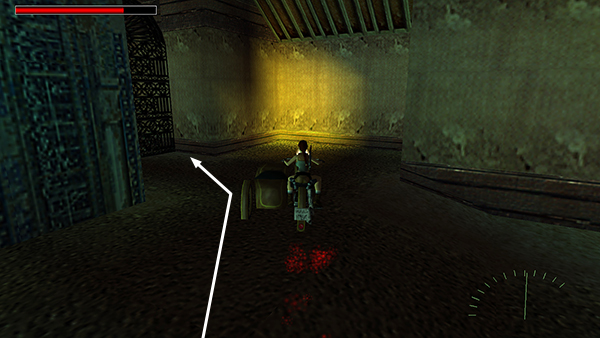
Veer left (north) and park next to the iron gate at the northeast end of the street. Lara is safe here.
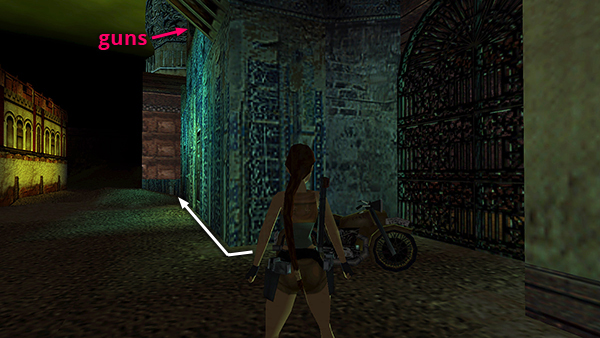
At this point, I will describe how to take out the guns from below. This takes a little patience but will make things a lot easier going forward. If you prefer, you can wait until you reach the ROOFTOPS to deal with the guns. In that case, pick up the main walkthrough here. To destroy the guns now, you'll sneak past them toward the west end of the street then approach the guns carefully from the west. This will allow you to shoot them with the revolver without activating them.
Here's how: From the alcove where you parked the motorcycle, move down the street to the west, staying as close to the blue-and-white wall as possible, so the guns on the roof can't target Lara.
NOTE: If you accidentally step out too far and the guns activate, either reload and start again or run back to the safe alcove with the gate and motorcyle, letting the guns target Lara briefly so they point to the right (east/southeast). The guns must be pointing away from Lara in order to destroy them from below.
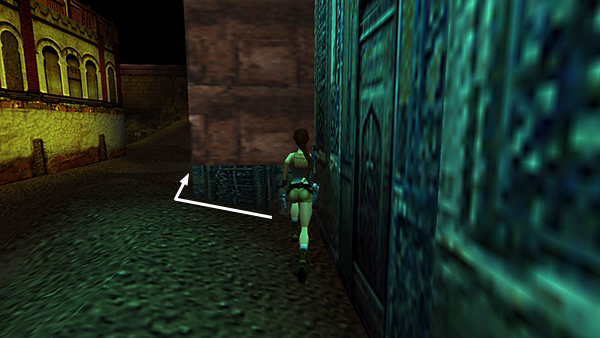
When you come to the end of the blue-and-white wall, continue around the corner, still staying as close to the right wall as possible.

Vault up into the doorway on the right.
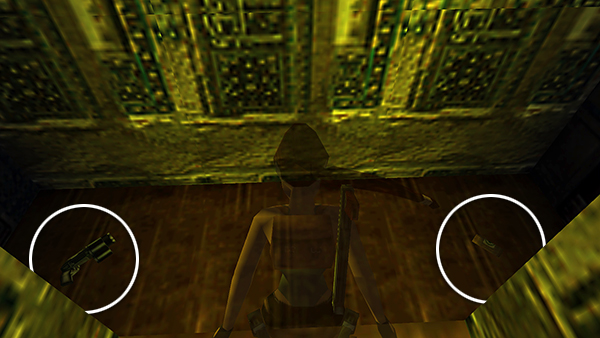
Inside you'll find a small medipack and GRENADE LAUNCHER (or 10 grenades if you already have the weapon).
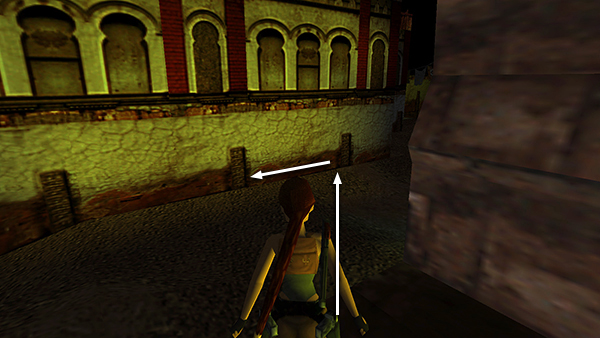
From the doorway of this alcove, check out the building across the street. Notice the three vertical brown bands spaced at intervals along the base of the wall. Run across the street toward the rightmost band. The machine guns should not target Lara at this distance. Turn left and follow the wall back to the east, just as far as the second brown band.
NOTE: Do not continue any farther along the street to the right (west). There are more enemies and a deep pit. It's possible with some fancy driving to jump the pit and get back again, but it's not necessary at this point. We'll explore there later.

Draw the revolver and walk forward one step at a time...

...just until Lara aims at the second machine gun on the roof. If you go any farther, the motion sensors will activate and the guns will start shooting.
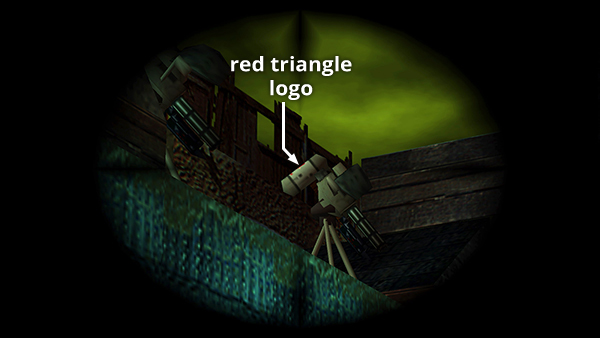
Now use the laser sight to target the second gun (i.e., the one on the right). Aim for the red triangle on the top of the white tank, or even a little above it. Again, you can use the laser sight bug to fire pistol rounds in order to conserve revolver ammo.
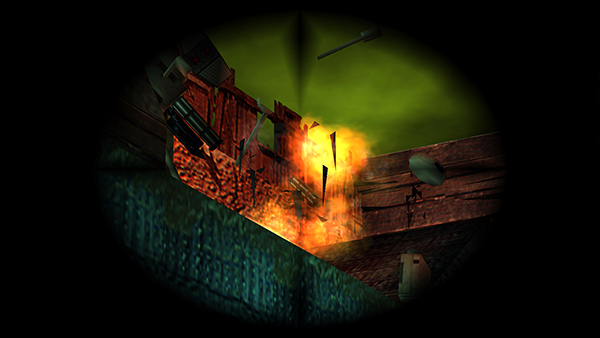
A direct hit on the top of the tank, near the red triangle, should destroy the gun.
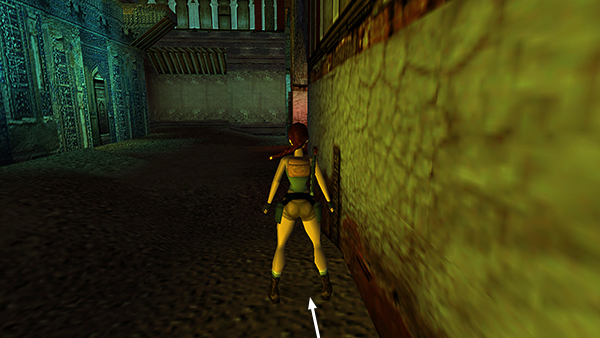
Step forward until Lara is standing about halfway between the second and third brown bands.

Draw the revolver and she should aim at the remaining gun.
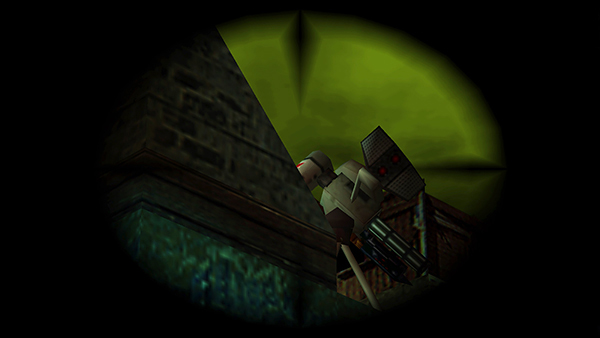
Again, use the laser sight to target the white tank with the red triangle or slightly above it. If you can't see the triangle at all, take another step forward, but be careful not to go too far, or the gun will activate. Shoot the red triangle...
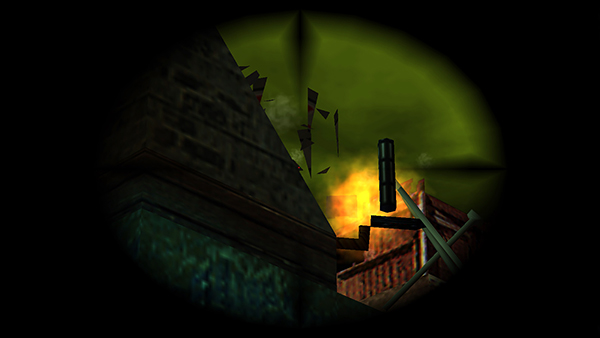
...to destroy this gun. Now the street is safe.
Copyright © 1999- - Stellalune ( ). All rights reserved. Feel free to copy or print this walkthrough for personal use. By all means, share it with friends, but please include this credit line so people can send me their feedback. No part of this walkthrough may be reproduced on another site without permission. Follow this link for details about this site's advertising and privacy policy.