Rise of the Tomb Raider - Soviet Installation Challenges (Part 2)
Updated: 4/24/16(†)
There are 4 challenges in the Soviet Installation. This guide, along with the annotated level maps linked below, should help you find any challenge items you missed. If you are playing this level for the first time, you may want to follow the main walkthrough instead.
To check your progress on any challenge, open the map screen in game. Then press Y on the controller or click the Missions/Challenges button at the bottom of the map screen. This sub-menu shows active and completed missions and challenges, and lets you toggle between them if you have more than one active at a time.
DIFFERENCE OF OPINION
In order to beat this challenge, you must find and destroy 7 cosmonaut posters scattered around the Copper Mill section of the Soviet Installation. They are marked with pink dots on the annotated level map.
All the posters can be destroyed using molotov cocktails once you learn how to craft them; however, this requires a lot of backtracking with bottles. You may want to wait to complete the challenge until you've unlocked FIRE ARROWS. Then return to this area and destroy all the posters in one go.
POSTER 1
The first poster is in the building on the left when facing the yellow ladder as you first start to climb up into the mill. The doorway has a rope barrier when you first see it. Check the walkthrough for details. (Click screenshot to enlarge.)
POSTER 2
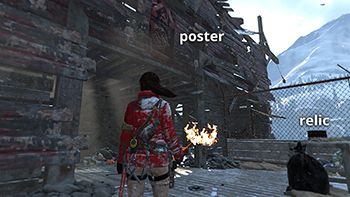
The second poster is in the area where you first learn to make molotov cocktails. It's behind a flammable barrier on the northeast side of the open area, in the same room where you find relic #13. Check the map and walkthrough if necessary. (Click screenshot to enlarge.)
POSTER 3
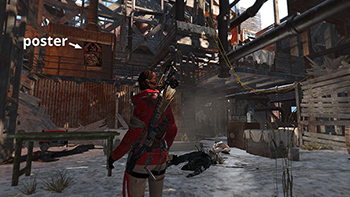
In the next building to the northwest (just in front of Lara in the screenshot for poster #2), go into the little fenced-in area at the back. Turn around to face the doorway and you'll see the poster hanging above it. Relic #16 is sitting on a table here, which should help you find this area on the map and in the walkthrough. (Click screenshot to enlarge.)
POSTER 4
The next poster is on the ledge with strongbox #9 in the barnlike building southeast of the one with the previous flags. Slide down the chute from that building and jump onto the ledge with the strongbox and flag, as described in the walkthrough. (Click screenshot to enlarge.)
POSTER 5
This poster is on the outer wall of the building on the northeast side of the mill, near relic #18. Unless you've unlocked fire arrows, you'll need to carry a bottle up from below to destroy the flammable barrier so you can get into this side area. Once you've done so, there are more bottles nearby to burn this flag and the next one. Check the walkthrough and map for details. (Click screenshot to enlarge.)
POSTER 6
The next poster is just around the corner from the 5th one. Go up the stairs and turn around and you'll spot it hanging high on the wall. (Click screenshot to enlarge.)
POSTER 7
The last poster is in the room in the northwest corner of the mill, where you squeeze through a small opening and fight 3 enemies before setting the building on fire. After you defeat these guys, use a molotov to burn the poster. If you return here later, there will be no more bottles. So if you miss this poster the first time, don't bother coming back until you've unlocked FIRE ARROWS. Check the map and walkthrough for details. (Click screenshot to enlarge.)
CAPTURE THE FLAG
This challenge requires you to cut down 7 Soviet flags scattered around the Logging Camp and Copper Mill areas of the Soviet Installation. They are marked with orange dots on the annotated level map. The Logging Camp Second Visit walkthrough also includes a section on this challenge. You won't be able to undertake this challenge until you've completed the Abandoned Mines level and unlocked the COMBAT KNIFE.
FLAG 1
One of the flags is planted on the deck of the Supply Shack, near the Communications Tower Base Camp. (Click screenshot to enlarge.)
FLAG 2
The next flag is just down the mountain from the Communications Tower Base Camp, on one of the flat ledges below the monolith. Follow the wooden stairs down. (Click screenshot to enlarge.)
FLAG 3
The next flag is on top of the rusty water tower north of the sawmill. You can reach it by climbing down from the Communications Tower Base Camp or by traveling to the Sheltered Ridge or Logging Camp Base Camp and then following the frozen streambed west or northeast, respectively. (Click screenshot to enlarge.)
FLAG 4
There's also a flag at the southeast corner of the sawmill building on the upper level. (Click screenshot to enlarge.)
FLAG 5
The next flag is just south of the Logging Camp Base Camp, near the chain-link fence at the edge of the cliff overlooking the river. (Click screenshot to enlarge.)
FLAG 6
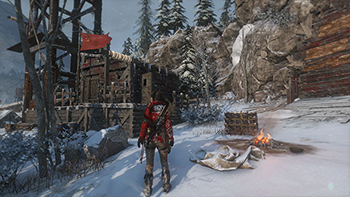
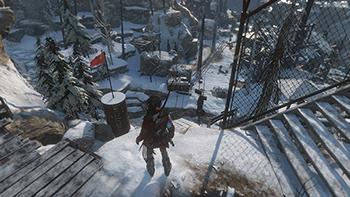
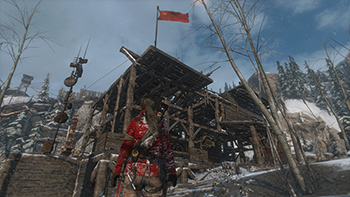
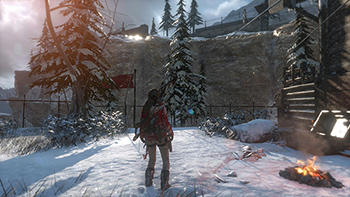
This flag is about halfway betwen the Logging Camp and the Copper Mill Yard Base Camp, next to the wooden guard tower and the cave with strongbox #7. If you're coming from the Logging Camp it's on the left of the tower, as shown here. If you're coming from the Copper Mill, it's on the right, as in this screenshot. (Click screenshot to enlarge.)
FLAG 7
This flag is standing next to the Copper Mill Yard Base Camp. If it's the only one you need, it obviously makes sense to fast travel to this camp. (Click screenshot to enlarge.)
Top of Page | Challenges Part 1 | Collectible Guides | Main ROTTR Page
†UPDATE HISTORY: 4/24/16 - Page first posted online.
WAS THIS WALKTHROUGH HELPFUL? If not, I apologize and invite you to contact me with any questions. If you need help right away, I recommend the r/TombRaider subreddit. Other fan-run forums are listed at tombraiders.net/stella/community.html. If this site was useful, please consider supporting it financially or in other ways. For details, visit tombraiders.net/stella/support.html. As always, I welcome your corrections/suggestions. Thank you!
Copyright © 2015 - Stellalune (). All rights reserved. Feel free to copy or print this walkthrough for personal use. By all means, share it with friends, but please include this credit line so people can send me their feedback. No part of this walkthrough may be reproduced on another site without permission. Follow this link for details about this site's advertising and privacy policy.
Stella's Tomb Raider Site: tombraiders.net.


