City of Khamoon - Shortcut
This shortcut enables you to skip most of the level. It's great for speed runs, but you do miss a number of kills and pickups, including all three secrets. So use it at your discretion.

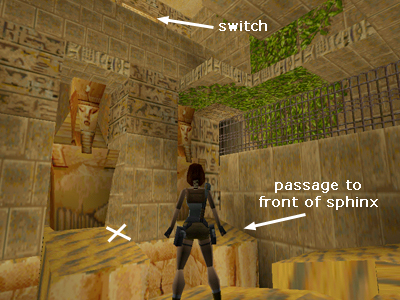
The AREA BEHIND THE SPHINX (described in the main walkthrough) is also the location of the final switch in the level—the one that dumps sand into the room with the SECOND SAPPHIRE KEY. This switch is high above the statues and ledges and can't be reached from below. . . unless you cheat. Climb onto the second ledge from the tunnel entrance to the spot marked with an X in the screenshot above.

Turn to face the wall near the entrance and adjust Lara's position as needed. Use the corner bug to get to the ledge above.
NOTE: If you need help using the corner bug, check out the page about it in the Palace Midas walkthrough and/or my useful bugs page. Both include instructions and screenshots.)

After using the bug, Lara ends up here. Turn around and throw the switch to dump sand into the next room. Then jump over to the ledge with the magnum clips. (If you're doing a speed run, skip the clips and jump to the next ledge to the right.) From there, make your way across the small high ledges to the other end of the room.

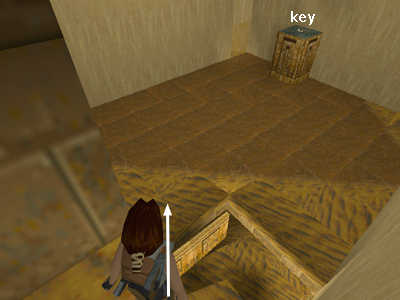
Approach the opening above the SAPPHIRE KEY ROOM cautiously. It's a long way down. Jump diagonally to the left to clear the opening. Get the key off the pedestal and then return to the opening below the doorway.

Run off the edge into doorway below (as indicated in the screenshot above). Enter the room ahead and use the key to open the level exit.
Walkthrough text and diagrams copyright © 1998- Stellalune (email ). All TR1 screenshots were made using Glidos and Fraps. Feel free to copy or print this walkthrough for personal use. By all means, share it with friends, but please include this credit line so people can send me their feedback. No part of this walkthrough may be reproduced on another site without permission. Follow this link for details about this site's advertising and privacy policy.