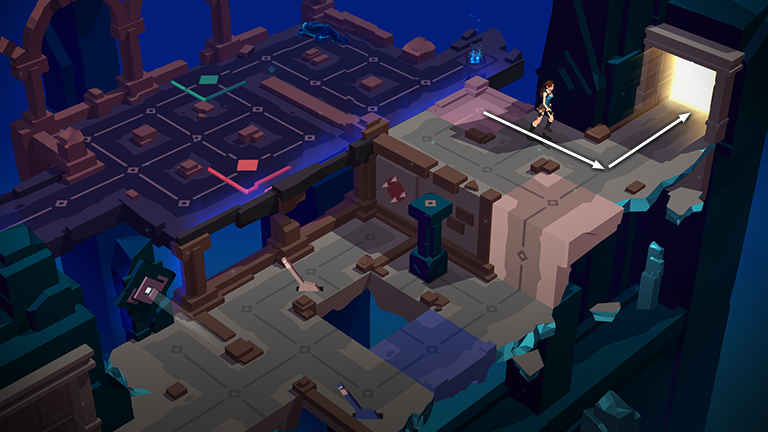
STELLA'S LARA CROFT GO WALKTHROUGH - Android, iOS, PS4 and Vita, Steam, and Windows Phone/PC/Tablet
THE MIRROR OF SPIRITS - PART 11: THE VOID
Updated: 4/1/17(†)
Relic Fragments: 1
Gems 1
Follow this link for my video walkthrough.
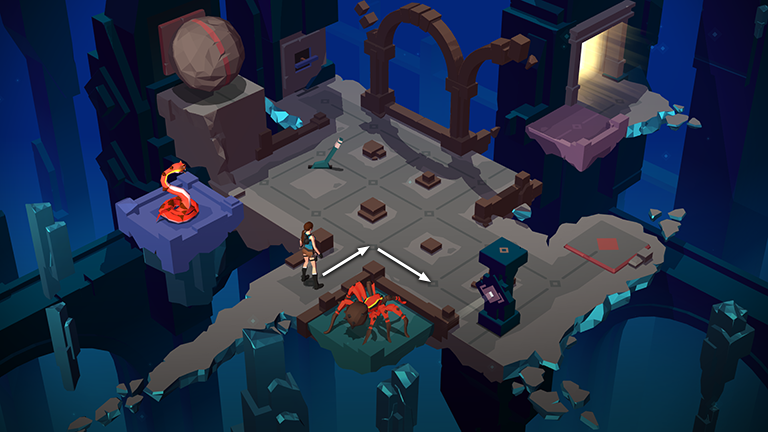
Step forward, then to the lower right.
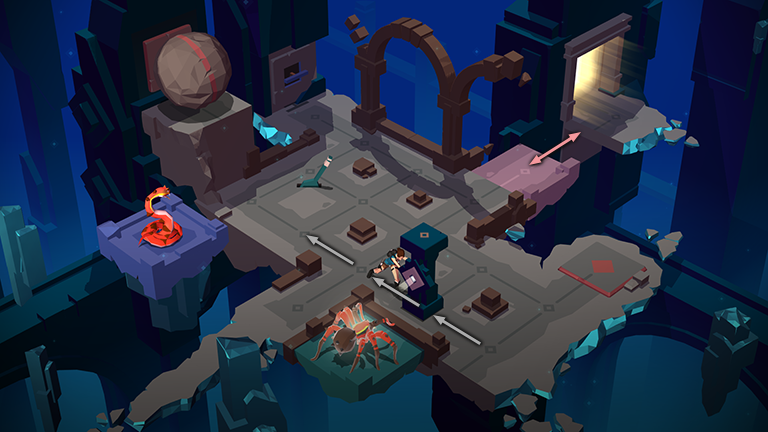
Grab the movable pillar with the beam of light emanating from it and drag the pillar to the left three times. Notice that as the beam strikes the spider, the pink block slides away from the exit toward the lower right. Then, when the beam moves on, the pink block slides back to its original position.
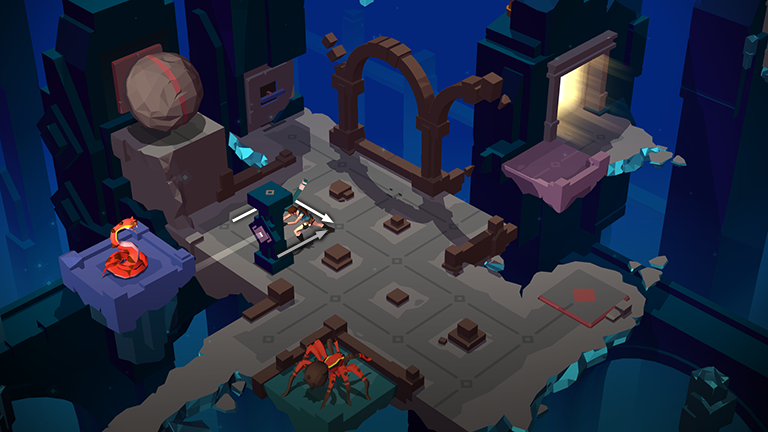
Move around to the upper right side of the pillar and pull it once.
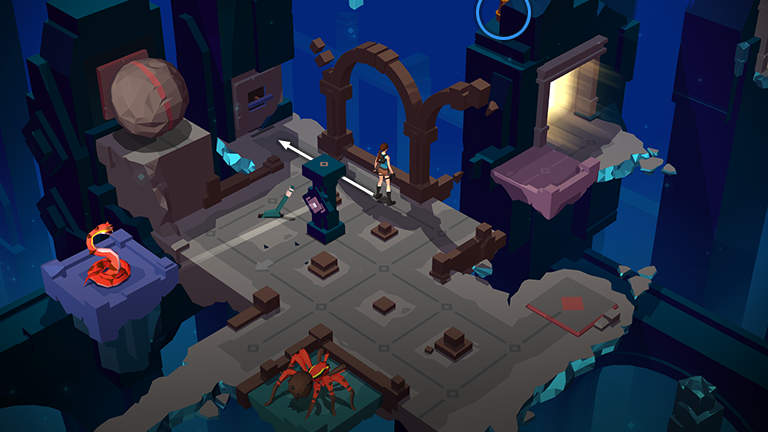
Smash the vase above and behind the exit to get the final CRYSTAL (14/14). Then move to the switch in the upper left corner.
NOTE: If you've found all the gems in all previous levels, you will now unlock the MIDAS LARA OUTFIT. To change outfits, return to the main menu. Rotate the menu items until the watch (labeled "Outfits") is visible. Select it to examine and equip any outfits you've purchased or unlocked. If you missed any gems, you can replay any previously completed level by selecting it from the journals in the main menu ring.
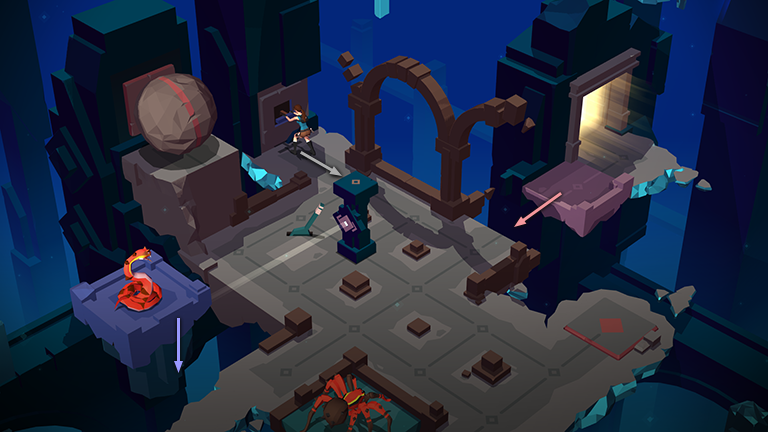
Pull the switch to lower the purple block with the snake sitting on it. The beam of light from the pillar then strikes the snake, moving the pink block away from the exit. As with the other timed switches you've encountered, this one takes 6 turns to retract.
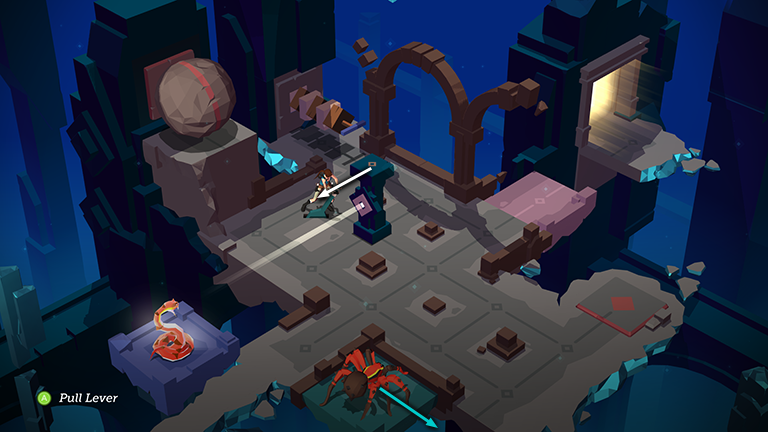
Step to the lower left and pull the teal lever to slide the teal block, with the spider sitting on top, to the right.
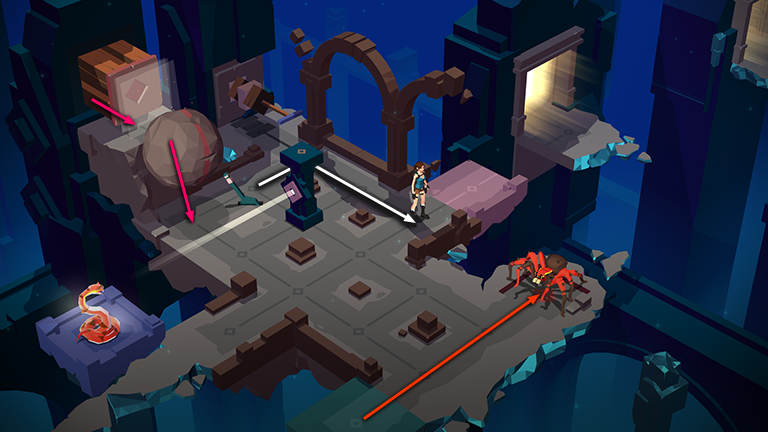
Move back to the upper right, then twice to the lower right. As you do this, the spider steps off the teal block and moves onto the pink pressure pad, activating the pink block trap on the upper left side of the room and pushing the boulder off the ledge.
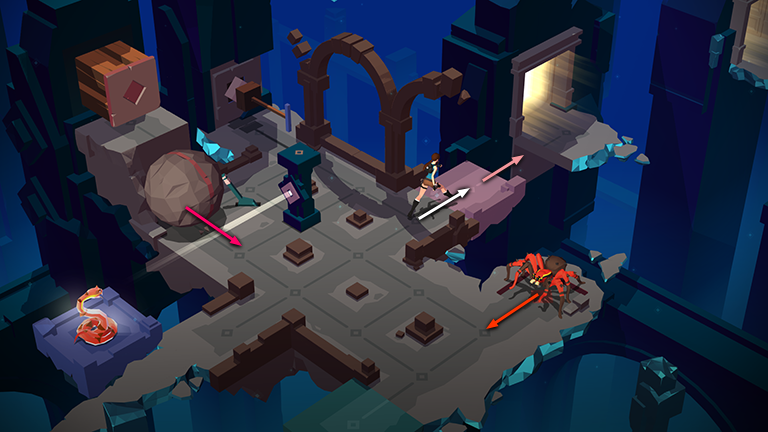
Step onto the pink block. The boulder also rolls forward one space, blocking the beam of light so it no longer touches the snake. This causes the pink block to slide back toward the exit, with Lara riding along. The spider also moves off the pressure pad, but this has no effect since the block trap has already been activated.
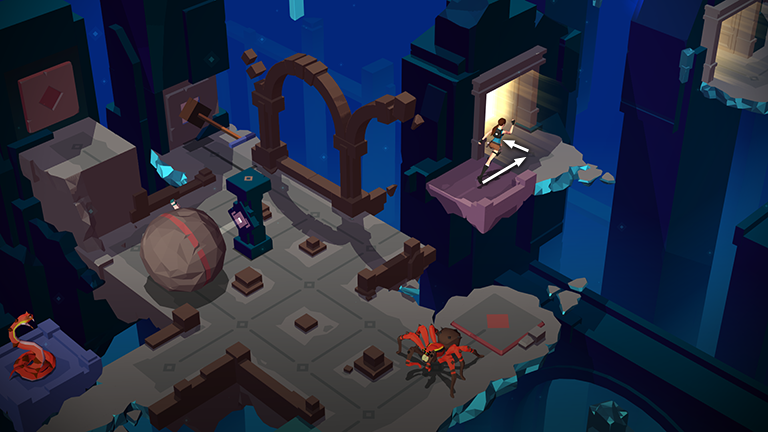
Step off the pink block and exit here.
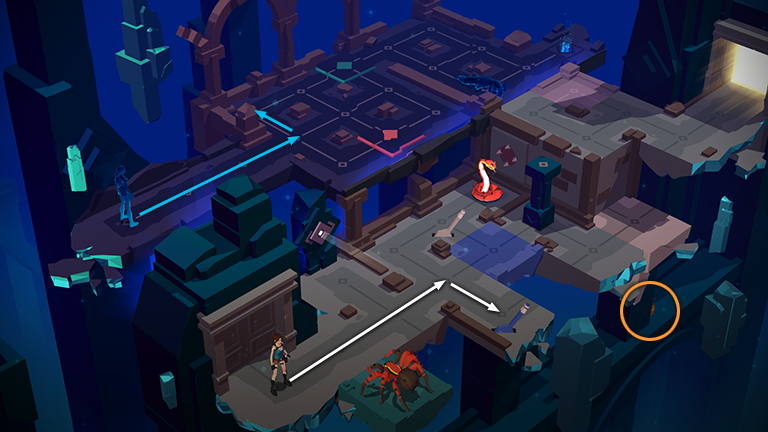
In the next area, move three times to the upper right, then once to the lower right. Break the vase on the ledge below to get the final piece of the EYE OF THE ABYSS (10/10). Meanwhile, on the upper level, Spirit Lara moves forward then left.
NOTE: If you've found all 10 pieces of this relic, you'll unlock the SPIRIT LARA OUTFIT. See the note above about changing outfits. If you've just completed all the relics in the game, you'll unlock the Curator achievement/trophy. If you've found all the gems as well, you'll get the Preservation Society achievement/trophy for smashing all the vases in the game.
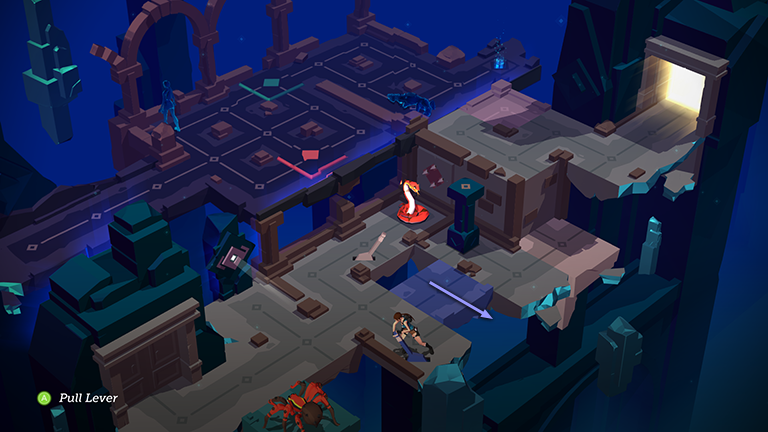
Use the purple lever to shift the purple block to the right.
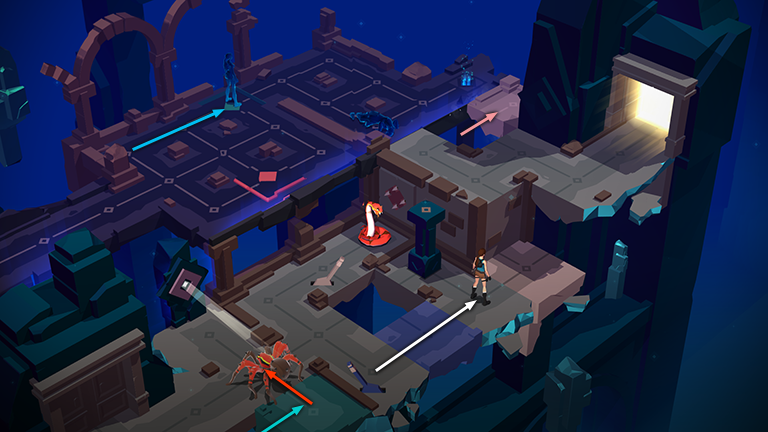
Step onto the purple block, then once more to the upper right. As you do this, a lot happens: Spirit Lara moves onto the teal pressure pad, causing the teal block to slide to the right. The spider sitting on the teal block moves into the beam of light, which causes the pink block between the two exits to slide back. The spider also steps off the teal block but remains within the beam of light.
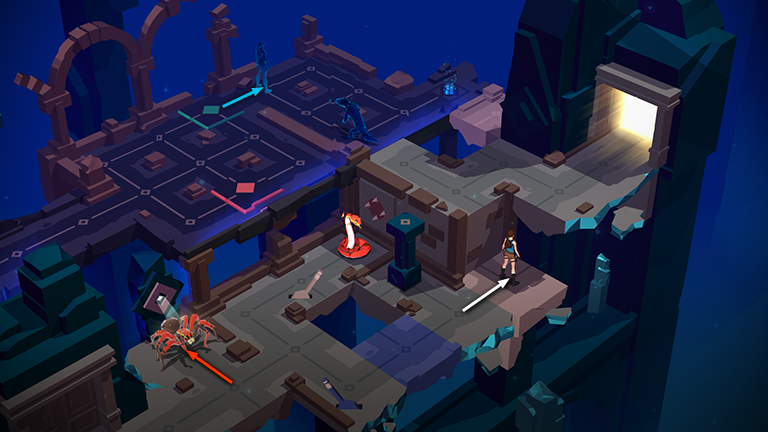
Move forward once more, onto the tan block. Spirit Lara also moves forward, stepping off the teal pressure pad and attracting the attention of the spirit lizard sitting off to her right. The spider moves toward the wall but remains within the beam of light.
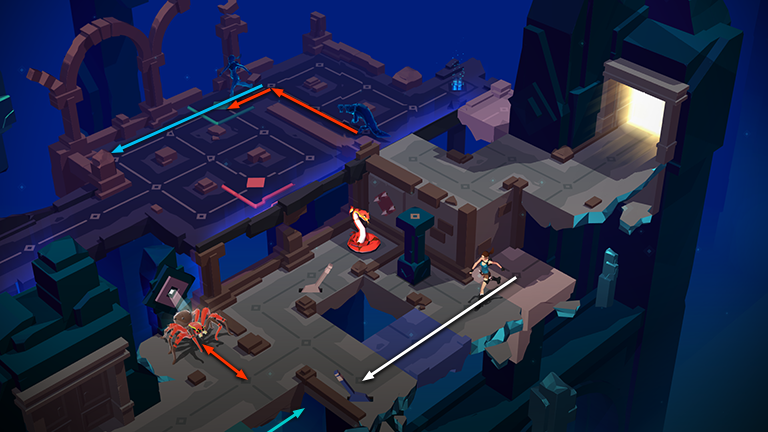
Move back three spaces to the lower left. Spirit Lara mirrors your movements. The spirit lizard follows two spaces behind her, ending up on the teal pressure pad, which causes the teal block to slide to the right. The spider, meanwhile, moves back and forth within the beam of light.
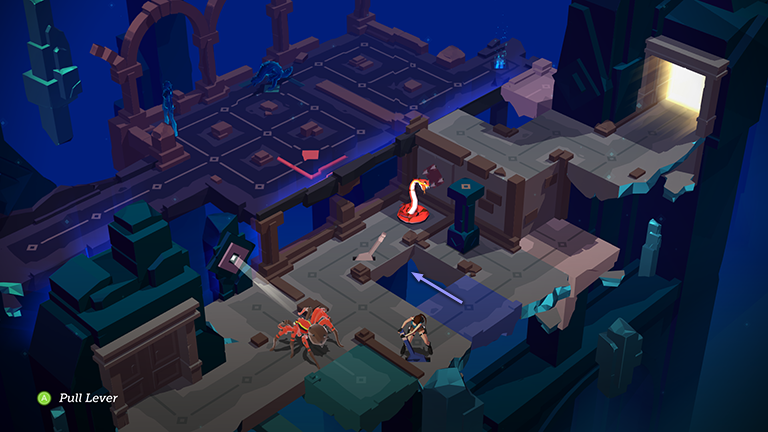
Use the purple lever to move the purple block back to the left.
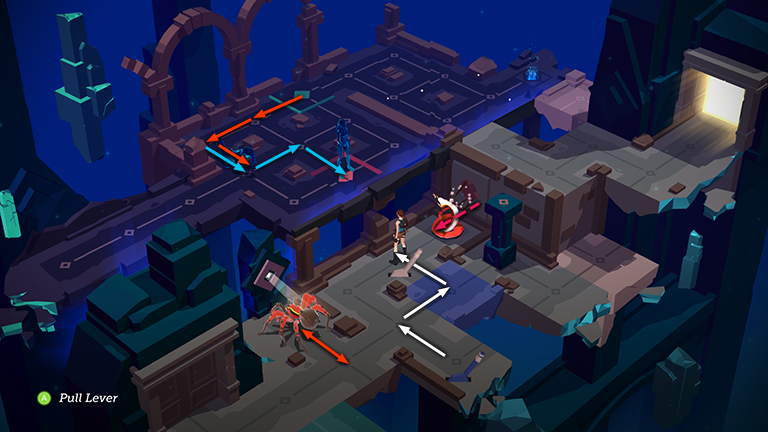
Now move to the upper left, upper right (onto the purple block), then upper left again. As you go, Spirit Lara moves onto the pink pressure pad, activating the arrow trap. The snake sitting between Lara and the trap shields her from the arrows and dies doing so. Meanwhile, the spirit lizard continues to follow Spirit Lara, and the spider continues to pace back and forth within the beam of light.
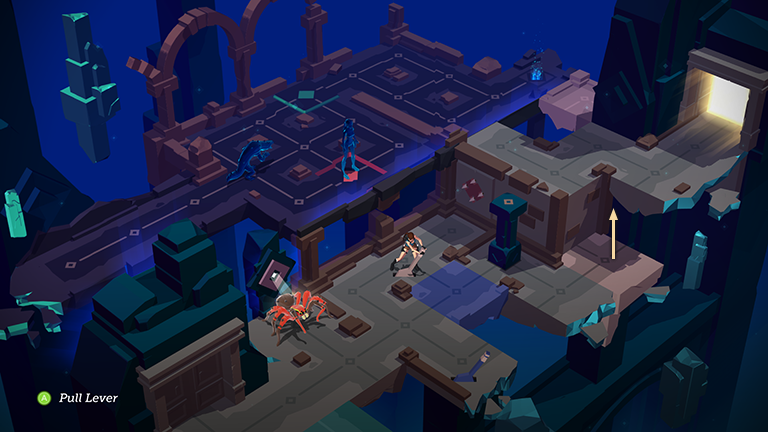
Pull the tan lever to raise the tan block in the right corner.
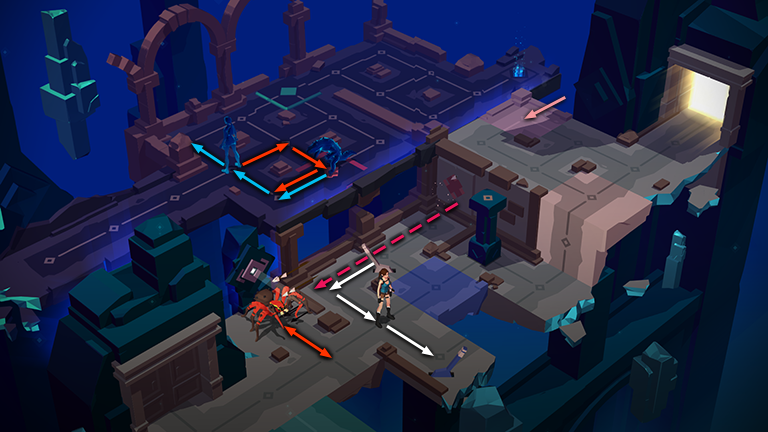
Move to the lower left then twice to the lower right in order to get back to the purple lever. As you do this, Spirit Lara moves off the pink pad and into the left corner. The spirit lizard, still following two spaces behind her, moves onto the pink pad, activating the arrow trap again and killing the spider. When the spider dies, the pink block slides back to its original position.
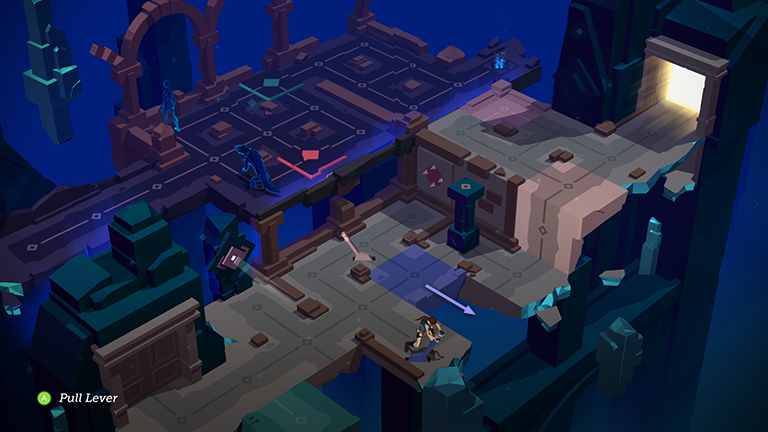
Use the purple lever once again to slide the purple block back to the right.
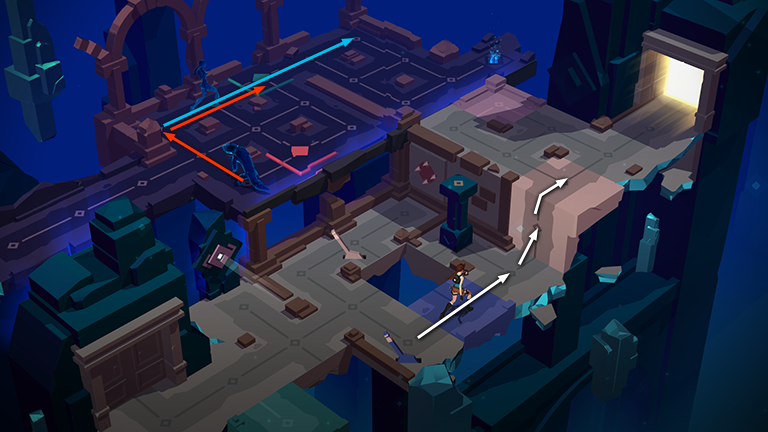
Cross over the purple block and climb up onto the tan block. Meanwhile, Spirit Lara moves forward into the upper corner, and the spirit lizard follows two spaces behind her, ending up on the teal pressure pad. (The teal block moves back and forth when the pad is pressed and released, but this is no longer important now that the spider is dead.)
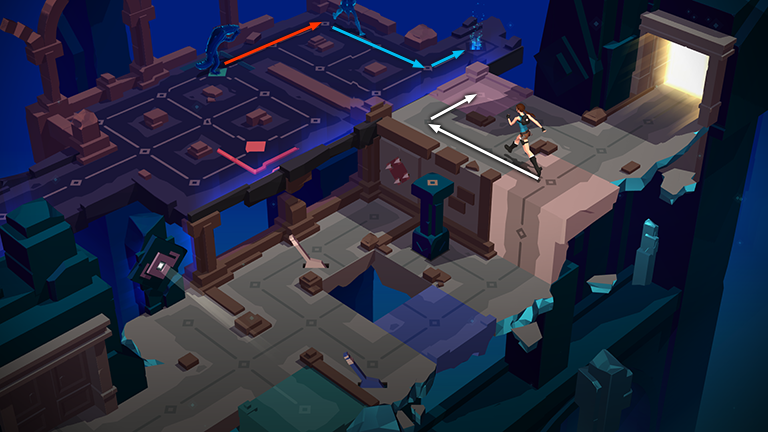
Since Spirit Lara can't move forward, you can't head directly for your exit. Instead, move around to the left, and onto the pink block. This allows Spirit Lara to reach her exit. Once she's gone, the spirit lizard settles down for a nap.
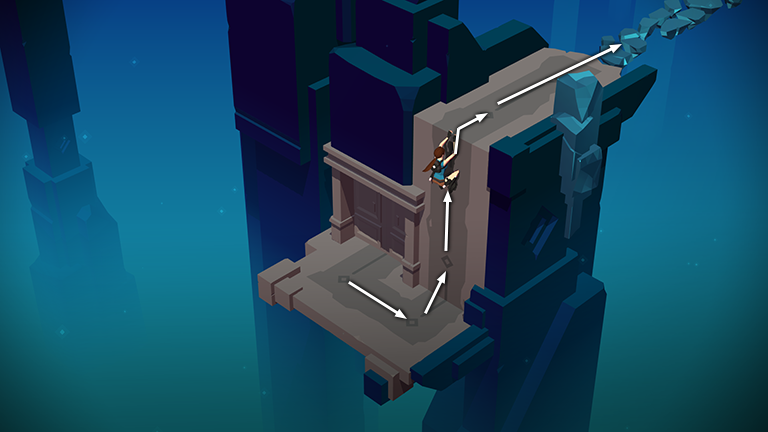
In the next small area, climb onto the ledge and step out onto the floating walkway. Lara runs across automatically.
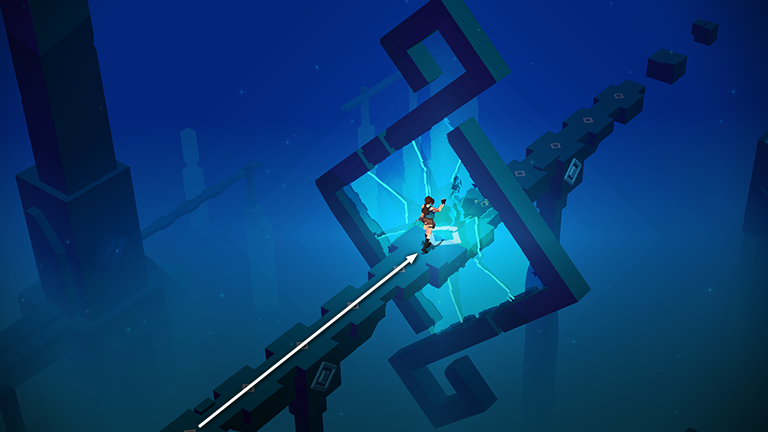
Approach the mirror to change places with Spirit Lara and once more return to the "real" world.
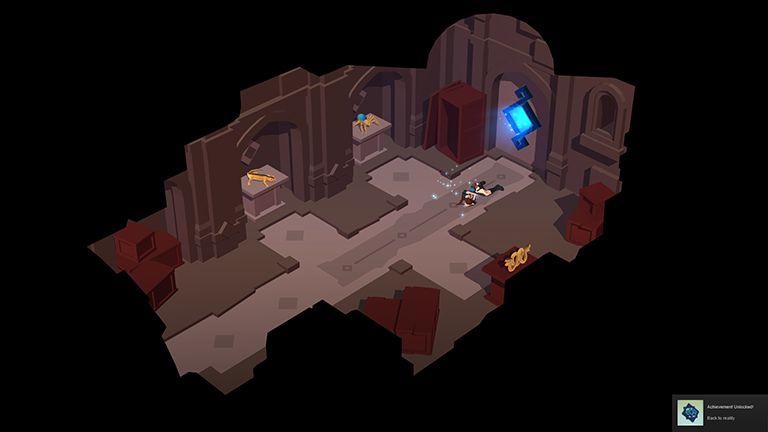
When Lara wakes up in Croft Manor, you'll automatically unlock the Back to Reality achievement/trophy. Lara examines the mirror, which is now hanging on the wall where she originally put it. The MIRROR OF SPIRITS is then added to your inventory, and Lara walks away.
- THE END -
†UPDATE HISTORY: 4/1/17 - Walkthrough first posted.
WAS THIS WALKTHROUGH HELPFUL? If not, I apologize and invite you to contact me with any questions. If you need help right away, I recommend the r/TombRaider subreddit. Other fan-run forums are listed at tombraiders.net/stella/community.html. If this site was useful, please consider supporting it financially or in other ways. For details, visit tombraiders.net/stella/support.html. As always, I welcome your corrections/suggestions. Thank you!
Copyright © - Stellalune ( ). Screenshots for the Shard of Life expansion levels were made using the Steam version of Lara Croft GO. Feel free to copy or print this walkthrough for personal use. Share it with friends if you like, but please include this credit line so people can send me their feedback. No part of this walkthrough may be reproduced on another site without permission. Follow this link for details about this site's advertising and privacy policy.
Stella's Tomb Raider Site: tombraiders.net.
