STELLA'S LARA CROFT GO WALKTHROUGH - Android, iOS, PS4 and Vita, Steam, and Windows Phone/PC/Tablet
THE ESCAPE - PART 1: A CLOSING DOOR
Updated: 9/15/15(†)
Relic Fragments: 1
Gems: 2
Follow this link for my video walkthrough.
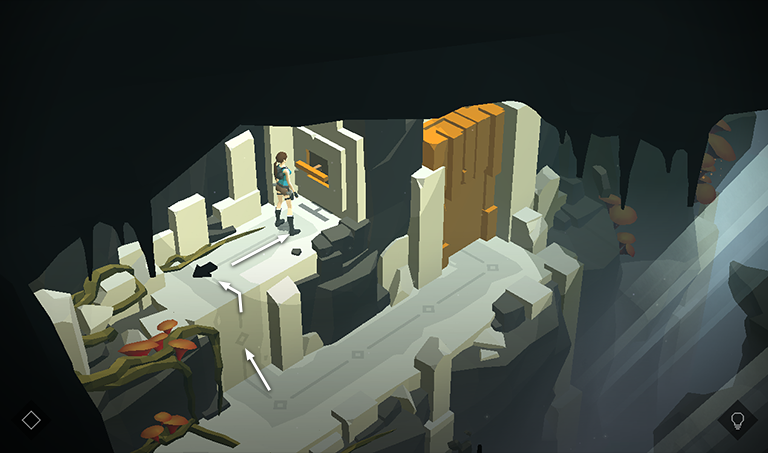
Welcome to the final chapter of the main story. Here we are introduced to another new mechanic inspired by classic Tomb Raider games: the timed door. Naturally this works a little differently in a turn-based setting, but the basic idea is the same. Start by climbing onto the ledge and moving to the right.
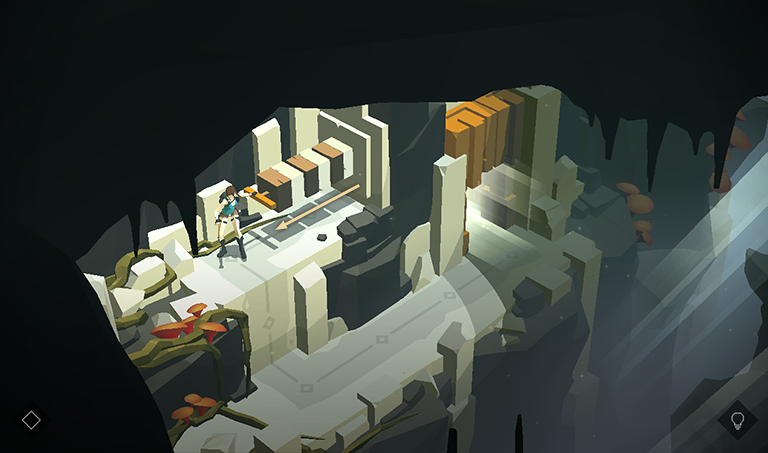
Then pull the switch by tapping/clicking the arrow icon on the floor. (If you're using a controller, hold Y/Triangle and move the left stick to pull the switch.) This opens the door off to the right. As you'll see, as soon as Lara moves again, the switch begins to retract and the door begins to close. You'll have six turns to reach it before it shuts completely. If that happens, you must to return to the switch and pull it again.
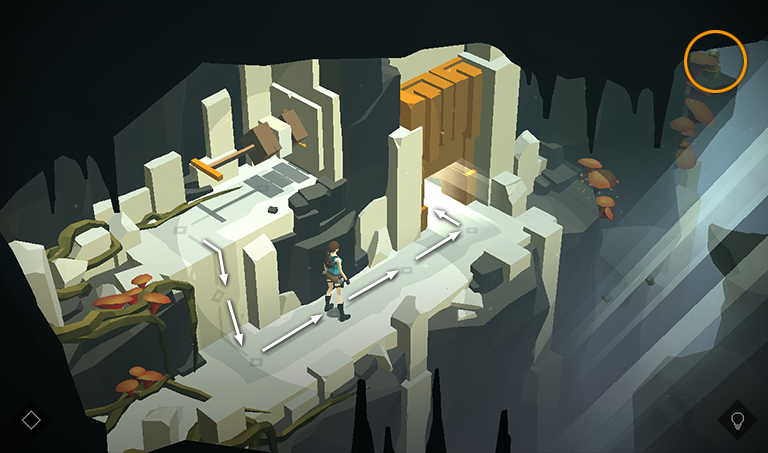
Climb down off the ledge and move toward the timed door. Smash the vase in the upper right corner to collect a fragment of THE NECKLACE OF DREAMS relic (1/3). Then dive through the door before it shuts.
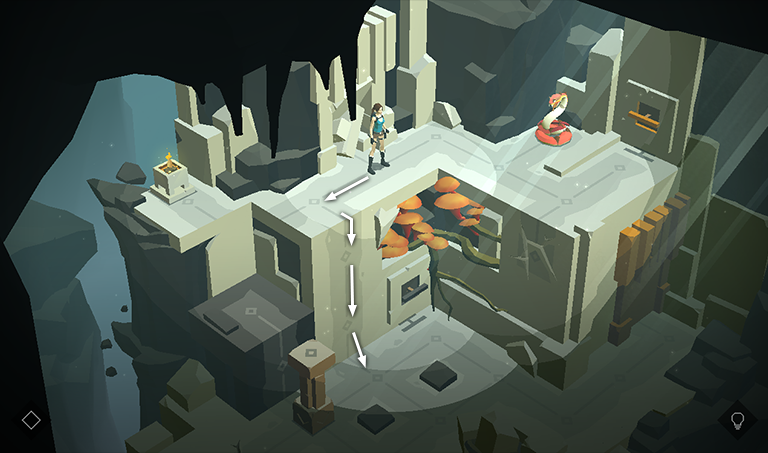
In the next area, step to the left and climb down the wall to the floor below.
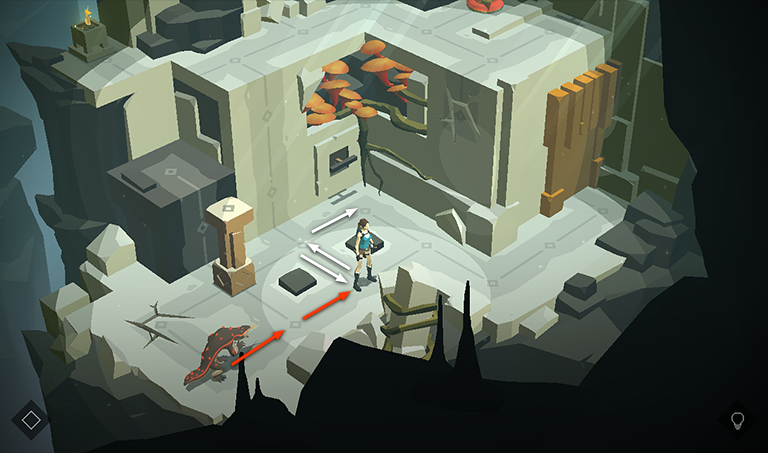
Step forward to get the lizard's attention. Then move back toward the climbable wall and then right to the switch.
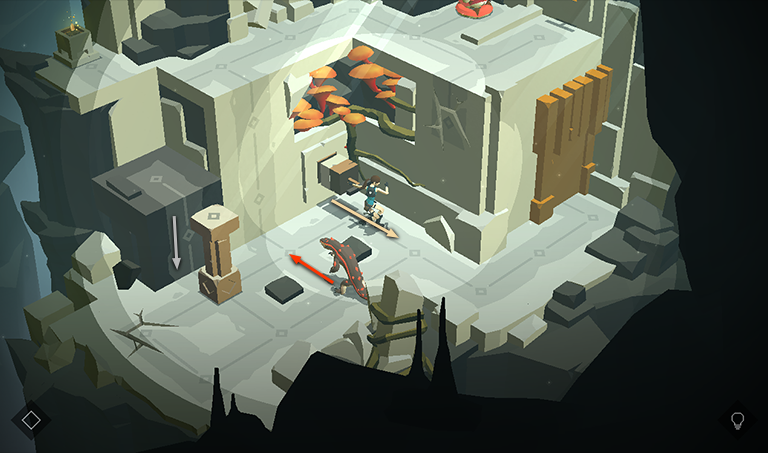
Pull the switch to lower the gray block. As with the timed doors, the block stays down for six turns, until the switch retracts into the wall. Meanwhile, the lizard follows two spaces behind Lara and stops, trapped between the switch and the movable pillar.
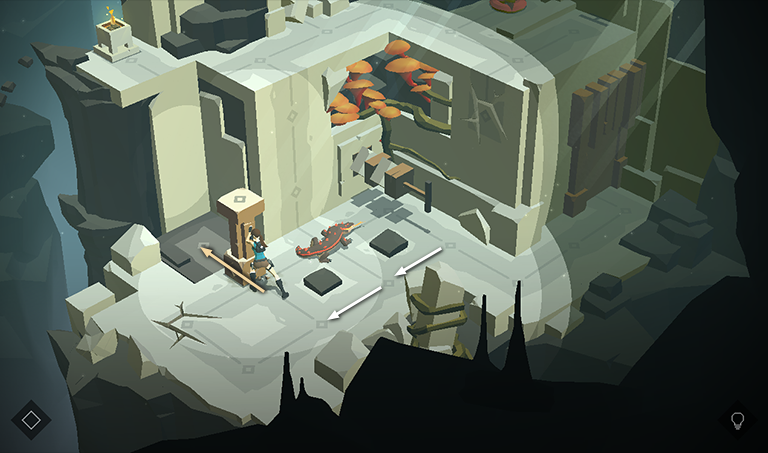
Move twice to the left and push the pillar onto the gray block.
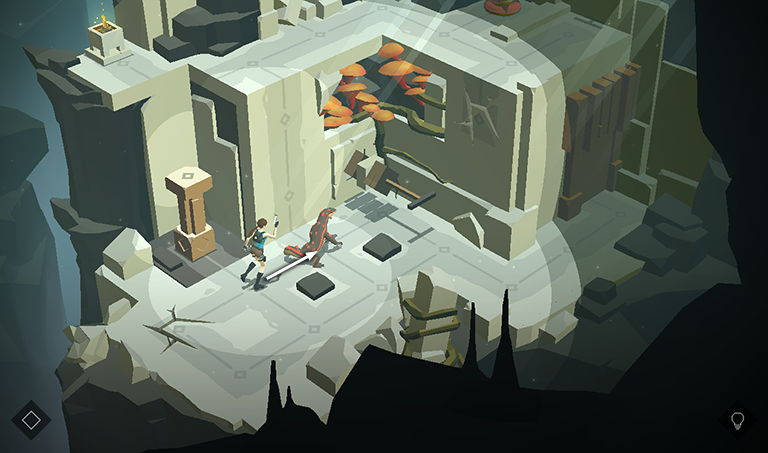
Step to the right to kill the lizard.
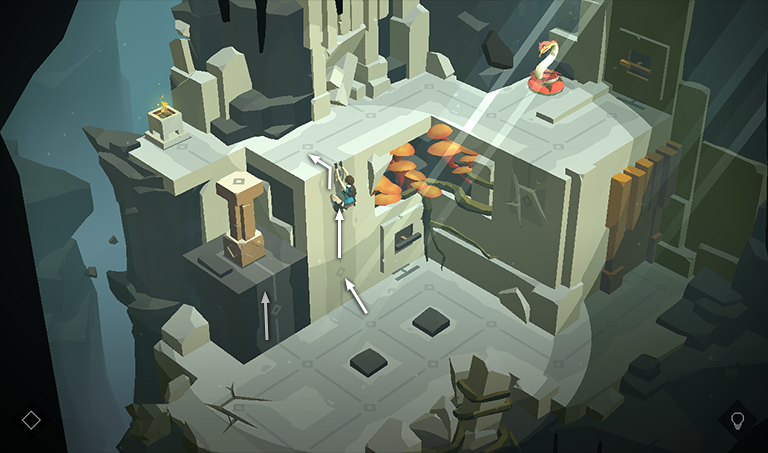
Now climb back onto the upper ledge. As you do this, the switch retracts and the gray block returns to its original position.
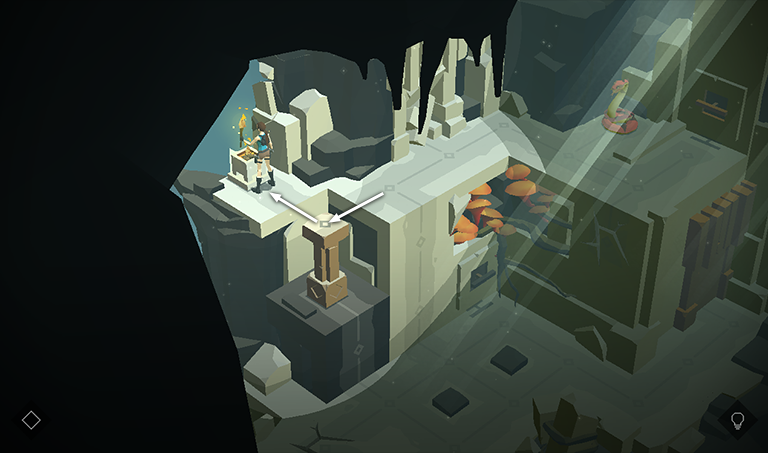
Hop across the pillar to the brazier and light a TORCH.
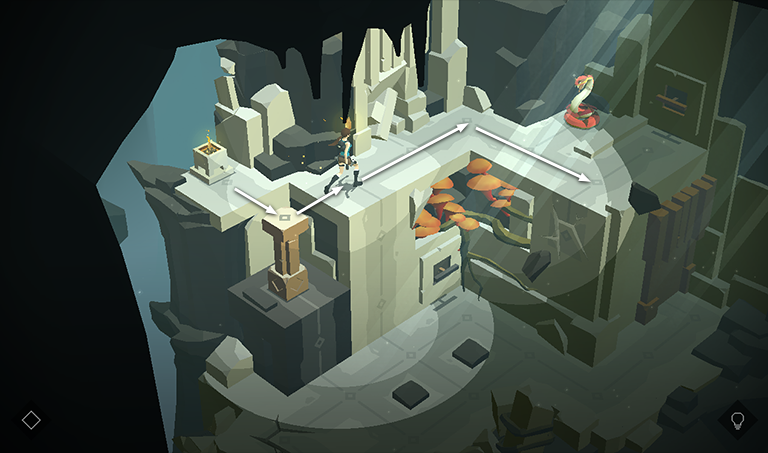
Hop back across the pillar and follow the ledge around to the right. With torch in hand, Lara can pass safely in front of the snake.
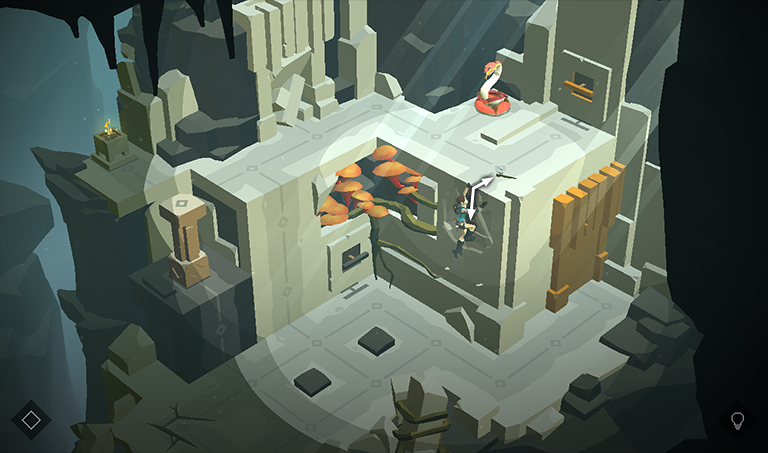
Hang from the ledge in front of the cracked wall. Then pull up. Lara drops the torch in the process, but that's OK; you don't need it anymore.
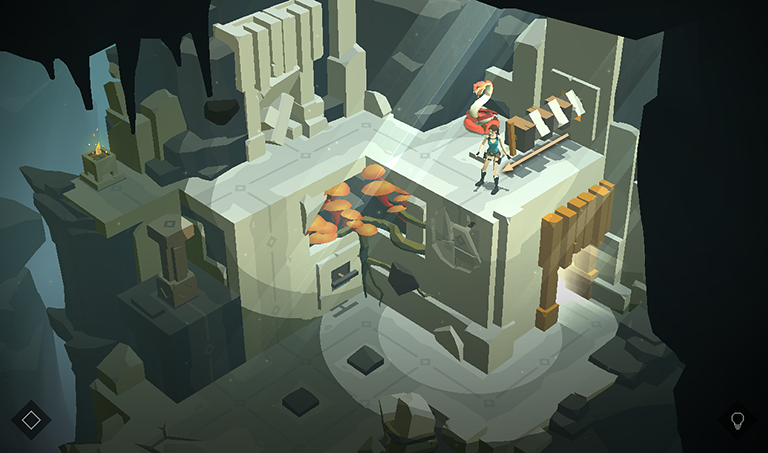
Pull the switch to open the timed door below.
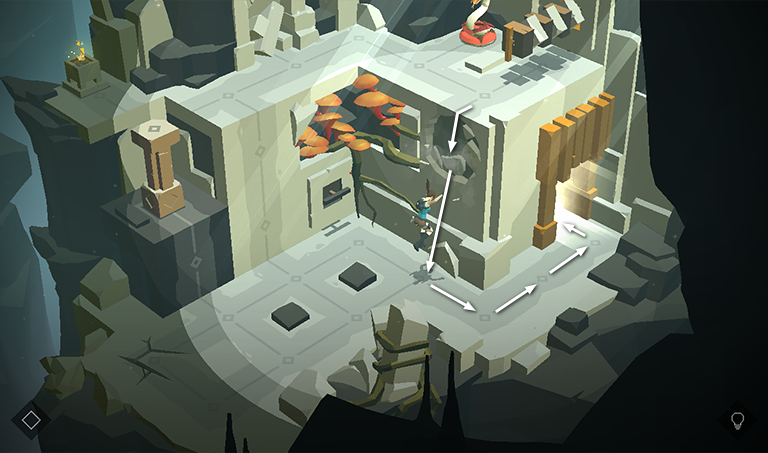
Hang from the edge in front of the cracked wall again. It gives way, dropping Lara to the floor below. Move directly around to the right and you'll be able to make it through the door on the last turn before it closes.
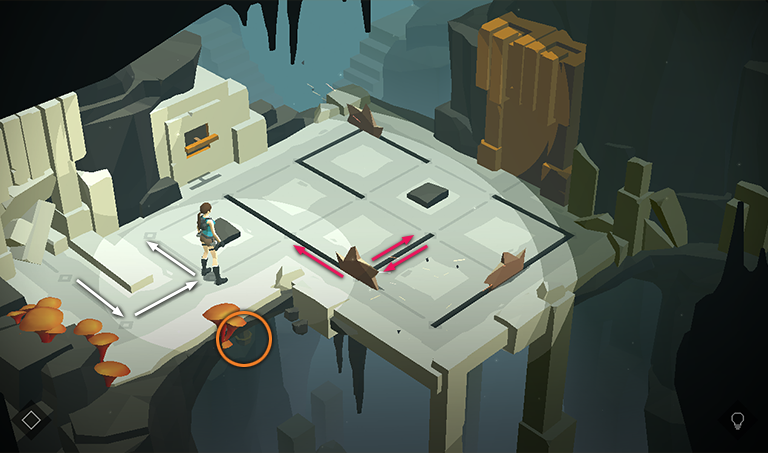
In the next room, there's another switch and a timed door, plus 3 spinning blades set into the floor. Start by moving forward, then to the right. Pause here and smash the vase in the dark area below the ledge to obtain a TOPAZ (1/7). Then move to the upper left, into the space to the left of the switch.
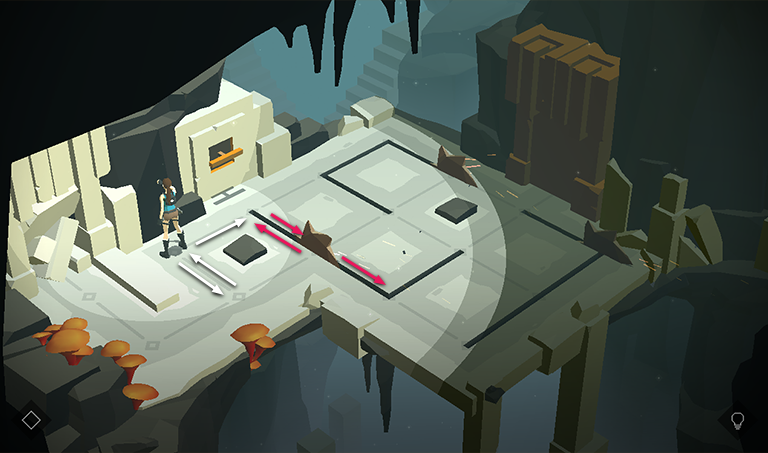
You can't move directly to the switch without running into one of the blades, so step back to the lower right, then to the upper left again, then right toward the switch. This allows the blade several turns to move away.
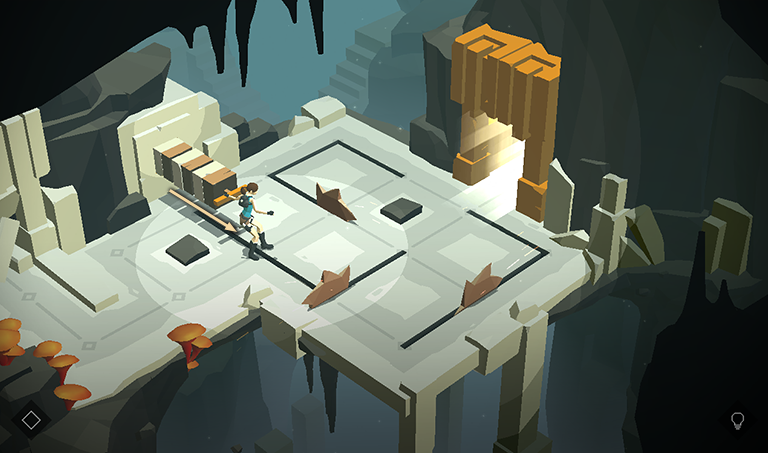
Pull the switch to open the timed door on the right side of the room. You now have six turns to get through it without running into any of the blades in the process.
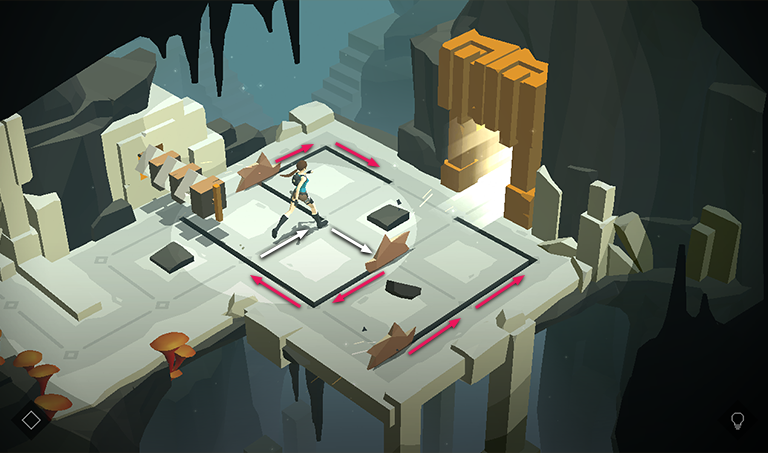
Move to the upper right, then the lower right. Meanwhile, the blades move as indicated in the screenshot above.
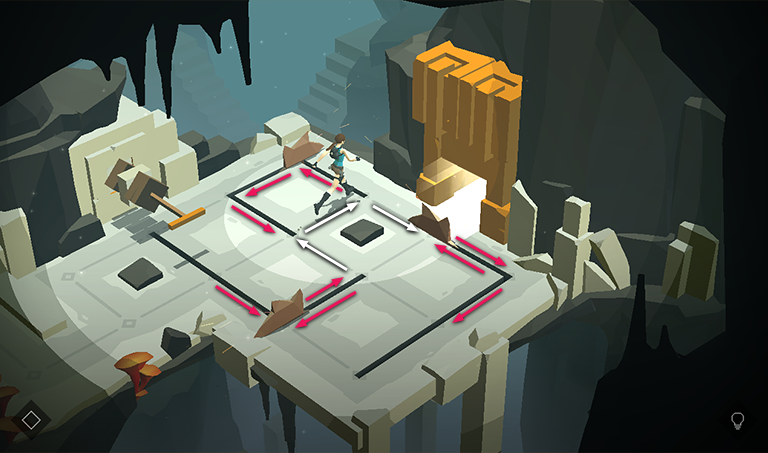
Step back to the left, forward, then right, toward the doorway.
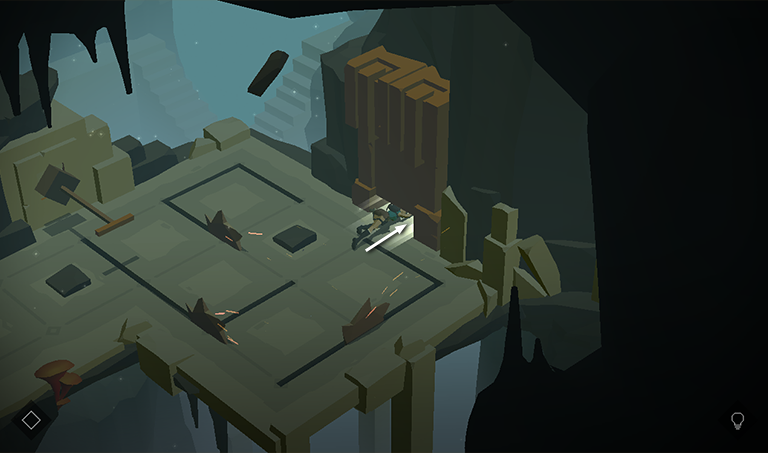
Finally move forward to clear the timed door before it closes.
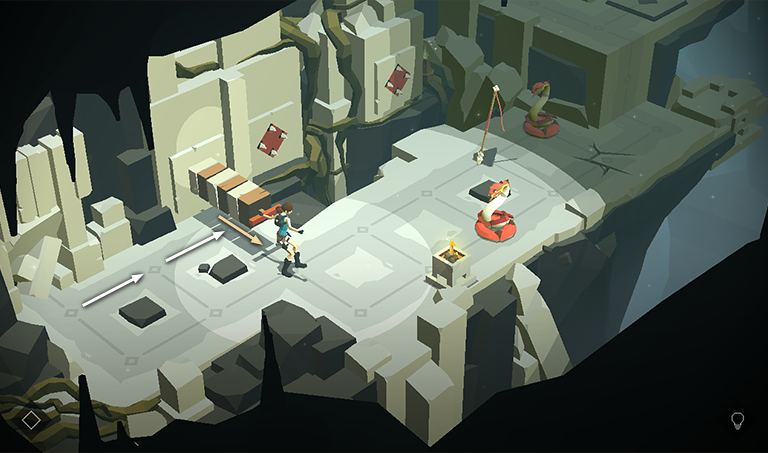
In the next area, move to the right and pull the switch to deactivate the arrow traps. This lasts for six turns. When the switch retracts completely, the arrow traps reactivate.
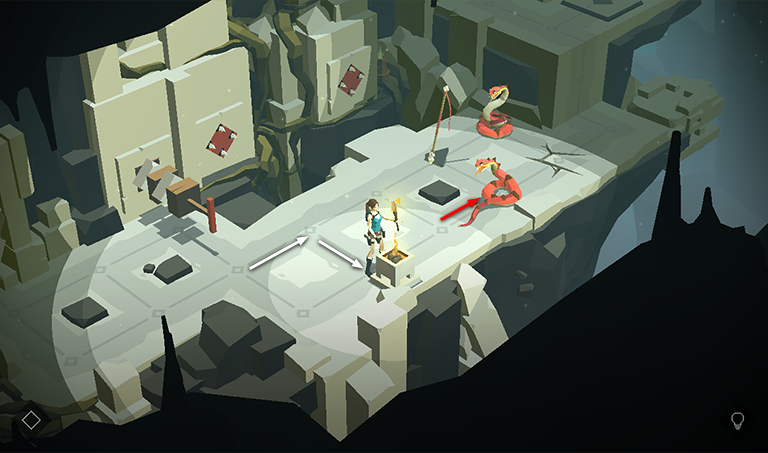
To make the most of those six turns, go to the brazier and light a TORCH. This frightens the nearer of the 2 snakes, causing it to move back one space. Do not chase the snake any farther or it will move onto the cracked floor, and you don't want that.
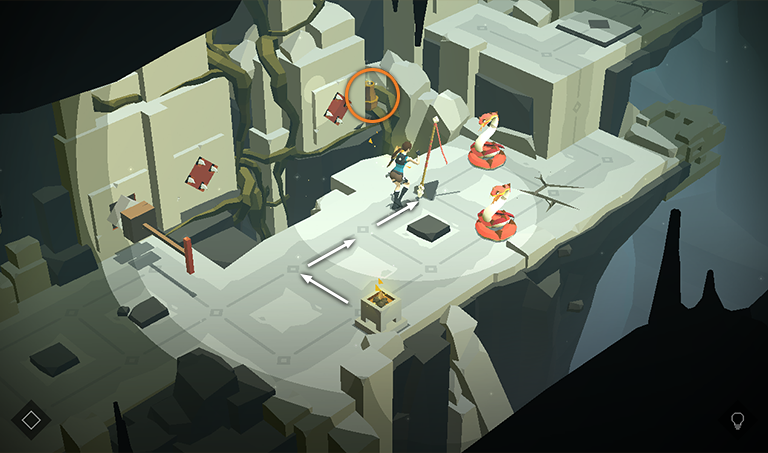
Instead move to the upper left, then twice to the upper right to get the SPEAR. Break the vase sitting beside the arrow trap on the right to get another TOPAZ (2/7).
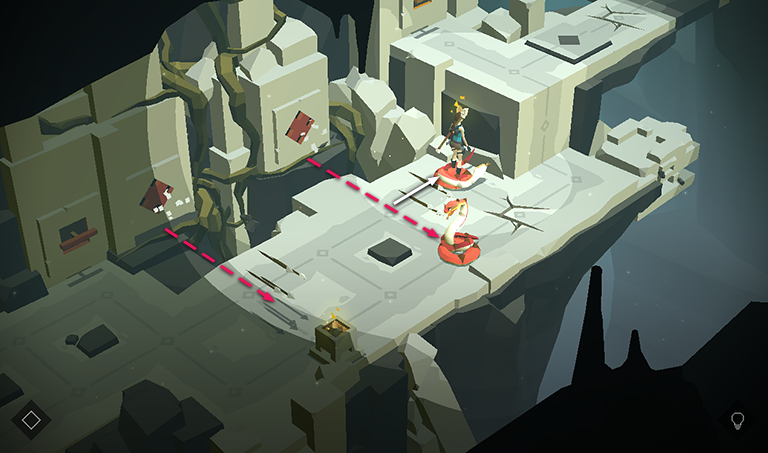
Move forward to shoot the snake in the corner. As you do this, the switch retracts and the arrow traps come back online, puncturing the other snake. The arrows miss Lara, since by now she has moved out of the way.
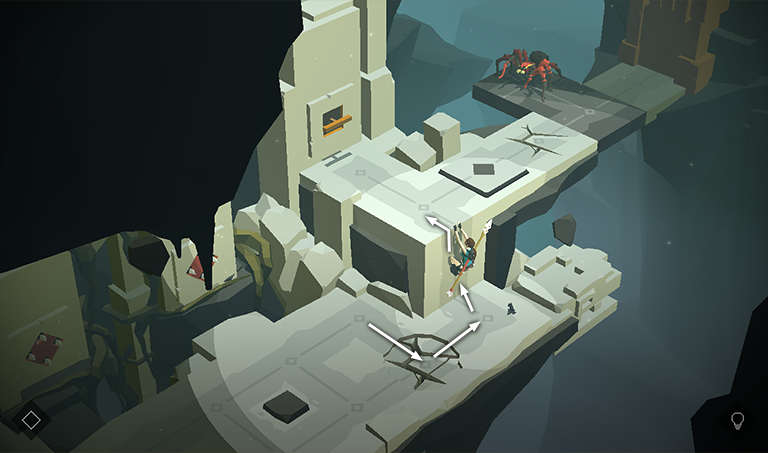
Cross over the cracked floor and climb onto the ledge above.
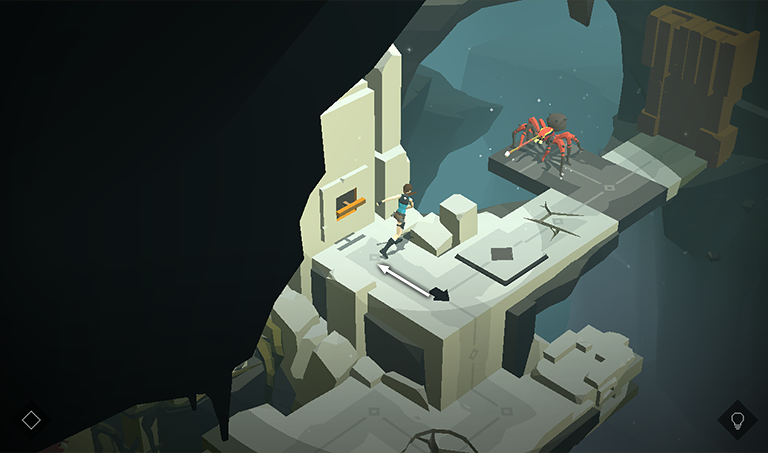
Approach the switch but don't pull it yet. First, use the spear to kill the spider sitting on the gray platform ahead.
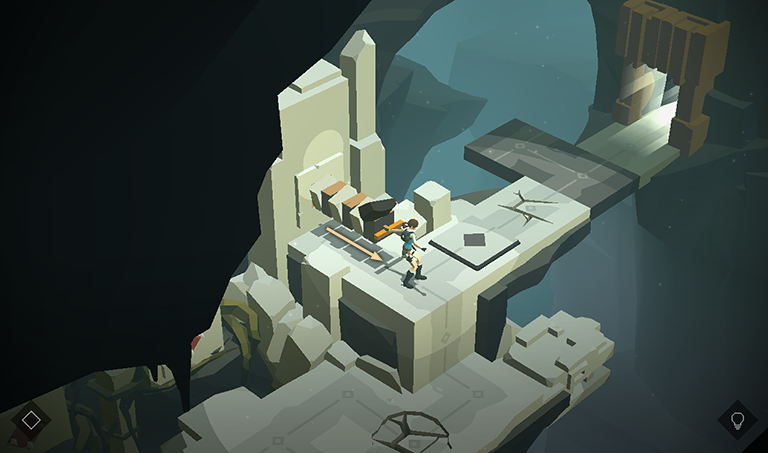
Now pull the switch to open the timed door beyond the gray platform.
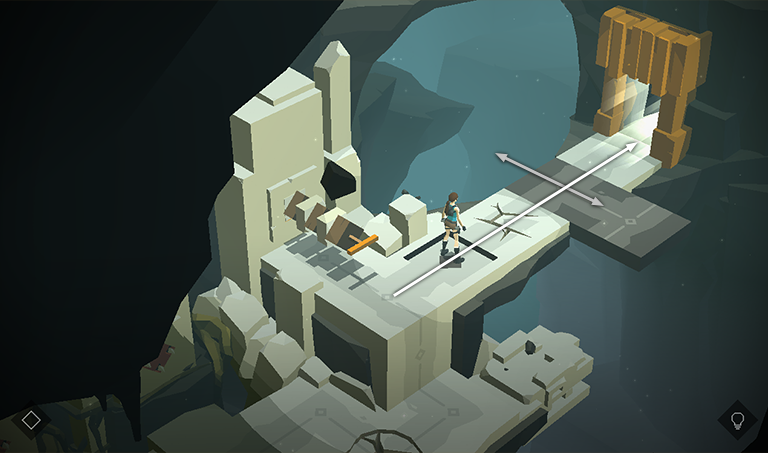
Move forward onto the pressure pad, which shifts the gray platform to the right. You've already taken care of the spider, so this is not a problem. Just continue across the cracked floor and straight on through the doorway.
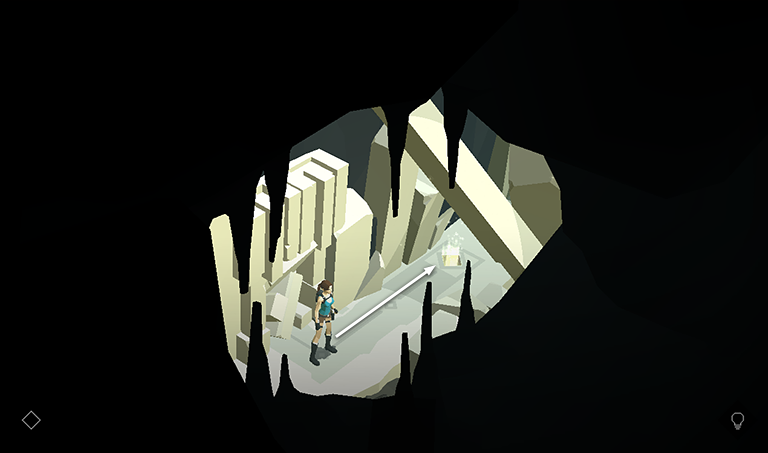
The final area in this level is just a short pathway leading to the exit.
†UPDATE HISTORY: 9/15/15 - Walkthrough first posted, along with video.
WAS THIS WALKTHROUGH HELPFUL? If not, I apologize and invite you to contact me with any questions. If you need help right away, I recommend the r/TombRaider subreddit. Other fan-run forums are listed at tombraiders.net/stella/community.html. If this site was useful, please consider supporting it financially or in other ways. For details, visit tombraiders.net/stella/support.html. As always, I welcome your corrections/suggestions. Thank you!
Copyright © - Stellalune ( ). Screenshots were made using the Andy Android emulator. Feel free to copy or print this walkthrough for personal use. Share it with friends if you like, but please include this credit line so people can send me their feedback. No part of this walkthrough may be reproduced on another site without permission. Follow this link for details about this site's advertising and privacy policy.
Stella's Tomb Raider Site: tombraiders.net.