STELLA'S LARA CROFT GO WALKTHROUGH - Android, iOS, PS4 and Vita, Steam, and Windows Phone/PC/Tablet
MAZE OF SNAKES - PART 10: THE KEY OF STONES
Updated: 9/6/15(†)
Relic Fragments: 1
Gems: 2
Follow this link for my video walkthrough.
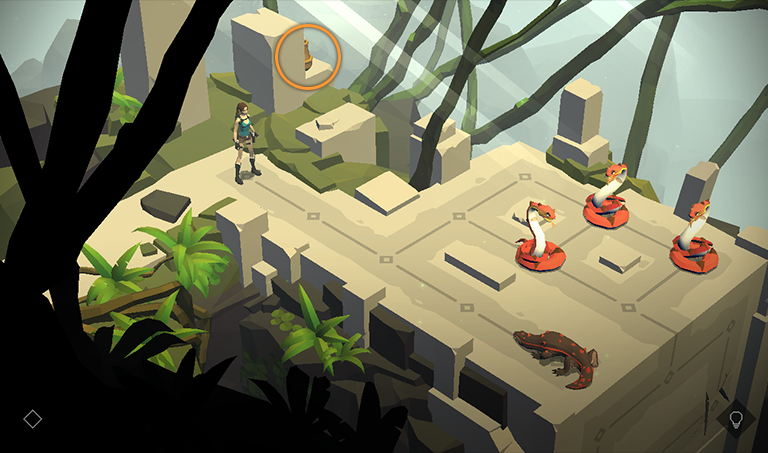
Smash the vase behind the square pillar in the background to recover another fragment of THE TWIN SNAKES relic (10/10). If you've found all 10 pieces of this relic, you'll now unlock the AREA 51 OUTFIT.
To change outfits, tap/click the diamond at the lower left corner of the screen. Then tap/click the back arrow repeatedly to move out into the main menu ring. On a controller, press Start/Options to pause. Then choose the 'Quit' option. Swipe or use the left stick to rotate the menu items until the watch (labeled "Outfits") is visible. Tap/click it to examine and equip any outfits you've purchased or unlocked.
If you missed any relic fragments, you can replay any previously completed level by selecting it from the journals in the main menu ring.
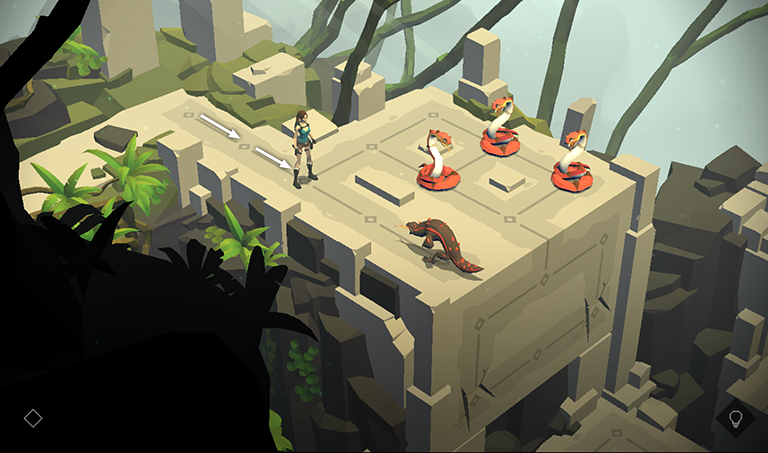
Move forward twice to get the attention of the lizard sitting near the edge of the ledge.
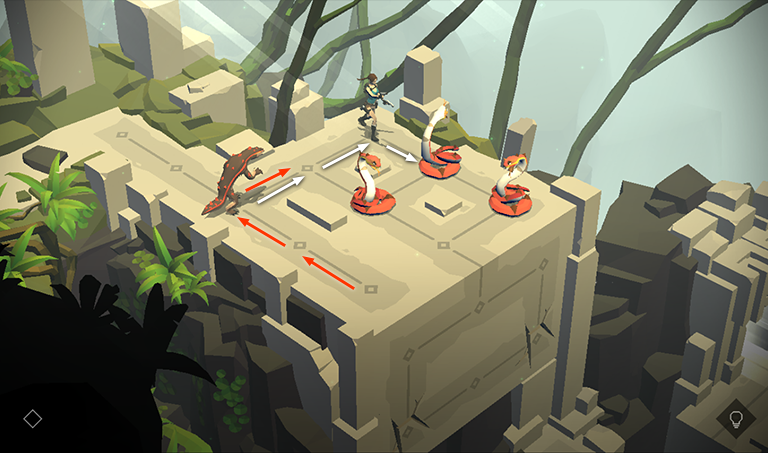
Move twice to the right, into the upper corner of the ledge, then once to the lower right to kill the first of 3 snakes. The lizard pursues but remains two spaces behind Lara.
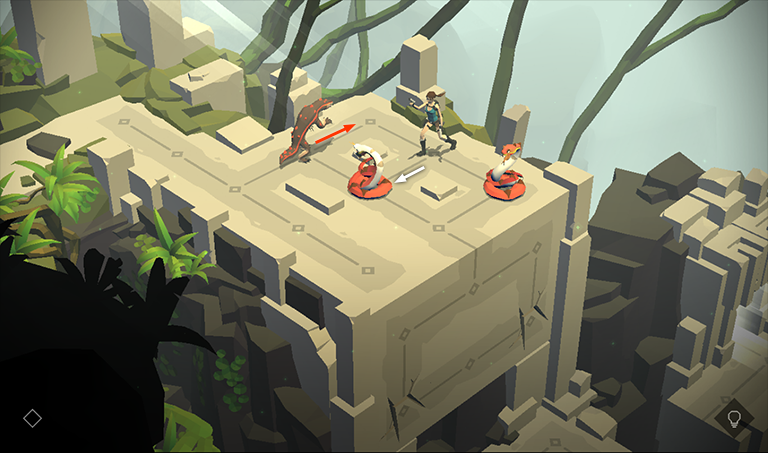
Now move once to the left to shoot the second snake. The lizard follows along the path you traced before, moving one space to the right.
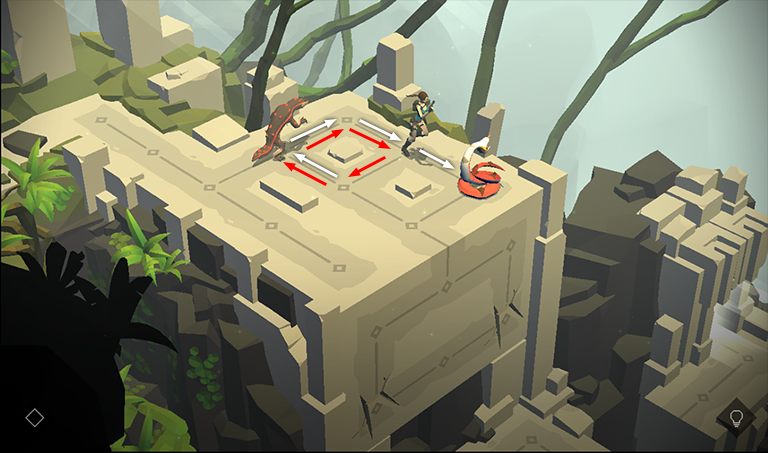
To kill the third snake without being attacked by the lizard, move clockwise around the little, square section of floor in the upper corner of the ledge. Then continue forward to approach the third snake from the side, killing it with your pistols. The lizard follows, ending up in the upper corner.
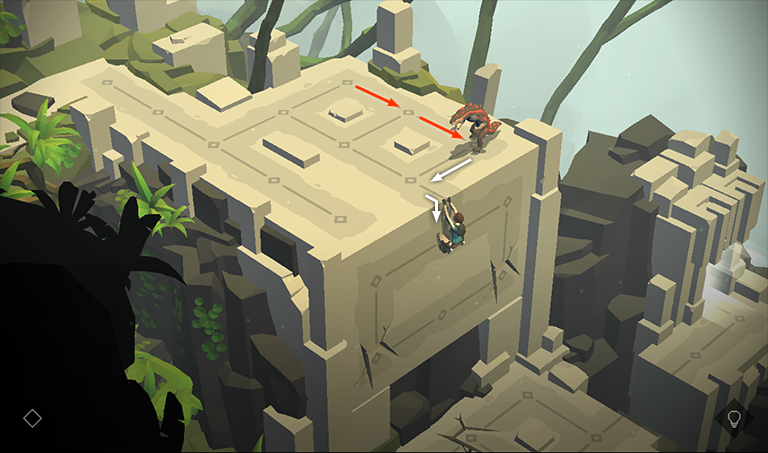
Now move to the left and hang from the edge of the ledge. As you do this, the lizard moves into the spot where the third snake was.
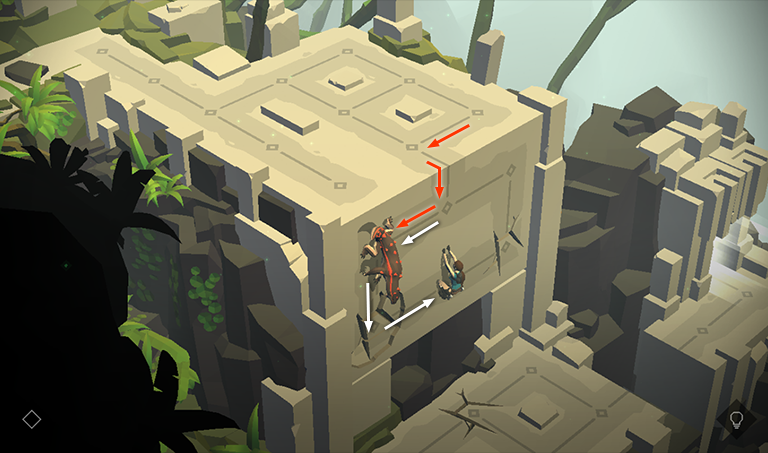
Climb to the left, down onto the cracked area, then to the right. The lizard trails behind.
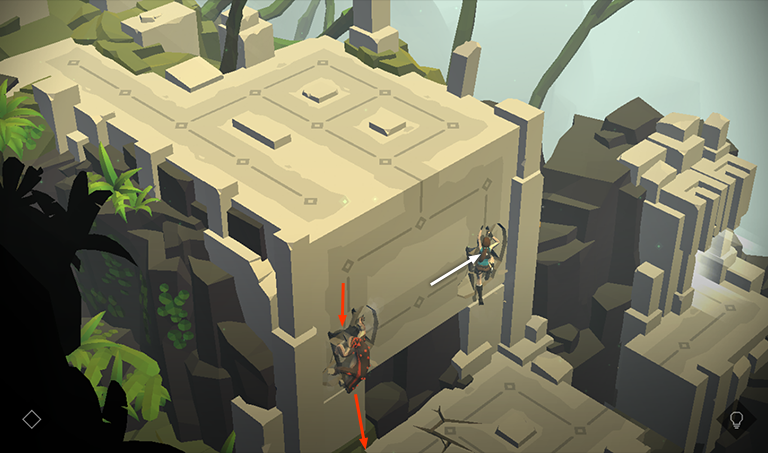
Move to the right once more. As the lizard attempts to follow, the cracked section he's standing on will give way, and he'll fall to the ground stunned.
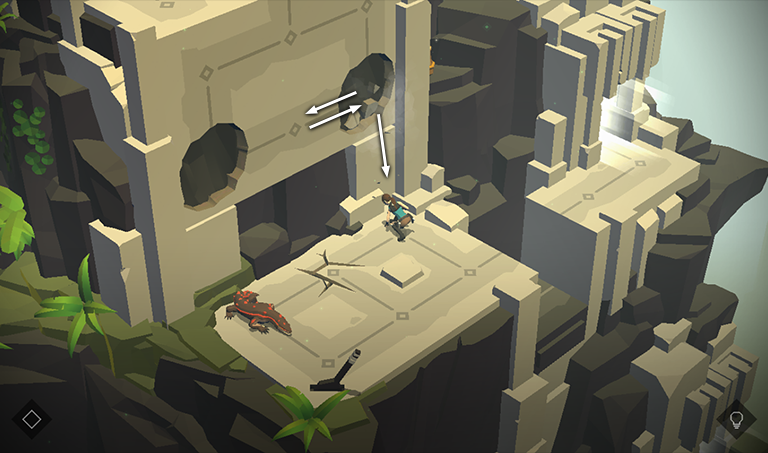
To get down, move to the left or upward, then back onto the cracked wall, causing it to collapse and dropping Lara onto the floor below.
NOTE: You could instead do this sequence in reverse. Move onto the cracked section of wall on the right first, leading the lizard onto it to make it fall. Then move onto the other cracked section and drop down to the lower level from there.
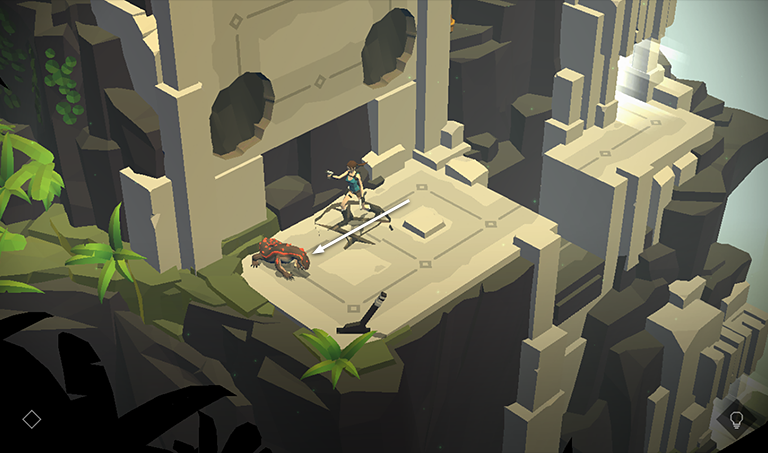
Move over the cracked floor, approaching the lizard from the side to kill it.
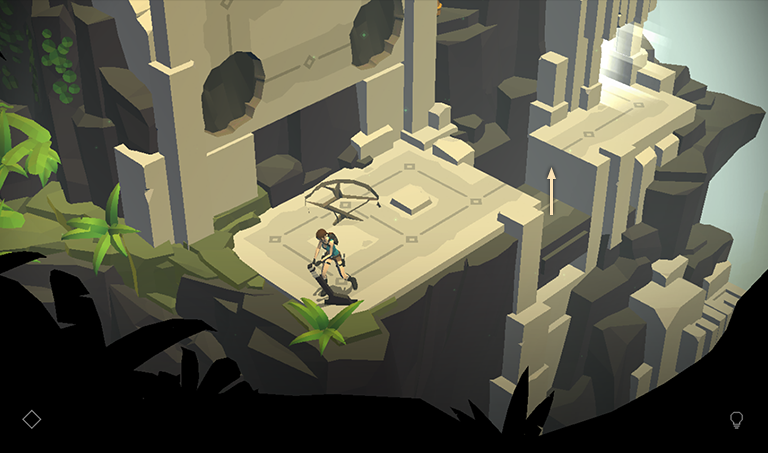
Now pull the lever to raise a dark gray block completing the walkway on the right.
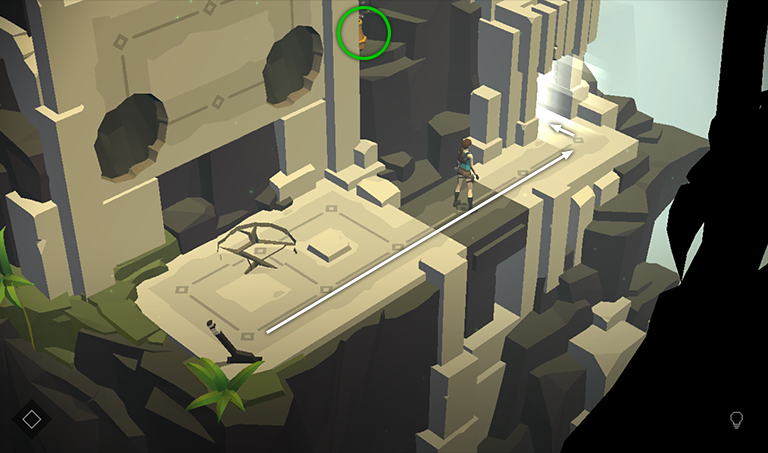
As you cross this walkway, smash the vase on the ledge to the left to get another EMERALD (18/19).
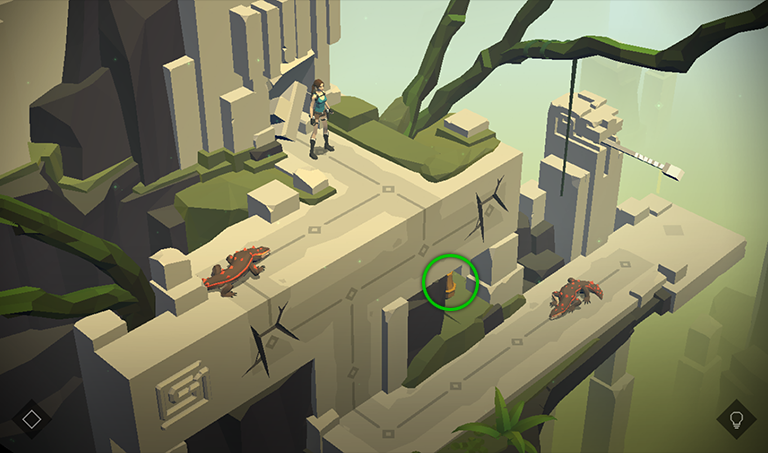
In the next area, break the vase in the alcove below to obtain the final EMERALD (19/19). You don't unlock anything yet, but if you find all of the gems in all of the levels, you'll be rewarded with a special outfit.
Again, if you missed any gems, you can replay previously completed levels by selecting them from the journals in the main menu ring.
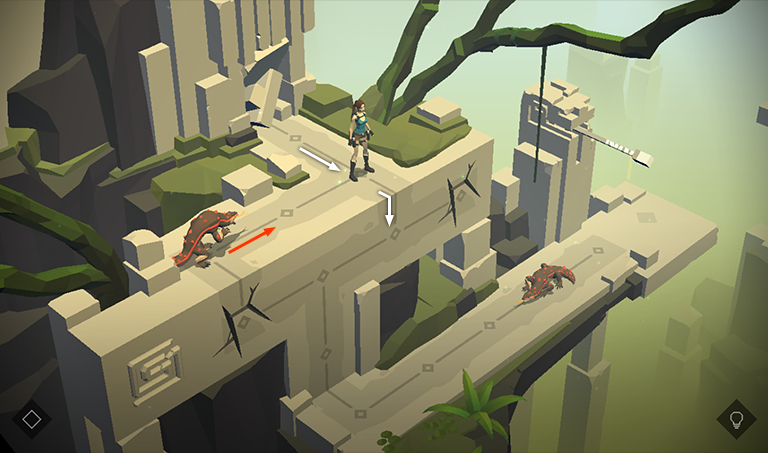
Step forward to get the attention of the lizard on the left. Than hang from the ledge as it starts to chase you.
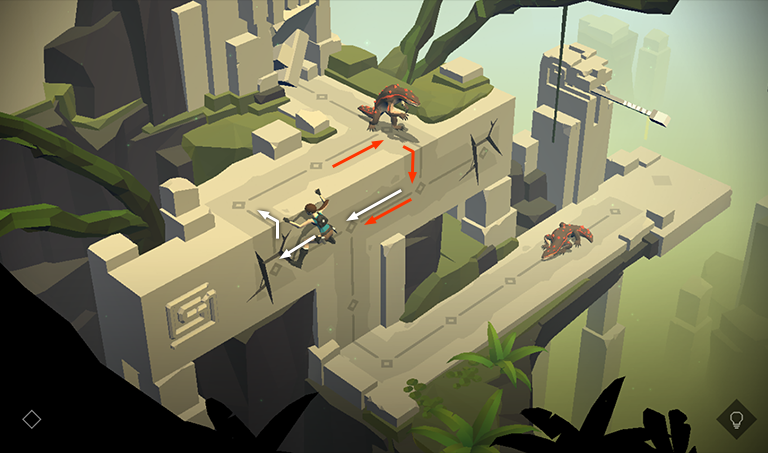
Climb to the left onto the cracked section of wall. Then pull up.
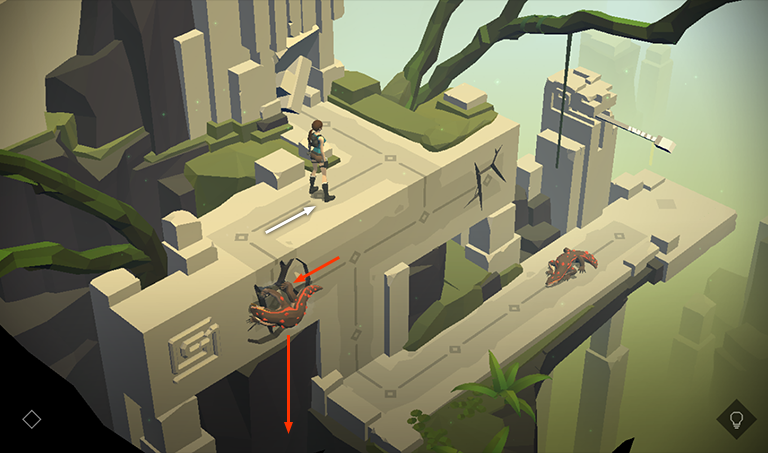
Now move along the ledge to the right. When the lizard reaches the cracked wall, it collapses, dropping him into the abyss.
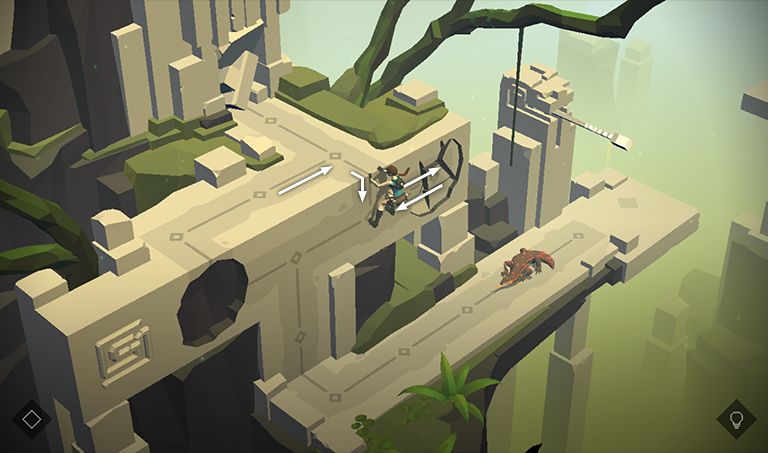
To deal with the second lizard, start by hanging from the ledge once more. Move to the right to break the other bit of cracked wall. Move back to the left. (Do not attempt to completely destroy the wall or Lara will fall down in front of the lizard.)
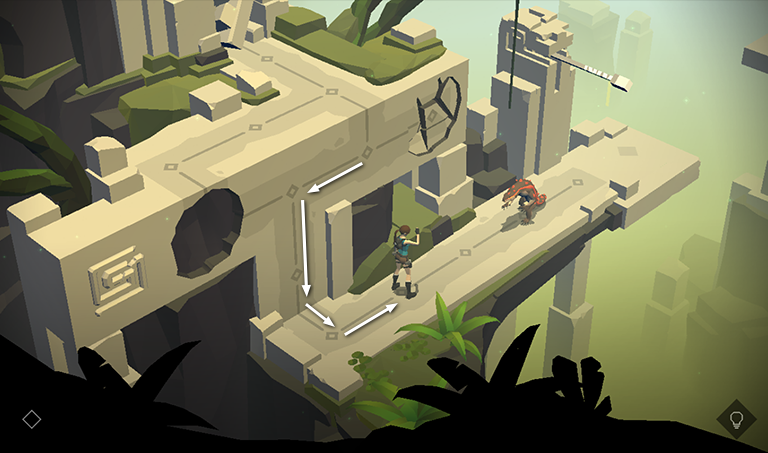
Climb to the left and then down to the lower ledge. Advance one space toward the lizard to get its attention.
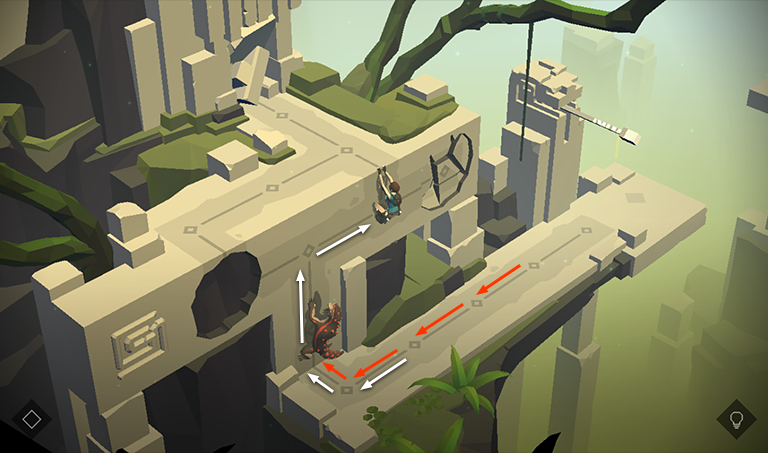
Then climb back up the wall and over to the right with the lizard following behind.
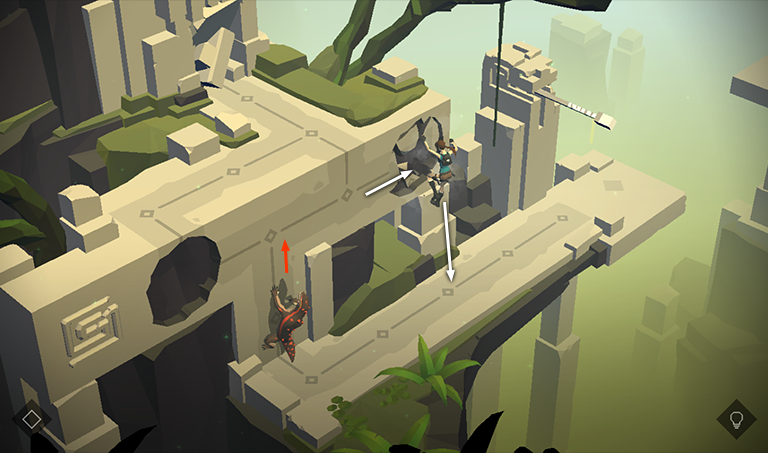
When you move onto the cracked area, it collapses, dropping Lara safely onto the lower ledge.
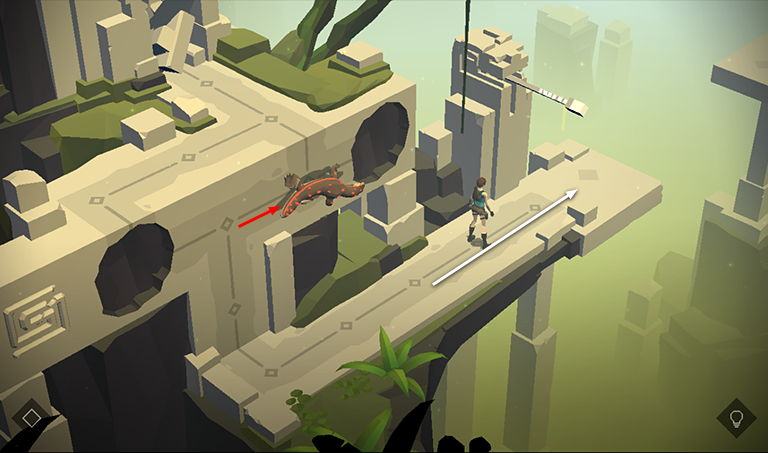
Be sure to smash the vase (shown above in the first screenshot for this area) to get the 19th EMERALD if you didn't do so before. Then head to the right, leaving the lizard staring into the gaping hole. Poor thing. His brain just isn't large enough to match wits with the Tomb Raider. ;-) When you move to the right, Lara pulls the bar above to extend a bridge.
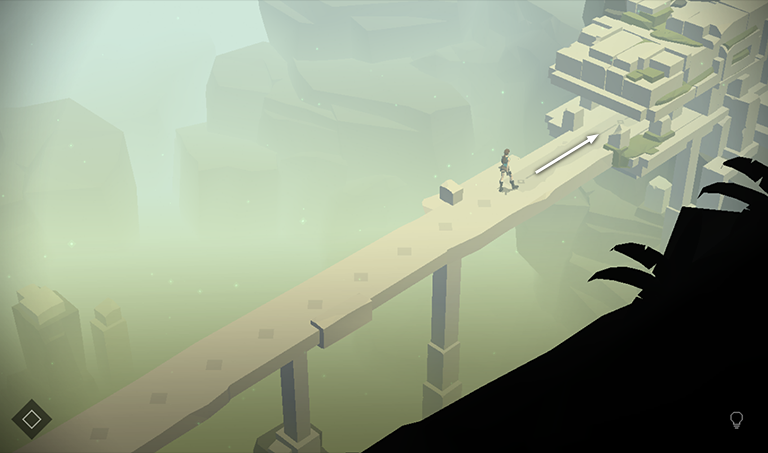
Cross over it and go through the doorway to the next room.
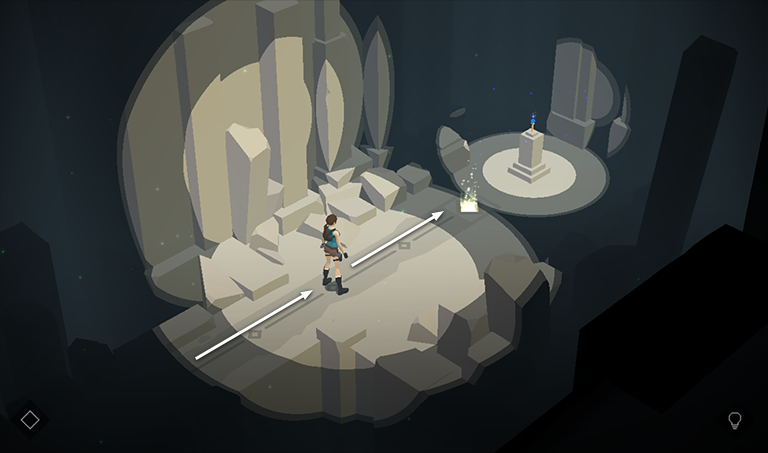
Proceed to the right and approach the pedestal to take THE KEY OF STONES. Doing so unlocks the Key of Stones achievement/trophy. When you have the key, Lara automatically continues to the next area.
†UPDATE HISTORY: 8/30/15 - Walkthrough first posted.
8/31/15 - Added achievements.
9/6/15 - Added video walkthrough.
WAS THIS WALKTHROUGH HELPFUL? If not, I apologize and invite you to contact me with any questions. If you need help right away, I recommend the r/TombRaider subreddit. Other fan-run forums are listed at tombraiders.net/stella/community.html. If this site was useful, please consider supporting it financially or in other ways. For details, visit tombraiders.net/stella/support.html. As always, I welcome your corrections/suggestions. Thank you!
Copyright © - Stellalune ( ). Screenshots were made using the Andy Android emulator. Feel free to copy or print this walkthrough for personal use. Share it with friends if you like, but please include this credit line so people can send me their feedback. No part of this walkthrough may be reproduced on another site without permission. Follow this link for details about this site's advertising and privacy policy.
Stella's Tomb Raider Site: tombraiders.net.